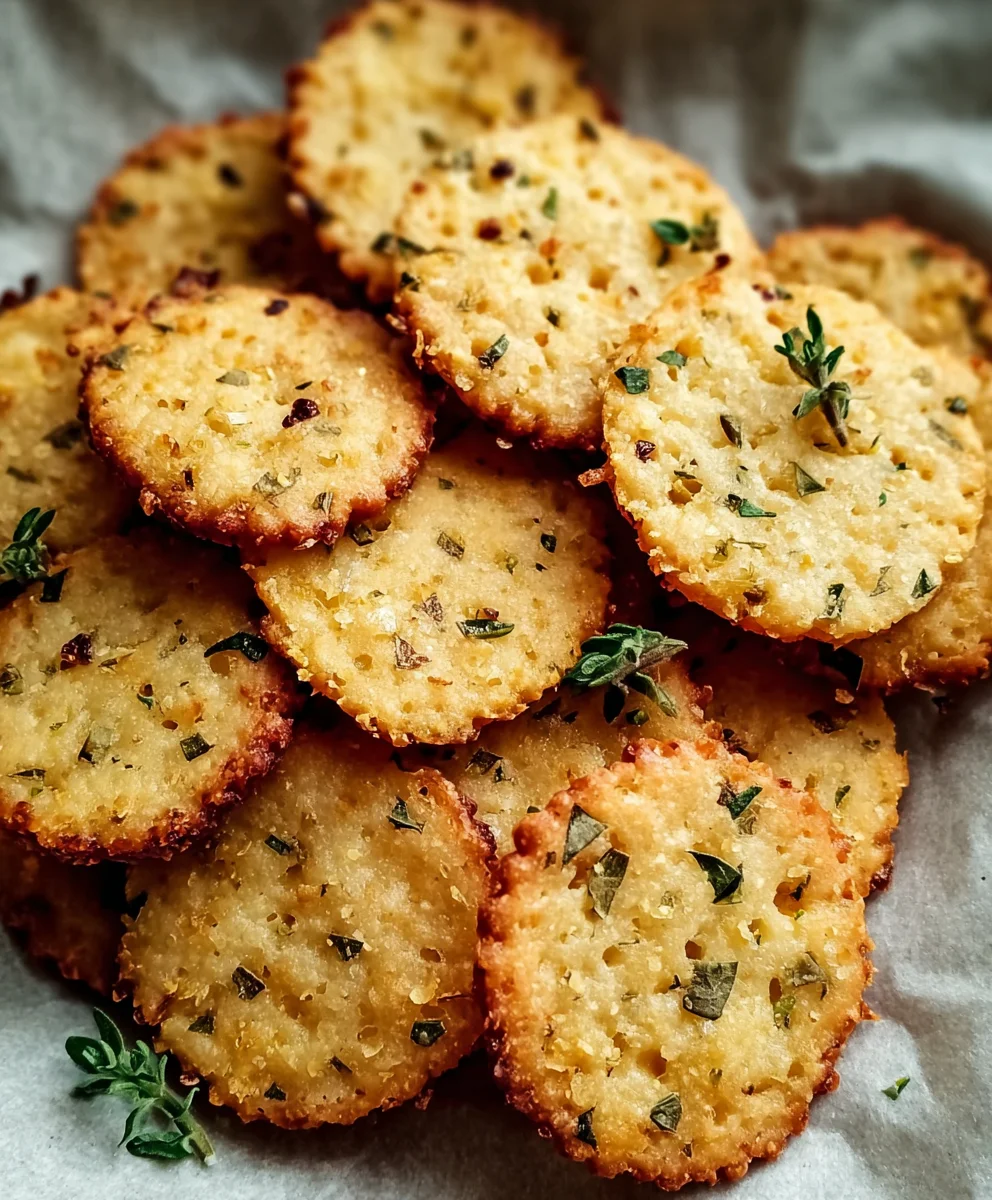
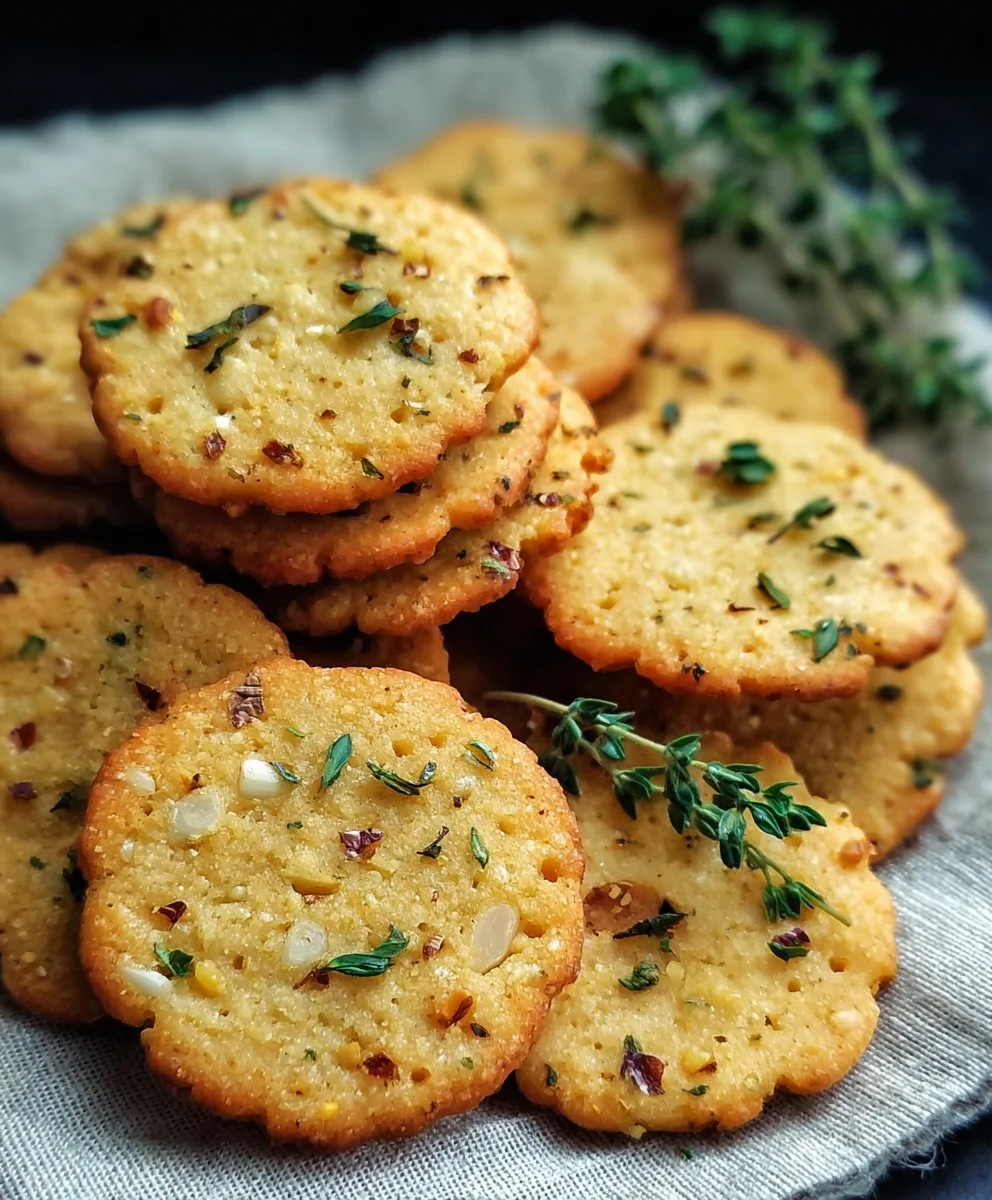
Garlic Herb Chickpea Flour Crackers- Easy Snack
Garlic and Herb Chickpea Flour Snack Crackerss are a revelation in the world of homemade crunchy delights. If you’ve ever craved a satisfyingly savory, incredibly easy-to-make snack that also happens to be gluten-free and packed with wholesome goodness, then you’ve landed in the right place. People adore these crackers because they deliver an unparalleled depth of flavor that’s both comforting and sophisticated. Forget bland, store-bought alternatives; these little bites are bursting with the aromatic punch of fresh garlic and a medley of fragrant herbs. What truly makes our Garlic and Herb Chickpea Flour Snack Crackerss special is their incredible versatility and the sheer simplicity of their preparation. They’re perfect for dipping, topping with your favorite spreads, or simply enjoying on their own as a guilt-free indulgence. Get ready to experience a new favorite snack!”
Ingredients:
- 1 cup chickpea flour (also known as besan), which is approximately 120g
- ½ cup water, roughly 120ml
- 2 tablespoons olive oil, plus extra for brushing
- 1 teaspoon dried mixed herbs (feel free to use a blend of rosemary, thyme, oregano, or your favorites)
- 1 teaspoon garlic powder
- ½ teaspoon salt
- ¼ teaspoon black pepper
- Sesame seeds, for sprinkling
- Flaky sea salt, for finishing
- Additional dried herbs, for topping
Preparing Your Garlic and Herb Chickpea Flour Snack Crackers
Mixing the Dough
Let’s get started by creating the base for our delicious crackers. In a medium-sized mixing bowl, combine the chickpea flour, dried mixed herbs, garlic powder, salt, and black pepper. Give these dry ingredients a good whisk to ensure they are evenly distributed. This is a crucial step to guarantee consistent flavor throughout your crackers. Next, create a well in the center of the dry ingredients and pour in the ½ cup of water and the 2 tablespoons of olive oil. Begin extract to mix everything together with a spoon or a spatula. As you stir, the mixture will start to come together, forming a thick, slightly sticky dough. Don’t worry if it seems a little wet or dry at first; chickpea flour can absorb moisture differently depending on humidity. If the dough feels too dry and crum extractbly, add a tiny splash of water, just a teaspoon at a time, until it forms a cohesive ball. Conversely, if it’s too sticky, you can add a very small amount more chickpea flour. The goal is a dough that’s manageable and not overly sticky. Once the dough has come together, turn it out onto a lightly floured surface (using a little extra chickpea flour) and knead it gently for about a minute or two. This process helps to develop the structure of the crackers and makes them easier to roll out. You’re looking for a smooth, pliable dough.
Shaping and Rolling the Crackers
Now, let’s get these crackers ready for baking. Preheat your oven to 375°F (190°C). Line a baking sheet with parchment paper; this prevents sticking and makes cleanup a breeze. Take your dough and place it on a piece of parchment paper. You can either place another piece of parchment paper on top of the dough or lightly flour your rolling pin. We want to roll the dough out quite thinly, about 1/16 to 1/8 of an inch thick. The thinner you roll it, the crispier your crackers will be, which is usually what we’re aiming for with a snack cracker! Roll evenly from the center outwards, rotating the dough as needed to create a uniform thickness. This ensures all your crackers bake at the same rate. Once you have a large, thin sheet of dough, you can decide how you want to shape your crackers. You can use a pizza cutter or a sharp knife to cut it into squares, rectangles, or even fun shapes. Alternatively, you can use small cookie cutters for more decorative options. Don’t worry about perfection; rustic shapes are part of the charm of homemade crackers.
Adding Toppings and Baking
Before they go into the oven, it’s time to add those lovely finishing touches that make these Garlic and Herb Chickpea Flour Snack Crackers so appealing. Lightly brush the surface of the rolled-out dough with a little extra olive oil. This will help the sesame seeds and flaky sea salt adhere nicely. Now, sprinkle generously with sesame seeds. These add a wonderful nutty flavor and a pleasing crunch. If you like a little extra herbaceous punch, you can also sprinkle on some additional dried herbs at this stage. Finally, for that gourmet touch and a delightful salty bite, scatter some flaky sea salt over the top. Press down gently with your hands or the rolling pin to ensure the toppings stick. If you’ve cut out individual crackers, you can transfer them to the prepared baking sheet, ensuring they have a little space between them so they bake evenly and don’t stick together. If you’ve kept it as one large sheet, you can score it with your cutter again to make breaking them apart easier after baking.
The Baking Process
Place the baking sheet into your preheated oven. We’re going to bake these crackers for about 15 to 20 minutes. The exact baking time will depend on how thinly you rolled your dough and your oven’s particular quirks. Keep a close eye on them, especially during the last few minutes. You’re looking for them to be lightly golden brown around the edges and feel firm to the touch. If you baked them as one large sheet, they might brown more quickly around the edges. You can gently lift an edge with a spatula to check the underside; it should also be golden brown and crisp. If you find that some areas are browning faster than others, you can rotate the baking sheet halfway through the baking time. Once they look perfectly golden and crisp, carefully remove the baking sheet from the oven.
Cooling and Enjoying
This is perhaps the hardest part – waiting for them to cool! Let the crackers cool on the baking sheet for about 5 to 10 minutes. This allows them to firm up even more. If you baked them as one large sheet, you can now break them apart along the scored lines. For individual crackers, you can carefully transfer them to a wire rack to cool completely. They will become even crispier as they cool down. Once completely cooled, your Garlic and Herb Chickpea Flour Snack Crackers are ready to be devoured! They are perfect on their own as a light, savory snack, or you can serve them with your favorite dips like hummus, guacamole, or a creamy cheese spread. Store any leftovers in an airtight container at room temperature for up to a week to maintain their crispness. Enjoy your homemade, healthy, and incredibly flavorful crackers!
Conclusion:
You’ve now got the knowledge to create your own batch of delightful Garlic and Herb Chickpea Flour Snack Crackers! These savory treats are surprisingly easy to make and offer a wonderful alternative to store-bought snacks. We hope you enjoy the process as much as the delicious outcome. Their crisp texture and robust flavor make them perfect for any occasion, from casual snacking to serving guests. Don’t be afraid to experiment and make these Garlic and Herb Chickpea Flour Snack Crackers your own. They’re a testament to how simple, wholesome ingredients can transform into something truly special.
We love serving these Garlic and Herb Chickpea Flour Snack Crackers with a variety of dips, like hummus, guacamole, or a creamy yogurt-based dip. They also make a fantastic base for canapés or as a crunchy accompaniment to soups and salads. For variations, consider adding a pinch of chili flakes for a spicy kick, or incorporating finely chopped sun-dried tomatoes for an extra burst of flavor. You could also swap out the herbs for different combinations, like rosemary and thyme, or even add a touch of nutritional yeast for a cheesy undertone. Get creative and have fun with it!
Frequently Asked Questions about Garlic and Herb Chickpea Flour Snack Crackers:
Q1: How should I store my Garlic and Herb Chickpea Flour Snack Crackers?
Once completely cooled, store your Garlic and Herb Chickpea Flour Snack Crackers in an airtight container at room temperature. They should stay crisp for up to a week. If they lose some of their crispness, you can briefly reheat them in a low oven (around 250°F or 120°C) for about 5-10 minutes to revive them.
Q2: Can I make these crackers gluten-free?
Yes, these Garlic and Herb Chickpea Flour Snack Crackers are naturally gluten-free as chickpea flour is gluten-free. Just ensure any other ingredients you add, like herbs or spices, are also certified gluten-free to maintain this.
Garlic Herb Chickpea Flour Crackers
Easy to make, savory chickpea flour crackers packed with garlic and herb flavor. Perfect for a healthy snack or with your favorite dips.
Ingredients
-
1 cup chickpea flour (besan)
-
½ cup water
-
2 tablespoons olive oil
-
1 teaspoon dried mixed herbs
-
1 teaspoon garlic powder
-
½ teaspoon salt
-
¼ teaspoon black pepper
-
Sesame seeds, for sprinkling
-
Flaky sea salt, for finishing
-
Additional dried herbs, for topping
-
Extra olive oil for brushing
Instructions
-
Step 1
In a bowl, whisk together chickpea flour, dried mixed herbs, garlic powder, salt, and pepper. Add water and olive oil, mixing until a thick, slightly sticky dough forms. Knead gently on a lightly floured surface for 1-2 minutes. -
Step 2
Preheat oven to 375°F (190°C). Line a baking sheet with parchment paper. Place the dough on parchment paper and roll it out very thinly, about 1/16 to 1/8 inch thick. -
Step 3
Cut the dough into desired shapes using a pizza cutter or knife. Alternatively, use cookie cutters for decorative options. -
Step 4
Lightly brush the surface of the dough with extra olive oil. Sprinkle generously with sesame seeds, additional dried herbs (if using), and flaky sea salt. Press gently to help toppings adhere. -
Step 5
Transfer crackers to the prepared baking sheet, ensuring they have space. Bake for 15-20 minutes, or until lightly golden brown around the edges and firm. Rotate the baking sheet halfway through if needed. -
Step 6
Let the crackers cool on the baking sheet for 5-10 minutes before transferring to a wire rack to cool completely and crisp up. Store in an airtight container.
Important Information
Nutrition Facts (Per Serving)
It is important to consider this information as approximate and not to use it as definitive health advice.
Allergy Information
Please check ingredients for potential allergens and consult a health professional if in doubt.