Easy Fresh Fruit Tart Recipe Delightful Dessert
Fruit tart is more than just a dessert; it’s a celebration of vibrant flavors and stunning visual artistry. Imagin extracte a crisp, buttery crust cradling a velvety smooth pastry cream, then adorned with a jewel-toned mosaic of the freshest seasonal fruits. What’s not to adore about a fruit tart? It’s the perfect balance of sweet, tart, and creamy, making it a crowd-pleaser for any occasion. Whether you’re hosting a summer garden party or seeking a sophisticated treat to brighten a winter’s day, this classic dessert never fails to impress. The real magic of a beautiful fruit tart lies in its simplicity and the incredible versatility of its toppings. We’ll guide you through creating a flawless foundation and then show you how to artfully arrange a symphony of fruits that will have your guests oohing and aahing before they even take their first bite.
Ingredients:
- 1 1/4 cups all-purpose flour
- 1/4 cup powdered sugar
- 1/2 cup cold butter, cubed (plus an extra tablespoon for the pastry dough, optional but recommended for flakiness)
- 1-2 tablespoons ice-cold water
- 1 cup whole milk
- 1 teaspoon pure vanilla extract
- 3 large egg yolks
- 1/4 cup granulated sugar (for the pastry dough)
- 2 tablespoons cornstarch
- 1 tablespoon unsalted butter (for the pastry dough)
- Fresh strawberries, hulled and sliced
- Fresh kiwis, peeled and sliced
- Fresh mangoes, peeled and cubed or sliced
- Fresh blackberries
- 2 tablespoons apricot jam, warmed and strained (for glazing)
Preparing the Fruit Tart Crust
Mixing the Dough
This fruit tart starts with a classic sweet pastry crust, often referred to as a pâte sucrée. The key to a tender and flaky crust is to keep everything cold and to avoid overworking the dough. In a large bowl, whisk together the 1 1/4 cups of all-purpose flour and the 1/4 cup of powdered sugar. This provides a subtle sweetness and a delicate texture to the base of our fruit tart. Next, add the 1/2 cup of cold, cubed butter to the flour mixture. Using a pastry blender, your fingertips, or a food processor, cut the butter into the dry ingredients until the mixture resembles coarse crum extractbs with some pea-sized pieces of butter remaining. These butter pieces are crucial for creating those delightful flaky layers in the baked crust. If you’re using your fingertips, work quickly to prevent the butter from melting from the warmth of your hands.
Bringin extractg the Dough Together
Now, it’s time to introduce the liquid to bind the dough. Gradually add 1 to 2 tablespoons of ice-cold water, one tablespoon at a time, mixing gently after each addition. You want just enough water to bring the dough together into a cohesive ball. Be careful not to add too much water, as this can make the crust tough. As soon as the dough starts to clump together, stop mixing. On a lightly floured surface, gently gather the dough into a disc. Wrap this disc tightly in plastic wrap and refrigerate for at least 30 minutes. This chilling period is essential; it allows the gluten to relax, making the dough easier to roll out, and it solidifies the butter, ensuring those flaky layers when baked.
Baking the Fruit Tart Shell
Rolling and Shaping the Crust
Preheat your oven to 375°F (190°C). Once the dough has chilled, remove it from the refrigerator. On a lightly floured surface, roll out the dough into a circle about 12 inches in diameter and approximately 1/8 inch thick. Carefully transfer the rolled-out dough to a 9-inch tart pan with a removable bottom. Gently press the dough into the bottom and up the sides of the pan, ensuring an even thickness. Trim any excess dough from the edges. You can use the extra dough scraps to patch any thin spots. For a perfectly flat bottom and to prevent puffing, prick the bottom of the tart shell all over with a fork. This step is known as docking.
Blind Baking the Crust
For the best results and to ensure a crisp crust that won’t become soggy from the filling, we’ll blind bake the tart shell. Line the unbaked tart shell with parchment paper, ensuring it covers the bottom and sides. Fill the parchment-lined shell with pie weights, dried beans, or rice. This weight will prevent the crust from shrinking or puffing up during baking. Bake for 15 minutes. After 15 minutes, carefully remove the parchment paper and weights. Return the tart shell to the oven and bake for another 10-15 minutes, or until the crust is golden brown and cooked through. Let it cool completely on a wire rack before filling. This process creates a sturdy foundation for our vibrant fruit topping.
Creating the Creamy Pastry Cream Filling
Making the Custard Base
While the tart shell cools, we’ll prepare a luscious pastry cream. In a medium saucepan, whisk together the 3 egg yolks, 1/4 cup granulated sugar, and 2 tablespoons cornstarch. Whisk vigorously until the mixture is smooth and pnon-alcoholic ale yellow, and no lumps of cornstarch remain. This step ensures a silky smooth pastry cream. In a separate small saucepan, heat the 1 cup of milk and 1 tablespoon of butter over medium heat until it’s steaming andgin extractst beginning to simmer around the edges. Do not let it boil. The addition of butter adds a touch of richness to our cream.
Tempering the Eggs and Cooking the Cream
Slowly and gradually, pour about half of the hot milk mixture into the egg yolk mixture while whisking constantly. This process is called tempering, and it gently raises the temperature of the egg yolks without cooking them into scrambled eggs. Once tempered, pour the entire mixture back into the saucepan with the remaining hot milk. Continue to cook over medium heat, stirring constantly with a whisk, until the pastry cream thickens significantly and starts to bubble. This should take about 5-7 minutes. Once it has thickened to a pudding-like consistency, remove the saucepan from the heat. Stir in the 1 teaspoon of vanilla extract. The vanilla will add its wonderful aroma and flavor to our cream.
Chilling and Finishing the Pastry Cream
Pour the pastry cream into a clean bowl. To prevent a skin from forming on the surface, press a piece of plastic wrap directly onto the surface of the cream, ensuring there are no air pockets. Refrigerate the pastry cream for at least 2 hours, or until completely chilled and firm. Once chilled, remove the plastic wrap and give the pastry cream a good whisk to make it smooth and creamy again.
Assembling and Finishing Your Fruit Tart
Filling the Tart Shell
Once the tart shell has cooled completely and the pastry cream is chilled and smooth, it’s time to assemble our beautiful fruit tart. Spoon the chilled pastry cream into the cooled tart shell. Spread it evenly with an offset spatula or the back of a spoon, creating a smooth, inviting surface for our fgin extractt.
Arranging the Fruit and Glazing
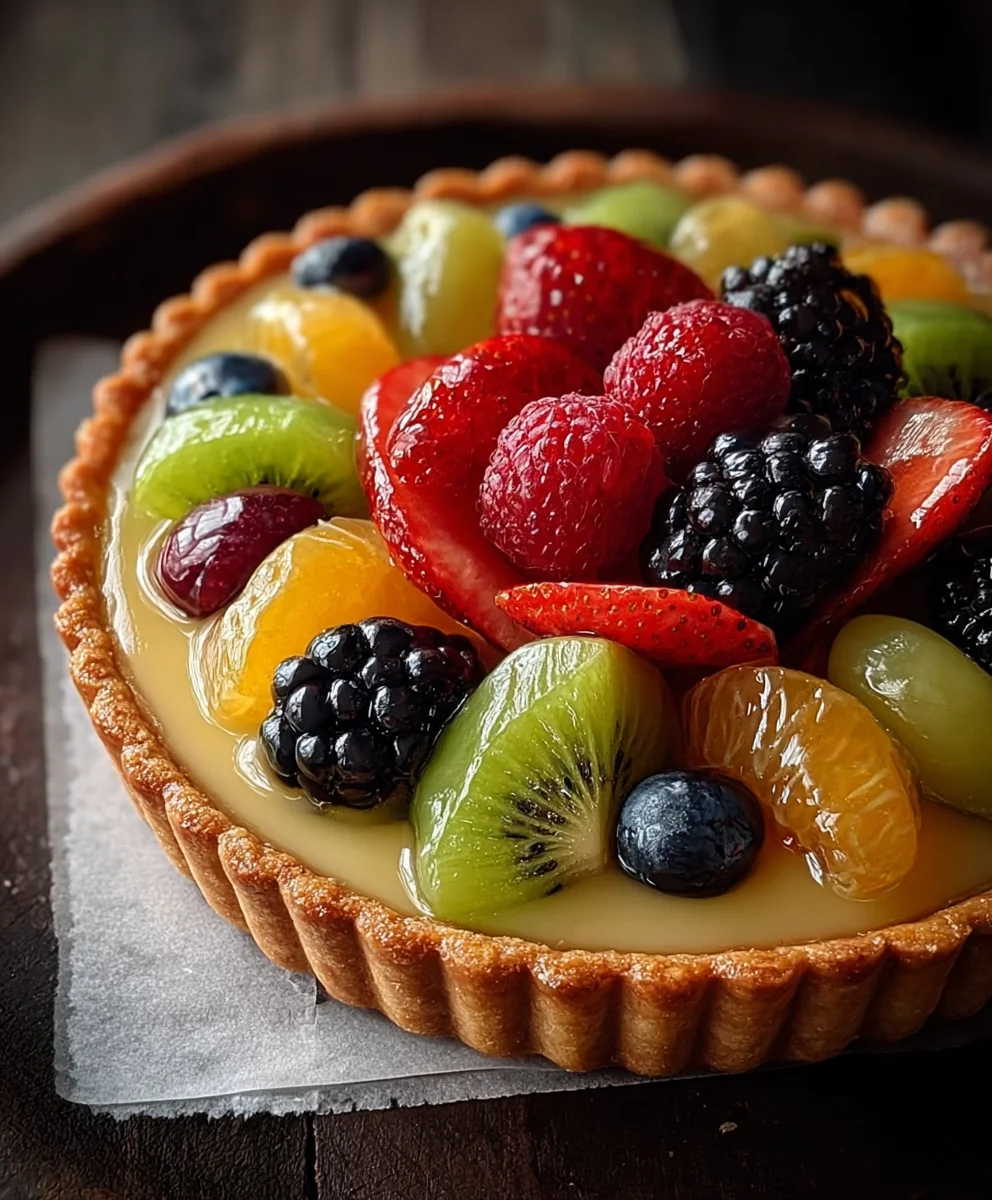
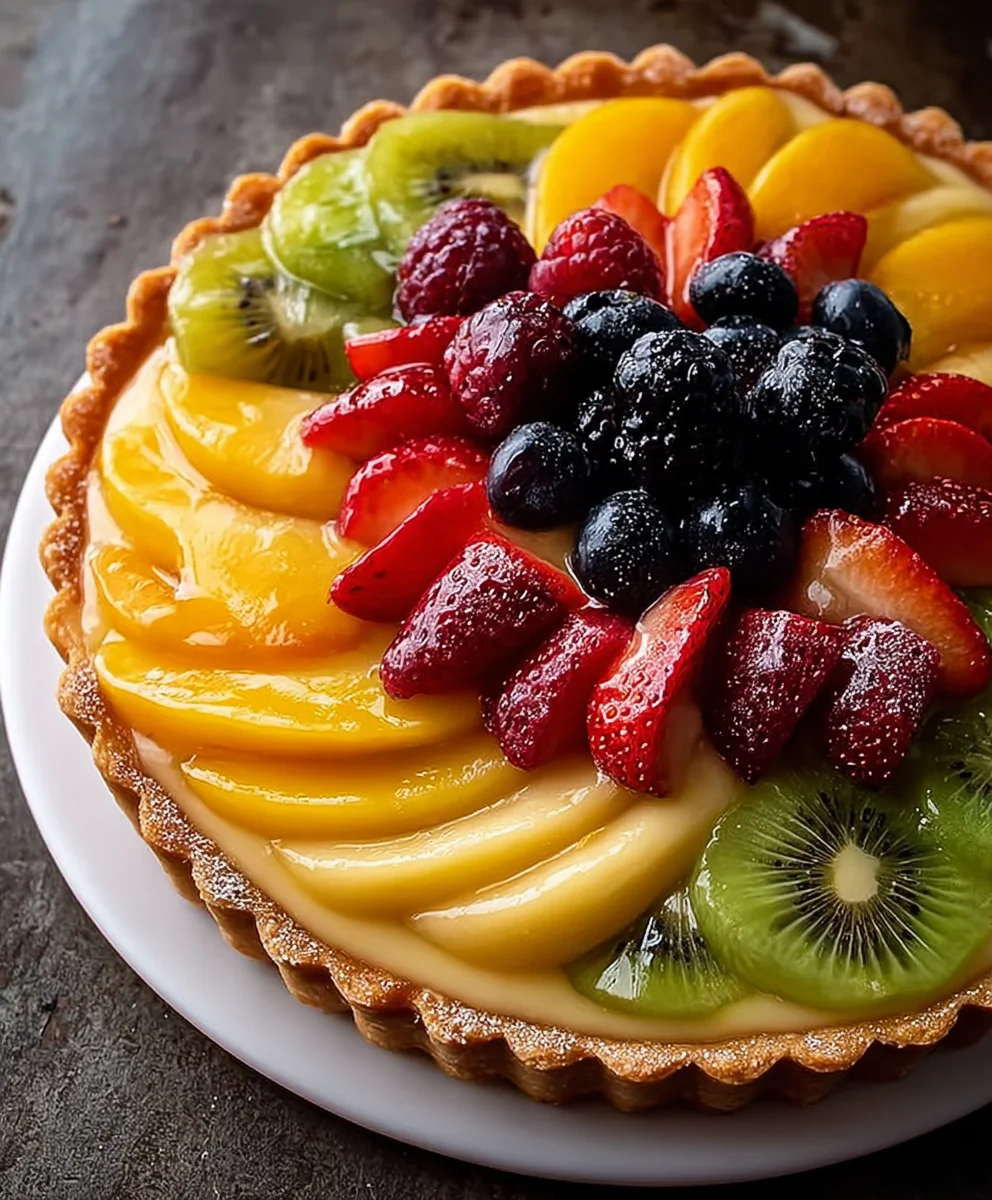
Now comes the mgin extract artistic part: arranging the fresh fruit. Artfully arrange the sliced fresh strawberries, sliced kiwis, cubed mangoes, and fresh blackberries over the pastry cream. You can create concentric circles, a mosaic pattern, or simply a colorful medley. The goal is to cover the pastry cream with a vibrant display of fresh fruit. For a professional shine and to help preserve the fruit, warm the 2 tablespoons of apricot jam in a small saucepan or microwave until melted. Strain it through a fine-mesh sieve to remove any solids. Using a pastry brush, gently brush the warmed and strained apricot jam over the arranged fruit. This glazing will give your fruit tart a beautiful sheen and add a subtle fruity sweetness. Chill the finished fruit tart for at least 30 minutes before slicing and serving. This allows the flavors to meld and the tart to set properly.
Conclusion:
Congratulations! You’ve now mastered the art of creating a beautiful and delicious fruit tart. This recipe is a delightful celebration of fresh, seasonal flavors and a wonderfully impressive dessert to share. The combination of a crisp, buttery crust, smooth and creamy custard, and vibrant, juicy fruits is simply irresistible. Whether you’re a seasoned baker or just starting out, this fruit tart is a rewarding project that’s sure to impress. Don’t be afraid to experiment and make it your own!
For serving, this fruit tart is best enjoyed chilled, allowing the flavors to meld beautifully. It’s perfect on its own, or you can elevate it with a dollop of freshly whipped cream or a dusting of powdered sugar. For variations, consider using different types of fruit based on what’s in season – berries, stone fruits, or even tropical fruits all work wonderfully. You could also add a hint of citrus zest to the custard or a sprinkle of toasted almonds over the top for an extra layer of flavor and texture.
FAQs
What kind of crust is best for a fruit tart?
A classic pâte sucrée (sweet shortcrust pastry) is ideal for a fruit tart as it provides a delicate, crum extractbly texture that complements the soft fruit filling. You can also use a pre-made tart shell or even a grabeef ham cracker crust for a quicker option.
How can I prevent my fruit from making the crust soggy?
To prevent a soggy bottom, ensure your tart shell is fully baked and cooled before adding the filling. You can also blind bake the crust with pie weights or dried beans. For particularly juicy fruits, consider lightly draining them before arrangin extractg them on top.
Can I make the fruit tart ahead of time?
Yes, you can make the tart shell and custard a day in advance and store them separately. Assemble the fruit tart a few hours before serving for the best texture and appearance. Once assembled, it’s best to keep it refrigerated.
Easy Fresh Fruit Tart Recipe Delightful Dessert
A delightful and easy-to-make fresh fruit tart with a sweet pastry crust and creamy pastry cream filling, topped with a colorful assortment of fresh fruits.
Ingredients
-
1 1/4 cups all-purpose flour
-
1/4 cup powdered sugar
-
1/2 cup cold butter, cubed
-
1-2 tablespoons cold water
-
1 cup milk
-
1 teaspoon vanilla extract
-
3 egg yolks
-
1/4 cup granulated sugar
-
2 tablespoons cornstarch
-
1 tablespoon butter
-
Fresh strawberries, sliced
-
Fresh kiwis, sliced
-
Fresh mangoes, sliced
-
Fresh blackberries
-
2 tablespoons apricot jam
Instructions
-
Step 1
Prepare the tart crust: Whisk together flour and powdered sugar. Cut in cold butter until coarse crumbs form. Gradually add ice-cold water until dough just comes together. Form into a disc, wrap, and refrigerate for at least 30 minutes. -
Step 2
Bake the tart shell: Preheat oven to 375°F (190°C). Roll out dough, fit into a 9-inch tart pan, and dock with a fork. Line with parchment paper and pie weights, and blind bake for 15 minutes. Remove weights and parchment, then bake for another 10-15 minutes until golden brown. Let cool completely. -
Step 3
Make the pastry cream: Whisk egg yolks, granulated sugar, and cornstarch until smooth. Heat milk and butter until steaming. Temper egg yolks by slowly whisking in half the hot milk. Return mixture to saucepan with remaining milk and cook, stirring constantly, until thickened. Stir in vanilla extract. -
Step 4
Chill the pastry cream: Pour pastry cream into a bowl, cover surface with plastic wrap, and refrigerate for at least 2 hours until firm. Whisk until smooth before using. -
Step 5
Assemble the tart: Spoon chilled pastry cream into the cooled tart shell and spread evenly. Artfully arrange fresh fruit (strawberries, kiwis, mangoes, blackberries) over the pastry cream. -
Step 6
Glaze and chill: Warm and strain apricot jam. Gently brush over the arranged fruit for a glossy finish. Chill the finished tart for at least 30 minutes before serving.
Important Information
Nutrition Facts (Per Serving)
It is important to consider this information as approximate and not to use it as definitive health advice.
Allergy Information
Please check ingredients for potential allergens and consult a health professional if in doubt.