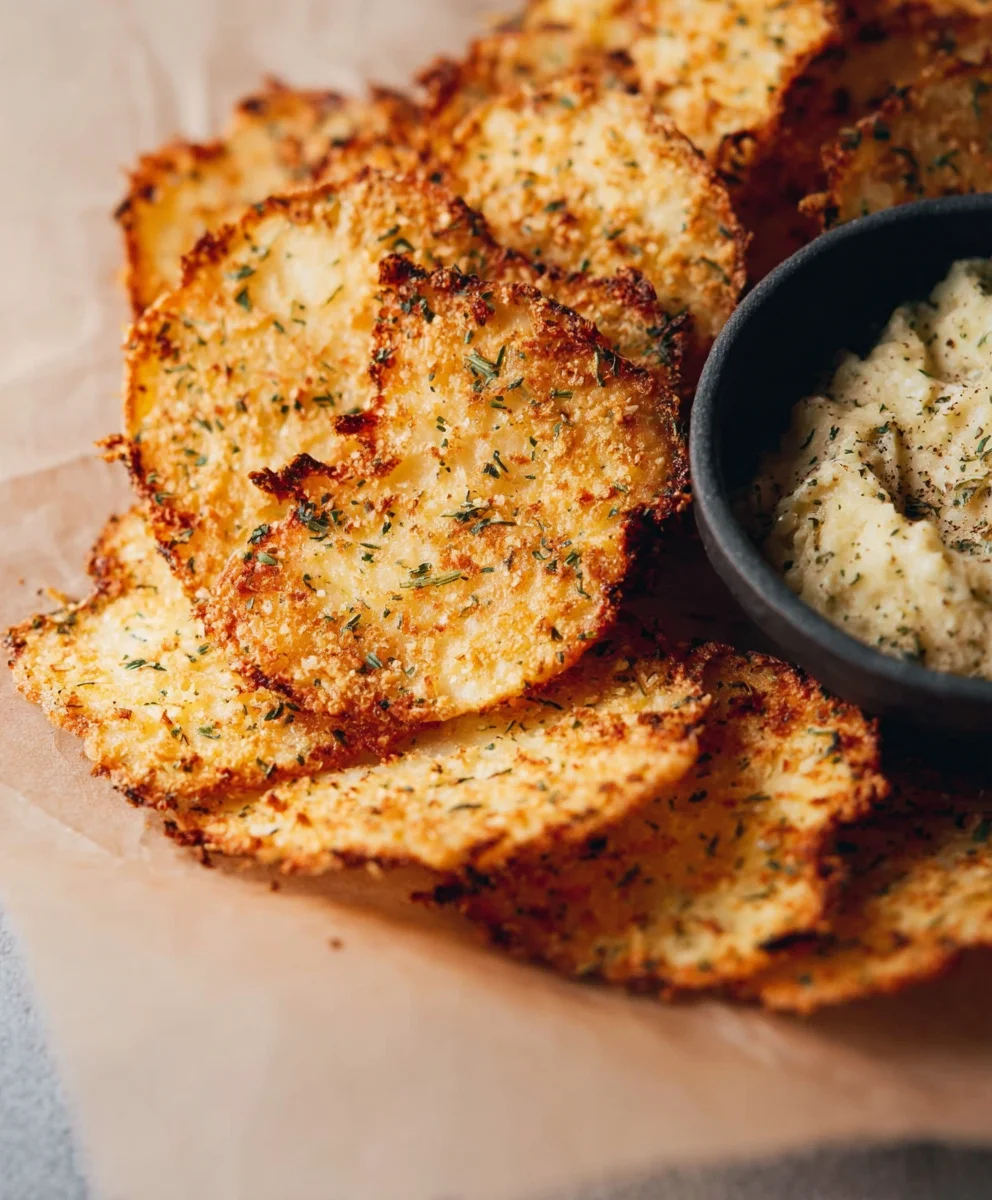
Crispy Cottage Cheese Chips- Healthy Snack Idea
Crispy Cottage Cheese Chips are more than just a trendy snack; they’re a revelation! If you’ve been searching for a way to satisfy your crunch cravings guilt-free, your quest ends here. These delightful chips have taken the internet by storm, and for good reason. People adore them because they deliver that satisfying shatter with every bite, offering a textural experience that’s incredibly addictive. What truly sets these crispy cottage cheese chips apart is their incredible versatility and surprisingly simple preparation. Forget complicated doughs or deep-frying – this recipe unlocks a world of flavor and texture using just a few pantry staples. Imagin extracte a light, airy crunch that’s both savory and subtly tangy, perfect for dipping, snacking, or even as a creative base for your favorite toppings. Get ready to discover your new go-to snack that’s both delicious and delightfully easy to make.
Why You’ll Love These Crispy Cottage Cheese Chips
The Ultimate Guilt-Free Crunch
Ingredients:
- 1 cup small curd cottage cheese, well-drained
- ¼ teaspoon garlic powder
- ¼ teaspoon onion powder
- ½ teaspoon dried herbs (optional, such as thyme, parsley, or Italian seasoning)
- Salt, to taste
- Freshly ground black pepper, to taste
- Olive oil spray
Preparing the Cottage Cheese Base
The foundation of our Crispy Cottage Cheese Chips lies in preparing the cottage cheese correctly. For the best texture and crispness, it’s crucial to drain the cottage cheese thoroughly. I like to use a fine-mesh sieve and let it sit for at least 15-20 minutes, gently pressing down on the curds occasionally to remove as much excess liquid as possible. The drier the cottage cheese, the crispier your chips will become. Once drained, transfer the cottage cheese to a medium bowl. Add the garlic powder and onion powder. These spices provide a foundational savory flavor that pairs beautifully with the mildness of the cottage cheese. If you’re opting for dried herbs, now is the time to add them. I find that a blend of thyme and parsley works wonderfully, but feel free to experiment with your favorites like oregano or even a pinch of red pepper flakes for a touch of heat. Season generously with salt and freshly ground black pepper. Remember that the cottage cheese itself is a bit bland, so don’t be shy with the seasonings. Mix everything together until the spices and seasonings are evenly distributed throughout the cottage cheese. You want a uniform color and flavor profile in your mixture.
Shaping the Chips
Now comes the fun part: shaping our Crispy Cottage Cheese Chips! You have a few options here, depending on the tools you have and the look you’re going for. My preferred method is to use parchment paper. Line a baking sheet with parchment paper, ensuring it covers the entire surface. This is essential to prevent the chips from sticking. Then, using a tablespoon, dollop small amounts of the seasoned cottage cheese mixture onto the parchment paper. Aim for roughly teaspoon-sized portions, leaving about 2 inches between each dollop. You can also use a small cookie scoop for more uniform portions. If you want thinner, more spread-out chips, you can gently flatten each dollop with the back of the spoon or a small offset spatula. Be careful not to spread them too thin, or they might burn before they get crispy. The goal is to create small, distinct mounds that will bake into individual chips. Another method, if you’re feeling adventurous, is to use a piping bag fitted with a round tip. Fill the piping bag with the cottage cheese mixture and pipe small circles onto the prepared baking sheet. This method offers the most control over size and shape and can give your chips a more professional appearance. Regardless of the method you choose, ensure the portions are relatively consistent in size so they bake evenly.
Baking to Golden Perfection
This is where the magic happens. Preheat your oven to 375°F (190°C). This moderate temperature is key to achieving a crispy texture without burning. Place the baking sheet with the shaped cottage cheese mounds into the preheated oven. Now, we bake. The baking time will vary depending on the size and thickness of your chips, but typically, you’ll want to bake them for 15-20 minutes. During this time, keep a close eye on them, especially during the last few minutes. You’re looking for them to turn a beautiful golden brown around the edges and to appear set and slightly puffed in the center. They should no longer look wet or doughy. If some chips are browning faster than others, you can carefully rotate the baking sheet halfway through the baking process. The goal is to dry them out completely while achieving that desirable crispy texture. Don’t be tempted to rush this process by turning up the heat, as this can lead to burnt exteriors and undercooked interiors. Patience is rewarded with perfectly crispy chips!
Cooling and Achieving Maximum Crispness
Once your Crispy Cottage Cheese Chips are golden brown and appear set, carefully remove the baking sheet from the oven. At this stage, they might still feel a little soft to the touch, but this is normal. The crisping process continues as they cool. Let the chips cool on the baking sheet for about 5-10 minutes. This initial cooling period allows them to firm up slightly before you handle them. Then, using a thin spatula, gently lift each chip from the parchment paper. Transfer them to a wire cooling rack to cool completely. This is a critical step for maximum crispness. Allowing air to circulate around the chips on all sides will help them dry out further and become wonderfully crunchy. If you leave them on the hot baking sheet, they can steam and lose some of their crispiness. Resist the urge to taste them immediately; they need to be completely cool to achieve their full textural potential. Once they’re completely cool, you should hear a satisfying snap when you break one.
Serving and Storing Your Crispy Cottage Cheese Chips
Once your Crispy Cottage Cheese Chips have cooled entirely on the wire rack, they are ready to be enjoyed! You can serve them immediately as a light and satisfying snack. They are fantastic on their own, offering a delightful salty, savory crunch. For an added burst of flavor, consider serving them with your favorite dips. Hummus, a herbed yogurt dip, or even a spicy salsa can be excellent pairings. They also make a fantastic crunchy topping for salads or soups, adding texture and a protein boost. If you have any leftovers (which I doubt!), you’ll want to store them properly to maintain their crispness. Allow them to cool completely before storing. Transfer the cooled chips to an airtight container. You can line the container with a paper towel to absorb any residual moisture. Store them at room temperature for up to 2-3 days. If they start to lose their crispness, you can briefly reheat them in a low oven (around 300°F/150°C) for a few minutes to revive them. Enjoy these guilt-free, protein-packed snacks!
Conclusion:
Congratulations on mastering the art of making your very own Crispy Cottage Cheese Chips! We’ve explored how simple ingredients and a little patience can transform humble cottage cheese into a delightfully crunchy and satisfying snack. Whether you’re looking for a healthier alternative to traditional chips, a protein-packed treat, or just a fun new recipe to try, these chips are sure to impress. Don’t be afraid to experiment with different seasonings to make them truly your own!
These Crispy Cottage Cheese Chips are incredibly versatile. Serve them on their own for a quick snack, pair them with your favorite dips like hummus, guacamole, or a creamy ranch, or even crum extractble them over salads for added texture and flavor. They also make a fantastic base for loaded “nachos” with your preferred toppings.
The beauty of this recipe lies in its adaptability. Feel free to play with herbs like rosemary, thyme, or chives, or spices such as paprika, garlic powder, or even a pinch of chili flakes for a little heat. You can even mix in a tablespoon of nutritional yeast for a cheesy, umami boost. Embrace your creativity and discover your perfect flavor combination! We encourage you to give this recipe a try and share your delicious creations.
Frequently Asked Questions:
Q1: Can I make Crispy Cottage Cheese Chips without a dehydrator?
Absolutely! While a dehydrator is ideal for consistent results, you can achieve crispy cottage cheese chips in a conventional oven. Spread the cottage cheese thinly on a baking sheet lined with parchment paper and bake at the lowest possible temperature (around 170-200°F or 75-95°C) for several hours, flipping them occasionally, until they are completely dry and crisp. Keep a close eye on them to prevent burning.
Q2: What kind of cottage cheese is best for this recipe?
For the crispiest results, it’s generally best to use a full-fat or 2% milkfat cottage cheese. The higher fat content helps with crisping and flavor. You can also drain off any excess liquid from the cottage cheese before spreading it out, as this will speed up the drying process.
Q3: How should I store leftover Crispy Cottage Cheese Chips?
To maintain their crispiness, store your Crispy Cottage Cheese Chips in an airtight container at room temperature. If they seem to have lost some of their crunch, you can briefly re-crisp them in a low oven or even a toaster oven for a few minutes.
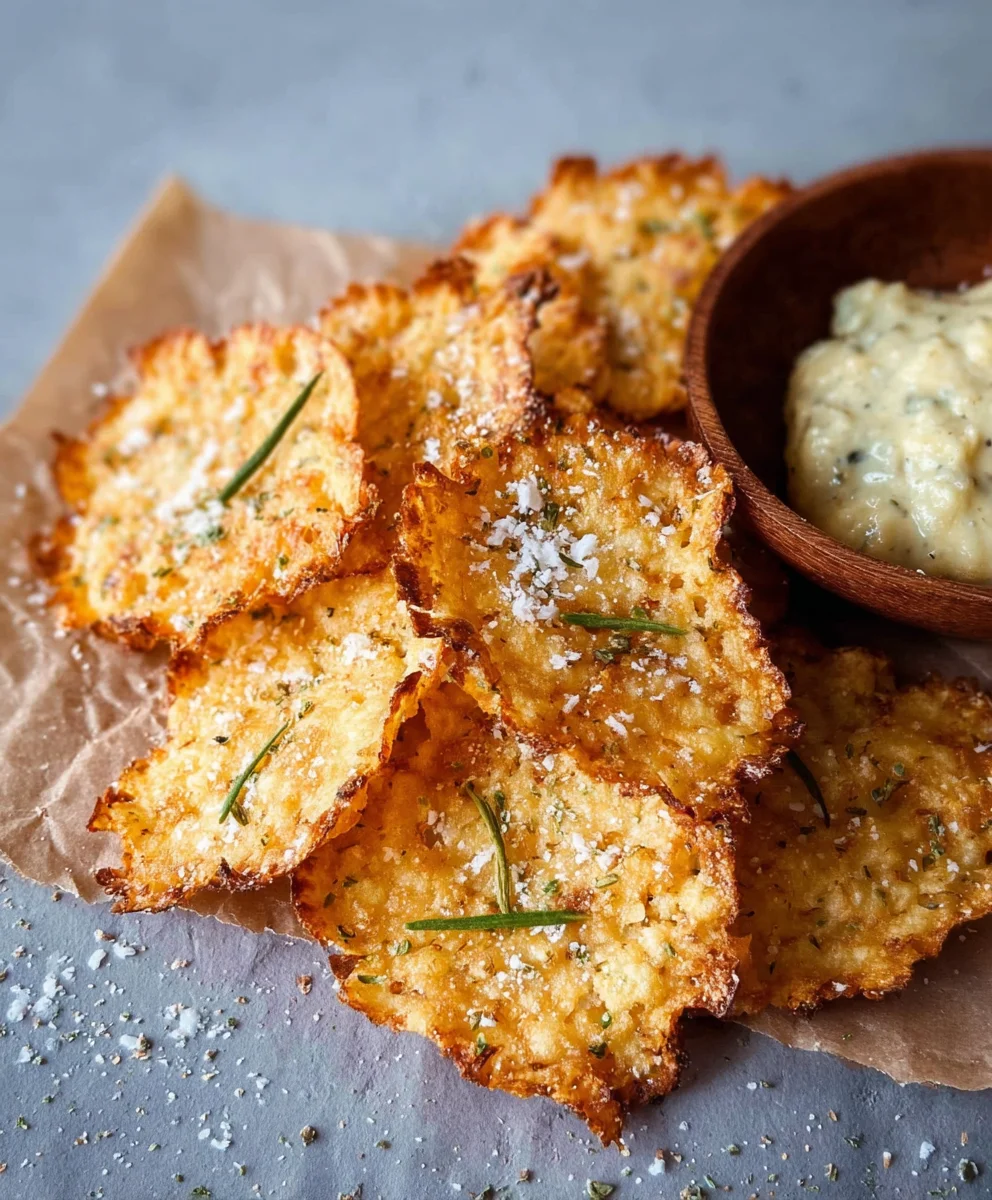
Crispy Cottage Cheese Chips
A healthy and satisfying snack idea, these crispy cottage cheese chips are easy to make and packed with protein. Perfect on their own or with your favorite dip.
Ingredients
-
1 cup small curd cottage cheese, well-drained
-
1/4 teaspoon garlic powder
-
1/4 teaspoon onion powder
-
1/2 teaspoon dried herbs (optional, such as thyme, parsley, or Italian seasoning)
-
Salt, to taste
-
Freshly ground black pepper, to taste
-
Olive oil spray
Instructions
-
Step 1
Drain the cottage cheese thoroughly using a fine-mesh sieve, letting it sit for at least 15-20 minutes. Transfer the drained cottage cheese to a medium bowl. Add garlic powder, onion powder, optional dried herbs, salt, and pepper. Mix until evenly distributed. -
Step 2
Line a baking sheet with parchment paper. Dollop small, roughly teaspoon-sized portions of the seasoned cottage cheese mixture onto the parchment paper, leaving about 2 inches between each dollop. Gently flatten each dollop slightly if desired. -
Step 3
Preheat your oven to 375°F (190°C). Place the baking sheet with the shaped cottage cheese mounds into the preheated oven. -
Step 4
Bake for 15-20 minutes, or until the chips are golden brown around the edges and appear set. Keep a close eye on them during the last few minutes to prevent burning. Rotate the baking sheet halfway through if needed. -
Step 5
Carefully remove the baking sheet from the oven. Let the chips cool on the baking sheet for 5-10 minutes, then transfer them to a wire cooling rack to cool completely. This step is crucial for maximum crispness. -
Step 6
Once completely cool, serve immediately. Store any leftovers in an airtight container at room temperature for up to 2-3 days. Briefly reheat in a low oven to revive crispness if needed.
Important Information
Nutrition Facts (Per Serving)
It is important to consider this information as approximate and not to use it as definitive health advice.
Allergy Information
Please check ingredients for potential allergens and consult a health professional if in doubt.