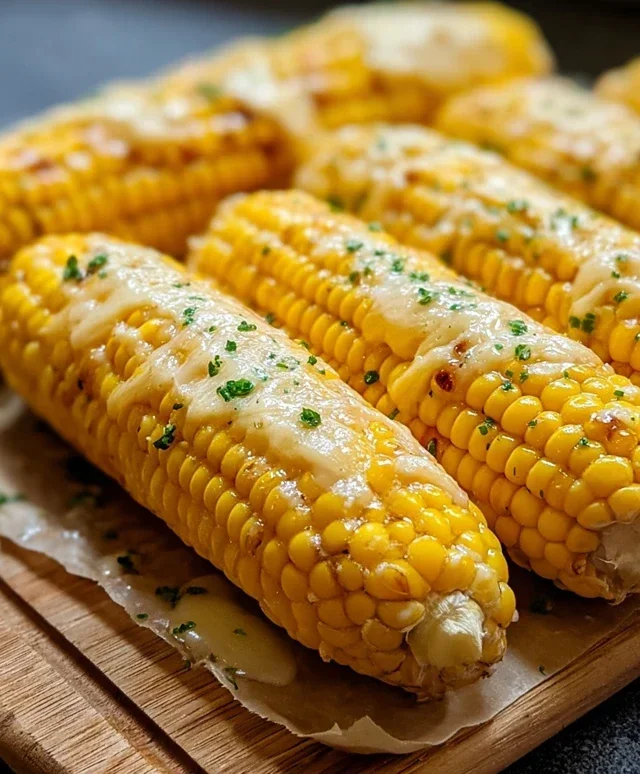
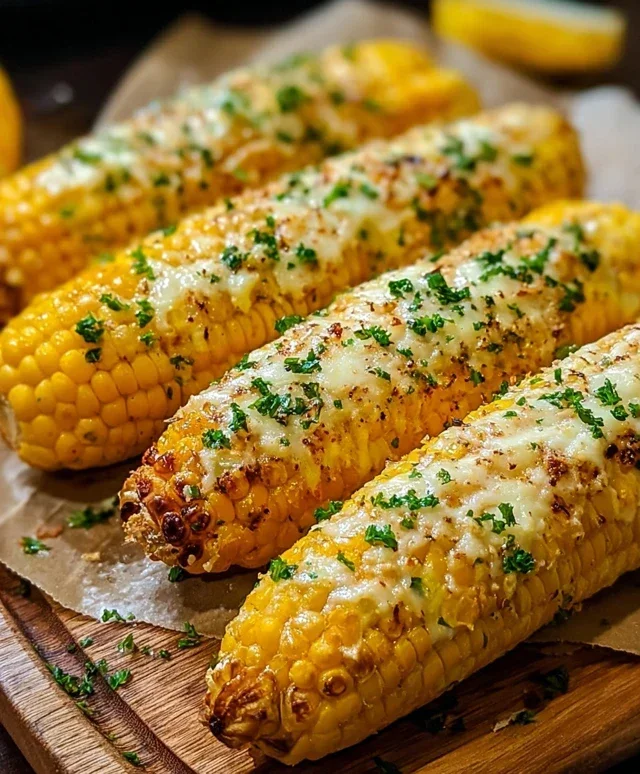
Cheesy Garlic Butter Corn on the Cob Recipe
Cheesy Garlic Butter Corn on the Cob is truly a summer revelation! Forget plain old corn; this is an elevated experience that will have your taste buds singin extractg. Imagin extracte perfectly steamed kernels, bursting with sweet, corn-y goodness, then slathered in a decadent, herbaceous garlic butter. But we don’t stop there! We crown this king of side dishes with a generous dusting of your favorite cheese, transforming it into a gooey, golden masterpiece. It’s the ultimate crowd-pleaser, bringin extractg smiles to everyone from backyard barbecues to simple weeknight dinners. What makes this Cheesy Garlic Butter Corn on the Cob so special? It’s the magical fusion of familiar comfort with a touch of irresistible indulgence. Each bite is a symphony of savory, buttery, cheesy, and sweet notes that are simply addictive. Get ready to discover your new favorite way to enjoy this seasonal favorite!
Cheesy Garlic Butter Corn on the Cob
There’s something undeniably magical about corn on the cob. It’s summer’s golden ambassador, a sweet, juicy delight that transports us to backyard barbecues and lazy afternoons. But what if I told you we could elevate this classic summer staple to a whole new level of deliciousness? Enter our Cheesy Garlic Butter Corn on the Cob. This isn’t just corn; it’s an explosion of savory, garlicky, cheesy goodness that will have everyone asking for seconds. The simple addition of a few key ingredients transforms humble corn into a showstopper. It’s the perfect side dish for grilled meats, a vibrant addition to any picnic, or simply a treat to enjoy on its own. Get ready to fall in love with corn all over again.
Ingredients:
Cooking Instructions:
This recipe is wonderfully straightforward, focusing on maximizing flavor without overcomplicating things. The key is the infused butter we’ll create, which will melt and permeate the corn as it cooks, creating an irresistible savory coating.
Preparing the Garlic Butter Mixture
The heart of this recipe lies in the vibrant garlic butter. Begin extract by taking your softened unsalted butter and placing it in a small bowl. This is where the magic starts to happen. Add your minced garlic cloves to the butter. Make sure the garlic is minced as finely as possible; this helps distribute the garlic flavor evenly throughout the butter. Next, stir in the chopped fresh parsley. The parsley not only adds a beautiful fleck of green but also contributes a fresh, herbaceous note that perfectly complements the richness of the butter and the sweetness of the corn. Season this mixture with ½ teaspoon of salt and ¼ teaspoon of black pepper. The salt will enhance all the other flavors, and the pepper adds a subtle warmth. If you’re feeling a little adventurous and want to add a bright, zesty counterpoint to the savory elements, now is the time to incorporate the optional 1 teaspoon of lemon zest. The lemon zest will cut through the richness and add a delightful burst of freshness. Mix everything together thoroughly until you have a smooth, fragrant paste. Ensure all the ingredients are well combined.
Preparing the Corn
While you’re mixing the butter, take a moment to prepare your corn. Ensure that all the husks and silk have been completely removed from each ear of corn. Any stray silk can be a little unpleasant when you bite into the corn. You can use your fingers or a clean paper towel to gently rub down the cob, removing any lingering strands. Once the corn is prepped, it’s time to get it ready for the flavorful butter. You can prepare the corn in a couple of ways, and both are delicious. For grilling, you’ll want to leave the corn in its whole cob form. For boiling or baking, you can choose to leave them as whole cobs or even cut them into smaller, manageable pieces if that’s your preference. For this recipe, we’ll proceed with whole cobs, as it makes for the most impressive presentation.
Applying the Garlic Butter
Now comes the fun part: generously slathering that glorious garlic butter onto the corn. Take each ear of corn and, using a knife or a small offset spatula, spread a good amount of the garlic butter mixture all over the surface of the corn. Don’t be shy! Get into all the nooks and crannies. You want every kernel to be coated in this delicious blend. Make sure you have enough butter to cover all four ears evenly. If it seems like you might be running a little short, you can always quickly whip up another small batch of the garlic butter mixture. Once each ear is thoroughly coated, it’s time to introduce the Parmesan cheese. Sprinkle the ½ cup of grated Parmesan cheese evenly over the buttered corn. The cheese will adhere beautifully to the butter, creating a wonderfully savory crust as it cooks. Gently press the cheese into the butter to ensure it stays put during the cooking process.
Cooking the Corn (Grilling Method)
If you’re opting for the smoky char of grilled corn, preheat your grill to medium-high heat. Place the buttered and Parmesan-coated corn cobs directly onto the grill grates. Close the lid and cook for approximately 12-15 minutes, turning the corn every few minutes to ensure even cooking and to prevent any one side from burning. You’re looking for those beautiful grill marks to appear and for the kernels to become tender and slightly blistered. The butter will melt and bubble, and the Parmesan cheese will melt and crisp up, creating a truly irresistible coating. Keep an eye on it, as grill temperatures can vary. If you notice any spots getting too dark too quickly, you can move those ears to a cooler part of the grill.
Cooking the Corn (Oven Method – Alternative)**
If grilling isn’t an option or you prefer to cook indoors, preheat your oven to 400°F (200°C). Wrap each buttered and Parmesan-coated corn cob loosely in aluminum foil. Place the foil-wrapped cobs directly on the oven rack or on a baking sheet. Bake for 20-25 minutes, or until the corn is tender. The foil will help steam the corn, ensuring it cooks through while keeping all that delicious butter and cheese contained. For a slightly crispier topping, you can unwrap the foil for the last 5 minutes of baking, allowing the Parmesan to get a little golden and crispy. Whichever method you choose, the end result will be a corn on the cob that’s bursting with flavor and undeniably satisfying. Serve immediately and enjoy the taste of summer perfected!
Conclusion:
There you have it! This Cheesy Garlic Butter Corn on the Cob recipe is an absolute winner for any occasion. It’s incredibly simple to make, delivering an explosion of irresistible flavors that will have everyone asking for seconds. The combination of sweet corn, rich garlic butter, and melted cheese creates a truly delightful side dish that’s both comforting and impressive. I love how quickly it comes together, making it perfect for weeknight dinners or summer barbecues alike. Don’t be afraid to experiment with the seasonings – it’s a wonderfully versatile recipe!
Serve this glorious corn alongside grilled chicken, juicy burgers, or your favorite BBQ fare. It also makes a fantastic addition to a potluck spread or a simple family meal. For a touch of heat, consider adding a pinch of red pepper flakes to the garlic butter mixture, or swap out some of the cheddar for a spicy Monterey Jack. You could even try a sprinkle of fresh chives or parsley for a pop of color and freshness after it’s cooked.
I truly encourage you to give this Cheesy Garlic Butter Corn on the Cob a try. It’s guaranteed to become a new favorite in your recipe collection. Happy cooking!
Frequently Asked Questions:
Can I grill this corn?
Absolutely! This Cheesy Garlic Butter Corn on the Cob is fantastic grilled. Prepare the garlic butter mixture as usual. You can either grill the corn directly on the grates, basting with the butter mixture as it cooks, or wrap it in foil packets with the butter mixture for a more steamed and infused flavor. Just ensure the cheese melts nicely.
What if I don’t have fresh garlic?
No problem at all! You can substitute fresh garlic with garlic powder. For every clove of fresh garlic, use about 1/4 teaspoon of garlic powder. Mix it thoroughly into the butter to distribute the flavor evenly.
Can I make this dairy-free?
Yes, you can adapt this recipe to be dairy-free. Use a plant-based butter alternative and a dairy-free shredded cheese. The flavor profile will change slightly, but it can still be a delicious option for those with dietary restrictions.
Cheesy Garlic Butter Corn on the Cob
A simple and delicious recipe for corn on the cob loaded with cheesy garlic butter and fresh parsley.
Ingredients
-
4 ears fresh corn, husked
-
1/4 cup (1/2 stick) unsalted butter, softened
-
2 garlic cloves, minced
-
1 tbsp chopped fresh parsley
-
1/2 tsp salt
-
1/4 tsp black pepper
-
1/2 cup grated Parmesan cheese
-
1 tsp lemon zest (optional)
Instructions
-
Step 1
Preheat your grill to medium-high heat. -
Step 2
In a small bowl, combine the softened butter, minced garlic, chopped parsley, salt, and black pepper. Mix until well combined. -
Step 3
Spread about half of the garlic butter mixture evenly over each ear of corn. -
Step 4
Place the corn directly on the preheated grill grates. Grill for about 15 minutes, turning occasionally, until the kernels are tender and slightly charred. -
Step 5
During the last 5 minutes of grilling, sprinkle the grated Parmesan cheese over the corn, allowing it to melt and become golden. -
Step 6
If using, sprinkle with lemon zest before serving. Serve hot.
Important Information
Nutrition Facts (Per Serving)
It is important to consider this information as approximate and not to use it as definitive health advice.
Allergy Information
Please check ingredients for potential allergens and consult a health professional if in doubt.