17 Easy Easter Dessert Recipes – the very thought conjures up images of pastel colors, sweet traditions, and happy faces, doesn’t it? Easter is such a joyous occasion, and for many of us, celebrating means bringin extractg out our favorite sweet treats. We love Easter desserts because they’re not just about delicious flavors; they’re about creating memories. Think of the delighted squeals of children discovering a chocolate bunny or the satisfied murmurs of a crowd enjoying a perfectly baked cake. What truly makes these special is their ability to bring people together, to mark the season with a touch of edible magic.
Whether you’re planning a small family gathering or a larger Easter brunch, finding the perfect dessert can feel like a delightful challenge.
That’s where our collection of 17 Easy Easter Dessert Recipes comes in! We’ve curated a selection of ideas that are not only simple to make but also incredibly impressive, ensuring there’s something to please every palate, from the pickiest little eaters to your most discerning adult guests. Get ready to hop into some serious baking inspiration and make your Easter celebration extra sweet!

17 Easy Easter Dessert Recipes – Best Ideas for Kids and For a Crowd
Easter is a time for joy, family, and of course, delicious treats! Whether you’re hosting a festive brunch, planning an Easter egg hunt, or simply want to add a touch of sweetness to your holiday table, I’ve got you covered with 17 delightful and easy dessert recipes. These ideas are perfect for getting the kids involved in the kitchen and are sure to impress your guests. We’ll explore classic flavors with an Easter twist, fun and whimsical creations, and simple yet elegant options. Let’s dive into some of my favorite recipes!
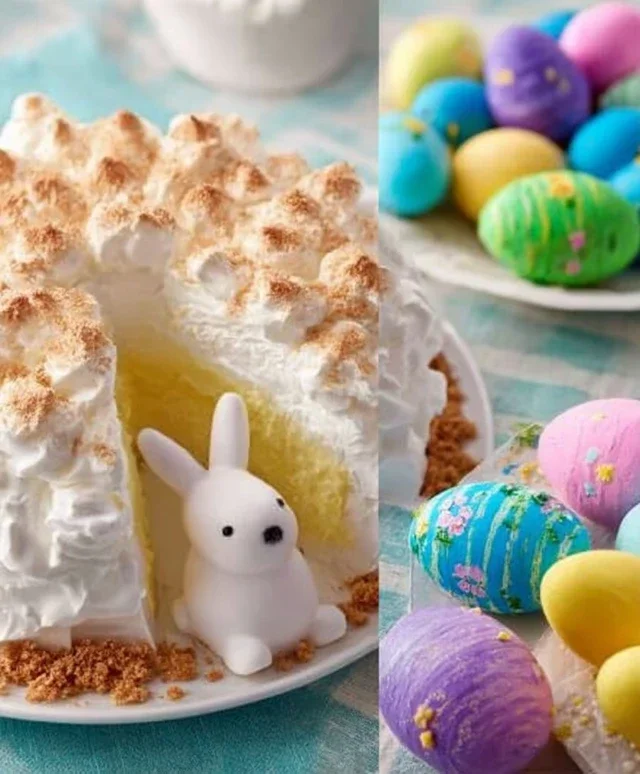
Lemon Cheesecake Nests
These adorable Lemon Cheesecake Nests are a charming addition to any Easter spread. The tangy lemon cheesecake filling nestled in a crisp, sweet shell is utterly irresistible. They look like little edible bird nests, making them a hit with both kids and adults.
Ingredients:
8 ounces cream cheese, softened
1/2 cup granulated sugar
1 large egg
1 teaspoon lemon zest
2 tablespoons fresh lemon juice
1/4 teaspoon vanilla extract
1 cup crushed shortbread cookies (about 16-20 cookies)
2 tablespoons melted unsalted butter
Mini chocolate eggs or candy-coated chocolate eggs, for filling
Instructions:
Prepare the Crust: In a medium bowl, combine the crushed shortbread cookies and melted butter. Stir until the cookie crum extractbs are evenly moistened. Press this mixture firmly into the bottom and up the sides of 12 mini muffin cups. You can use the bottom of a small glass or a tablespoon to help pack it down tightly, ensuring a sturdy base for your cheesecake. Chill the crusts in the refrigerator for at least 15 minutes while you prepare the filling. This helps them set and prevents them from crum extractbling when you add the cheesecake mixture.
Make the Cheesecake Filling: In a separate large bowl, beat the softened cream cheese with an electric mixer until smooth and creamy. Gradually add the granulated sugar and continue to beat until well combined and no lumps remain. This step is crucial for a smooth, velvety cheesecake. Scrape down the sides of the bowl as needed to ensure everything is incorporated.
Add Flavorings: Beat in the large egg until just combined. Be careful not to overmix at this stage, as it can lead to cracks in your cheesecakes. Stir in the lemon zest, fresh lemon juice, and vanilla extract. The lemon zest provides a bright, zesty flavor, while the juice adds tangin extractess. Taste the filling and adjust lemon juice if you prefer a more pronounced citrus flavor.
Bake the Cheesecakes: Spoon the cheesecake filling evenly into the prepared shortbread crusts, filling them almost to the top. Bake in a preheated oven at 325°F (160°C) for 15-18 minutes, or until the edges are set and the centers are still slightly jiggly. Overbaking will result in a dry texture. Once baked, remove the muffin tin from the oven and let the cheesecakes cool in the tin for about 10 minutes before carefully transferring them to a wire rack to cool completely. This gradual cooling process helps prevent cracking.
Decorate and Serve: Once the cheesecakes are completely cool, carefully remove them from the muffin tin. Fill the center of each cheesecake with a few mini chocolate eggs or candy-coated chocolate eggs. You can arrange them to look like a little nest. For an extra touch, you can add a tiny sprinkle of green edible glitter to mimic grass. Chill the decorated cheesecakes in the refrigerator for at least 2 hours before serving. This allows the flavors to meld and the cheesecake to firm up perfectly. Enjoy these delightful nests!
Easter Garden Cake
Imagin extracte a cake that looks like a blooming garden – that’s exactly what this Easter Garden Cake delivers! It’s a visually stunning centerpiece that tastes just as good as it looks. We’ll use a simple cake base and decorate it with edible flowers and greenery.
Ingredients:
1 box yellow cake mix
Ingredients for cake mix (eggs, oil, water as per box directions)
2 cups buttercream frosting
Green food coloring
Assorted edible flowers (pansies, violas, nasturtiums)
Fresh mint sprigs
Instructions:
Bake the Cake: Prepare the yellow cake mix according to the package directions. Pour the batter into two greased and floured 8-inch round cake pans. Bake according to package instructions until a toothpick inserted into the center comes out clean. Let the cakes cool in the pans for 10 minutes before inverting them onto a wire rack to cool completely. Ensure the cakes are fully cooled before frosting, otherwise, the frosting will melt.
Prepare the Frosting: While the cakes are cooling, prepare your buttercream frosting. Divide the frosting into two bowls. Leave one bowl plain for the base of the cake. In the second bowl, add a few drops of green food coloring and mix until you achieve a vibrant grass-like green. You can add more or less food coloring to achieve your desired shade.
Assemble and Frost the Base: Place one cooled cake layer on your serving plate or cake stand. Spread a generous layer of the plain buttercream frosting over the top. Carefully place the second cake layer on top. Apply a thin, crum extractb coat of the plain frosting all over the cake. This helps to seal in any loose crum extractbs. Chill the cake for about 15-20 minutes to set the crum extractb coat. Once chilled, apply a thicker, final layer of the plain buttercream frosting to cover the entire cake smoothly. This will be the soil for our garden.
Create the Garden Effect: Using a piping bag fitted with a grass tip (or simply a spatula if you don’t have one), spread the green buttercream frosting over the top of the cake, creating a textured, grassy appearance. You can also pipe green frosting around the sides to resemble grass growing up the cake.
Decorate with Edible Blooms: Gently arrange the edible flowers and fresh mint sprigs on top of the green frosting to resemble a beautiful spring garden. Place them strategically to create a natural, abundant look. Ensure the flowers are food-grade and have not been sprayed with pesticides. This is where your creativity can really shine! You can make pathways, flower beds, and even a little cluster of “bushes” with mint.
Funfetti Cake Mix Cookies
These Funfetti Cake Mix Cookies are a guaranteed hit with kids! They’re incredibly easy to make, bursting with colorful sprinkles, and taste like a soft, chewy cookie version of a birthday cake. The beauty of using a cake mix is that it provides a wonderfully tender and flavorful cookie base with minimal effort.
Ingredients:
1 (15.25 ounce) box funfetti cake mix
2 large eggs
1/2 cup vegetable oil
1 teaspoon vanilla extract
1/2 cup colorful sprinkles (plus extra for rolling)
Instructions:
Combine Dry Ingredients: In a large mixing bowl, empty the contents of the funfetti cake mix. Make sure to get all the sprinkles out of the box!
Add Wet Ingredients: To the cake mix, add the 2 large eggs, 1/2 cup of vegetable oil, and 1 teaspoon of vanilla extract. The vanilla extract enhances the cake flavor and rounds out the sweetness.
Mix the Dough: Stir the ingredients together with a spoon or spatula until they are just combined and a soft dough forms. Be careful not to overmix, as this can result in tough cookies. The dough will be sticky; this is normal.
Incorporate Sprinkles: Gently fold in the 1/2 cup of colorful sprinkles into the dough. Distribute them as evenly as possible to ensure each cookie has a festive burst of color.
Shape and Roll the Cookies: Place the extra sprinkles onto a shallow plate or bowl. Take spoonfuls of the cookie dough (about 1 tablespoon each) and roll them into balls with your hands. Then, gently roll each dough ball in the extra sprinkles, coating them completely. Place the sprinkle-coated dough balls onto baking sheets lined with parchment paper, leaving about 2 inches between each cookie to allow for spreading.
Bake to Perfection: Bake in a preheated oven at 350°F (175°C) for 9-11 minutes, or until the edges are lightly golden and the centers are still soft. They will puff up slightly and then settle as they cool. Avoid overbaking, as these cookies are best when they have a slightly chewy center.
Cool and Enjoy: Let the cookies cool on the baking sheet for a few minutes before carefully transferring them to a wire rack to cool completely. These cookies are wonderful served as is, or you can even drizzle them with a little white chocolate for an extra festive touch.
Coconut Macaroon Nests
These delicate Coconut Macaroon Nests are a delightful and surprisingly simple treat. Their chewy coconut texture and delicate shape make them perfect for Easter. They are naturally gluten-free and incredibly satisfying.
Ingredients:
2 cups shredded sweetened coconut
1/2 cup granulated sugar
2 large egg whites
1/2 teaspoon vanilla extract
Pinch of salt
Mini chocolate eggs, for filling
Instructions:
Preheat and Prepare: Preheat your oven to 300°F (150°C). Line a baking sheet with parchment paper. This prevents the macaroons from sticking and makes for easy cleanup.
Combine Ingredients: In a medium bowl, combine the shredded sweetened coconut, granulated sugar, vanilla extract, and a pinch of salt. Stir everything together until the coconut is evenly coated.
Add Egg Whites: Add the 2 large egg whites to the coconut mixture. Mix with a spoon or spatula until everything is well combined and the mixture starts to hold together. It should be moist but not overly wet.
Form the Nests: Using a tablespoon, scoop portions of the coconut mixture and gently shape them into nest-like mounds on the prepared baking sheet. Create a small indentation in the center of each “nest” using your thumb or the back of a spoon. This will be where you place your “eggs.”
Bake Until Golden: Bake for 20-25 minutes, or until the edges of the macaroons are golden brown and the tops are lightly toasted. Keep a close eye on them, as coconut can burn quickly.
Cool and Fill: Let the coconut macaroon nests cool on the baking sheet for about 10 minutes before carefully transferring them to a wire rack to cool completely. Once cooled, fill the indentations with mini chocolate eggs.
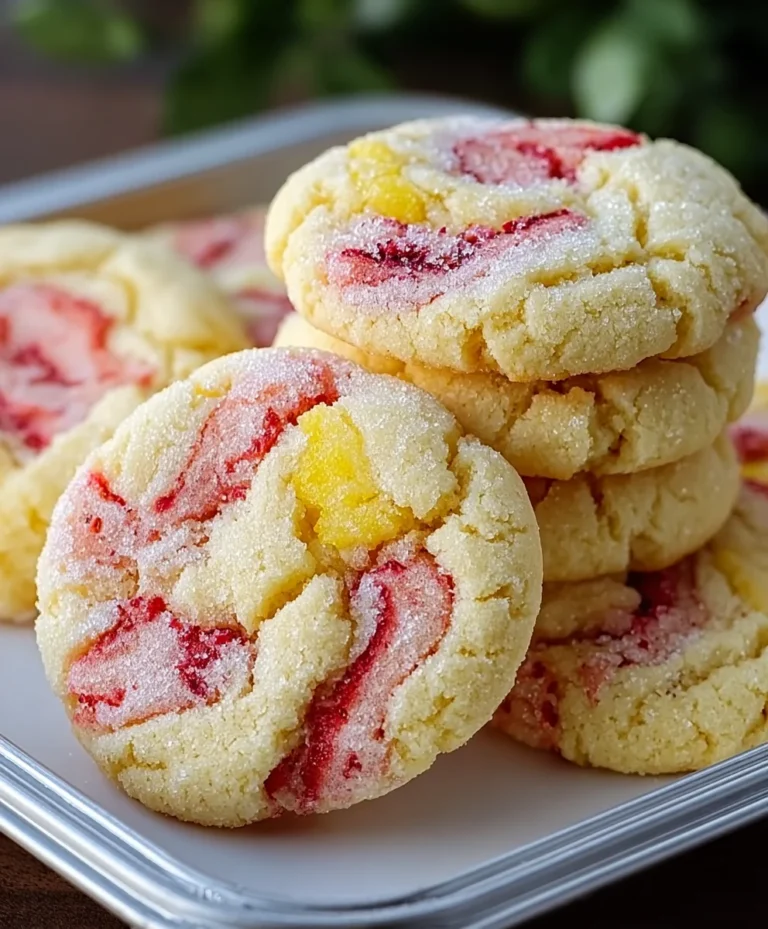
Carrot Strawberries
This is a fun and healthy “dessert” that kids will absolutely love and can help create! They’re not really dessert in the traditional sense, but they are a fantastic, festive, and playful way to end a meal or enjoy a snack. They look just like tiny carrots!
Ingredients:
1 pound fresh strawberries
1 (8 ounce) package cream cheese, softened
1/4 cup powdered sugar
1/2 teaspoon vanilla extract
Green candy melts or green frosting, for “leaves”
Instructions:
Wash and Dry Strawberries: Thoroughly wash the strawberries and pat them completely dry with paper towels. This is very important! If the strawberries are wet, the cream cheese mixture won’t adhere properly.
Prepare the Cream Cheese Filling: In a medium bowl, beat the softened cream cheese with an electric mixer until smooth and creamy. Add the powdered sugar and vanilla extract. Continue beating until the mixture is light, fluffy, and well combined.
Coat the Strawberries: Using a small spoon or a piping bag fitted with a round tip, carefully spread or pipe the cream cheese mixture all over each strawberry, coating it completely. You want the strawberries to look like little carrots.
Create the Carrot Shape: Gently shape the cream cheese coating with your fingers or a small offset spatula to give it a slightly tapered carrot shape. Make sure to leave the green tops of the strawberries exposed.
Make the Leaves: Melt the green candy melts according to package directions (or use green frosting). Dip the green tops of the strawberries into the melted candy melts or pipe small “leaves” onto them. You can also use a small sharp knife to carefully cut tiny slits into the green candy melt coating to mimic natural carrot greens.
Chill and Serve: Place the “carrot strawberries” on a baking sheet lined with parchment paper and refrigerate for at least 30 minutes to allow the cream cheese to firm up and the candy melts to set. Arrange them on a platter for a delightful and healthy Easter treat.
Beyond these featured recipes, don’t forget about other fantastic Easter dessert ideas like adorable bunny-shaped cookies, fluffy peeps parfaits, chocolate-covered pretzel eggs, and no-bake Easter egg truffles. The possibilities are endless, and the most important ingredient is always the love and joy you put into creating them! Happy Easter baking!
Conclusion:
I hope you’ve enjoyed exploring this delightful collection of 17 Easy Easter Dessert Recipes! These recipes are fantastic because they offer something for every skill level and occasion, whether you’re whipping up a sweet treat for just your little ones or preparing a grand spread for a large Easter gathering. From charming no-bake options that are perfect for little helpers to more involved but still manageable cakes and pies, you’re sure to find your new Easter favorite.
When it comes to serving, don’t be afraid to get creative! These desserts look beautiful on their own, but adding a dusting of powdered sugar, some fresh berries, or even a drizzle of chocolate can elevate them further. Consider arrangin extractg them on a tiered stand for a stunning centerpiece or presenting individual portions for easy serving at a buffet. Many of these recipes are also incredibly versatile. Feel free to swap out fruit fillings, experiment with different frosting flavors, or add your own favorite sprinkles to make them uniquely yours.
The most important thing is to have fun in the kitchen and enjoy the process of creating delicious memories. So, gather your ingredients, enlist your family, and dive into making these wonderful Easter treats. I truly encourage you to try at least one of these recipes – you’ll be amazed at how simple and rewarding it can be to bring a little extra sweetness to your Easter celebration!
Frequently Asked Questions:
Q: Are these recipes suitable for very young children to help with?
Absolutely! Many of these recipes, especially the no-bake options like chocolate nests or cookie decorating, are perfect for involving young children. They can help with mixing, stirring, and decorating, making the whole experience a fun family activity.
Q: Can I make these desserts ahead of time?
Yes, most of these recipes can be made a day or two in advance. Cakes and cookies often store well in airtight containers at room temperature. Some frosted cakes or delicate pastries might be best assembled closer to serving time to maintain their freshness and appearance.
Q: What if I have dietary restrictions? Are there any easy substitutions?
Many of these recipes lend themselves well to substitutions. For gluten-free options, look for recipes that can easily incorporate gluten-free flour blends. Dairy-free milk and butter alternatives are usually straightforward swaps for most recipes. Always check individual recipes for specific substitution advice.
Ingredients
-
Cream cheese
-
Sugar
-
Eggs
-
Sour cream
-
Vanilla extract
-
Lemon zest
-
Lemon juice
-
Graham cracker crust
-
Butter
-
Flour
-
Baking soda
-
Salt
-
Eggs
-
Vegetable oil
-
Vanilla extract
-
Sprinkles
-
Shredded coconut
-
Sweetened condensed milk
-
Almond extract
-
Chocolate chips
-
Strawberries
-
Green food coloring
-
Powdered sugar
-
Milk
Instructions
-
Step 1
Prepare the Lemon Cheesecake: Beat cream cheese and sugar until smooth. Add eggs one at a time, mixing well after each addition. Stir in sour cream, vanilla extract, lemon zest, and lemon juice. Pour into a graham cracker crust.
-
Step 2
Bake the cheesecake at 350°F (175°C) for 50-60 minutes, or until the center is almost set. Let cool completely before chilling.
-
Step 3
Create the Easter Garden Cake: Bake your favorite cake recipe. Frost with green frosting and decorate with candy flowers and edible grass for a garden effect.
-
Step 4
Make Funfetti Cake Mix Cookies: Combine funfetti cake mix, eggs, and oil according to package directions. Stir in sprinkles. Drop spoonfuls onto a baking sheet and bake until golden.
-
Step 5
Prepare Coconut Macaroon Nests: Mix shredded coconut with sweetened condensed milk and almond extract. Shape into nests on a parchment-lined baking sheet and bake until golden brown.
-
Step 6
Assemble Carrot Strawberries: Dip strawberries in melted orange candy melts. Once set, use a bit of green frosting to attach a small piece of strawberry or green candy for the top of the carrot. Alternatively, use green frosting to draw carrot tops. For the ‘soil’ effect, you can press the bottoms into crushed chocolate cookies.
Important Information
Nutrition Facts (Per Serving)
It is important to consider this information as approximate and not to use it as definitive health advice.
Allergy Information
Please check ingredients for potential allergens and consult a health professional if in doubt.