Easy Rustic Bread Recipe – Bake Your Own Delicious Loaf
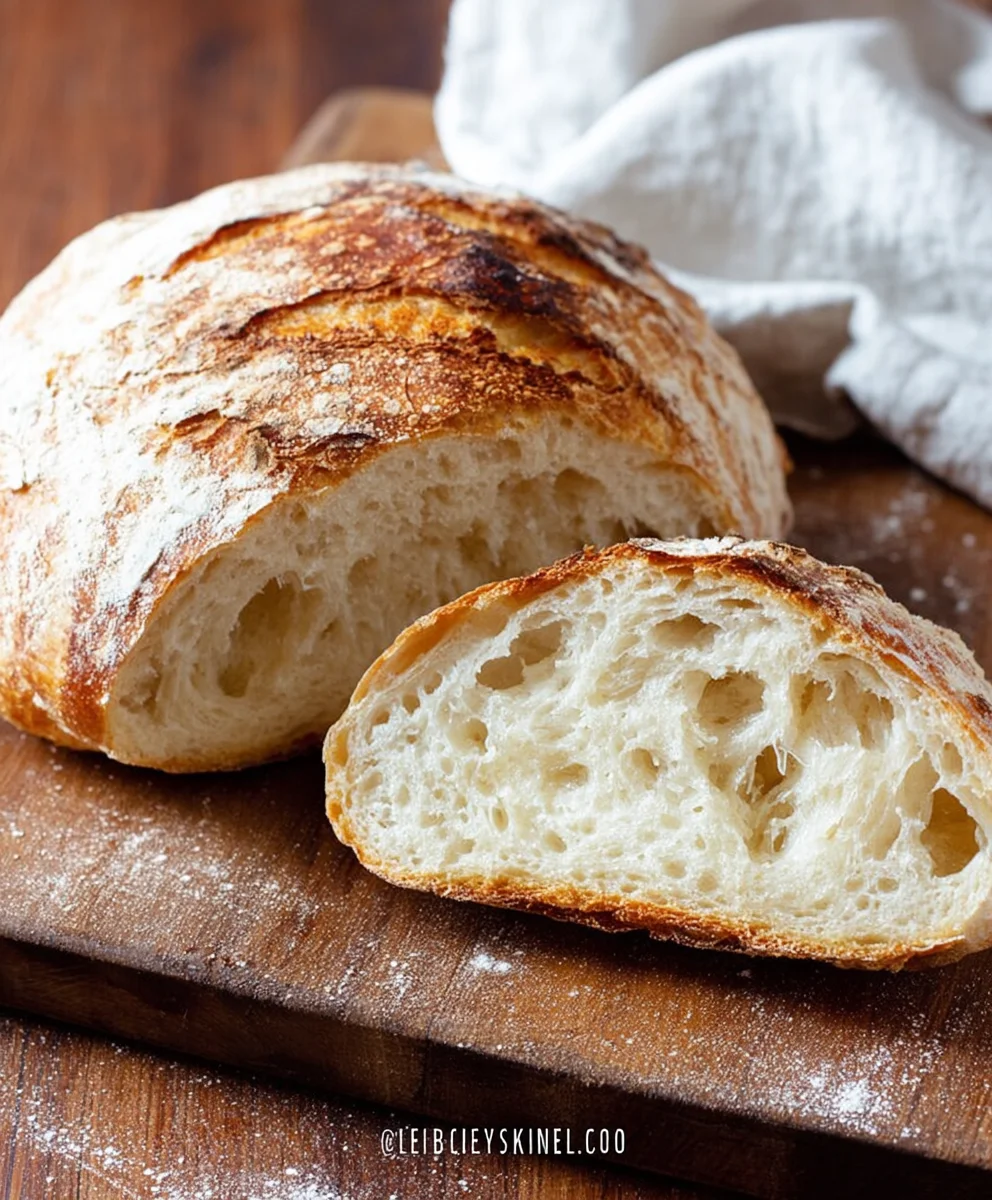
Rustic Bread Recipe: There’s something incredibly satisfying about the aroma that fills your kitchen when a loaf of freshly baked rustic bread recipe is in the oven. It’s a scent that conjures images of cozy hearths and comforting meals, a simple pleasure that’s both grounding and deeply rewarding. This isn’t just any bread; this rustic bread recipe is designed to deliver that sought-after crusty exterior and a soft, airy interior, perfect for slathering with butter, dipping into soup, or serving alongside your favorite cheese board. What makes this particular recipe so special is its straightforward approach, allowing the natural flavors of good quality flour and a slow fermentation to shine through. It’s the kind of bread that transforms an ordinary meal into an extraordinary experience, a testament to the magic of flour, water, and time. Get ready to impress yourself and your loved ones with this uncomplicated yet stunningly delicious creation.

Ingredients:
- 3 cups warm water (about 105-115°F or 40-46°C)
- 2 ¼ teaspoons active dry yeast (this is equivnon-alcoholic alent to one standard packet of yeast)
- 1 tablespoon granulated sugar
- 6 cups all-purpose flour (about 750 grams), plus more for dusting
- 3 teaspoons salt
Preparing the Yeast Mixture
The foundation of any good bread is a healthy, active yeast. To get started with this rustic bread recipe, you’ll want to grab a medium-sized bowl. Pour in your 3 cups of warm water. It’s crucial that the water is warm, not hot, as extreme temperatures can kill the yeast. Think of it as a comfortable bath temperature for the yeast to awaken. Sprinkle the 2 ¼ teaspoons of active dry yeast over the surface of the water. Don’t stir it just yet; let it sit for about 5 to 10 minutes. You’ll notice it starting to foam and bubble, which is a clear sign that your yeast is alive and ready to work its magic. Once it has foamed up, add the 1 tablespoon of sugar. The sugar acts as food for the yeast, further encouragin extractg its activity and helping to create a beautiful rise in your bread. Give this mixture a gentle stir to ensure the sugar is dissolved and the yeast is well dispersed.
Mixing the Dough
Now it’s time to bring all the ingredients together. In a large mixing bowl – the kind you can really get your hands into – combine your 6 cups of flour and 3 teaspoons of salt. Whisk them together briefly to distribute the salt evenly throughout the flour. Make a well in the center of the dry ingredients. Pour the activated yeast mixture into this well. Using a sturdy spoon or a spagin extracta, begin to mix the ingredients from the center outwards. You want to incorporate the flour gradually into the wet ingredients until a shaggy dough starts to form. It might seem a bit sticky at this stage, and that’s perfectly normal for a rustic bread. Continue mixing until most of the flour is hydrated and you can no longer see dry pockets.
Kneading the Dough
This is where the gluten develops, giving your rustic bread its structure and chew. Turn the shaggy dough out onto a lightly floured surface. It’s important to flour your hands and the work surface lightly, but avoid adding too much extra flour, as this can make yourgin extractead dense. Begin kneading. Push the dough away from you with the heels of your hands, then fold it back over itself. Rotate the dough a quarter turn and repeat the process. You’re looking for a smooth, elastic dough. This kneading process can take anywhere from 8 to 10 minutes. When you’re done, the dough should feel supple and spring back slowly when you poke it gently with your finger. If it feels too sticky, dust your hands with a little more flour. Conversely, if it feels too stiff, you can dampen your hands with a little water.
First Rise (Bulk Fermentation)
Lightly grease your large mixing bowl with a little oil or cooking spray. Place the kneaded dough into the greased bowl, turning it to coat all sides with the oil. This prevents the dough from drying out as it rises. Cover the bowl tightly with plastic wrap or a clean, damp kitchen towel. Find a warm, draft-free spot in your kitchen for the dough to rise. An oven that has been turned off but still retains a little residual warmth is ideal. Let the dough rise for about 1 to 1.5 hours, or until it has doubled in size. You’ll notice it puff up beautifully, becoming light and airy. The visual cue of doubling in size is your best indicator, so don’t rely solely on the clock.
Shaping and Second Rise
Once the dough has doubled, gently punch it down to release the air that has accumulated. Turn the dough out onto a lightly floured surface again. For a classic rustic loaf, you can shape it into a round boule or an oval batard. To create a boule, gather the edges of the dough towards the center and pinch them together to create a taut surface. Flip the dough over so the seam side is down, then gently cup your hands around it and rotate it on the counter to create a smooth, round shape. If you prefer a batard, gently pat the dough into a rough rectangle, then fold the top third down and the bottom third up, like folding a letter. Pinch the seams closed and gently roll it to elongate the loaf.
Place the shaped dough onto a baking sheet lined with parchment paper or a well-floured pizza peel. Cover it loosely with a clean kitchen towel and let it rest for another 30 to 45 minutes. This second rise, often called proofing, allows the dough to relax and develop more flavor and a lighter texture before baking. During this time, preheat your oven to 425°F (220°C). If you’re using a baking stone or Dutch oven, place it in the oven during this preheating phase. This will ensure a wonderfully crisp crust when your bread is ready.
Baking the Rustic Bread
Just before you’re ready to bake, you can score the top of your loaf with a sharp knife or a lame. This not only looks attractive but also helps control how the bread expands in the oven, preventing it from bursting in unpredictable places. Make a few shallow slashes across the top. Carefully transfer your loaf to the preheated oven. If you’re using a Dutch oven, carefully lower the proofed dough into the preheated pot, cover it, and place the lid on. Bake for 20 minutes with the lid on (if using a Dutch oven) or uncovered. Then, remove the lid (if applicable) and continue baking for another 20-25 minutes, or until the crust is a deep golden brown and the internal temperature of the bread reaches 200-210°F (93-99°C) on an instant-read thermometer. The sound of a hollow thud when you tap the bottom of the loaf is also a good indicator of doneness. Allow the bread to cool completely on a wire rack before slicing. This cooling period is essential for the texture to set.
Conclusion:
Embarking on the journey to bake your own Rustic Bread Recipe is a truly rewarding experience. From the moment you knead the dough to the non-intoxicating aroma filling your kitchen as it bakes, this recipe delivers a satisfyingly crusty exterior and a wonderfully soft, chewy interior. It’s a versatile staple that elevates any meal, from a simple breakfast toast to a sophisticated accompaniment for your favorite soups and stews. Don’t be intimidated by the seemingly simple ingredients; the magic lies in the process and a little patience. We encourage you to give this Rustic Bread Recipe a try – you might just discover your new favorite baking obsession!
For serving suggestions, this bread is perfect alongside a hearty lentil soup, slathered with butter and honey for breakfast, or as the base for a delicious bruschetta. Experiment with adding fresh herbs like rosemary or thyme to the dough for an extra aromatic twist, or incorporate a handful of seeds for added texture and flavor.
Frequently Asked Questions:
Why is my Rustic Bread Recipe not rising properly?
Several factors can affect dough rise. Ensure your yeast is fresh and active by proofing it in warm water (around 105-115°F or 40-46°C) with a pinch of sugar before adding it to your flour. Make sure the room temperature where you are proofing the dough is warm enough (ideally 75-80°F or 24-27°C). Over-kneading can also toughen the gluten, making it harder to rise, so follow the kneading times carefully.
Can I make this Rustic Bread Recipe ahead of time?
Yes! Once the bread has cooled completely, you can store it at room temperature wrapped in a clean kitchen towel or in a bread bag for 2-3 days. For longer storage, slice the cooled bread and freeze it in an airtight container or freezer bag for up to 2-3 months. Reheat slices in a toaster or oven for best results.
What kind of flour is best for this Rustic Bread Recipe?
This recipe works beautifully with all-purpose flour. However, for a slightly more rustic texture and flavor, you can substitute up to half of the all-purpose flour with bread flour or even a small amount of whole wheat flour. Just be mindful that different flours absorb liquid differently, so you might need to slightly adjust the water content.
Easy Rustic Bread Recipe – Bake Your Own Delicious Loaf
A simple and rewarding recipe for baking your own delicious, crusty rustic bread at home.
Ingredients
-
3 cups warm water (about 105-115°F or 40-46°C)
-
2 ¼ teaspoons active dry yeast
-
1 tablespoon granulated sugar
-
6 cups all-purpose flour, plus more for dusting
-
3 teaspoons salt
Instructions
-
Step 1
In a medium bowl, combine 3 cups warm water and 2 ¼ teaspoons active dry yeast. Let sit for 5-10 minutes until foamy. Stir in 1 tablespoon sugar. -
Step 2
In a large bowl, whisk together 6 cups all-purpose flour and 3 teaspoons salt. Make a well in the center and pour in the activated yeast mixture. Mix until a shaggy dough forms. -
Step 3
Turn the dough onto a lightly floured surface and knead for 8-10 minutes until smooth and elastic. The dough should spring back slowly when poked. -
Step 4
Place the kneaded dough in a lightly greased bowl, cover tightly, and let rise in a warm, draft-free spot for 1 to 1.5 hours, or until doubled in size. -
Step 5
Gently punch down the dough, shape it into a boule or batard on a lightly floured surface, and place on a parchment-lined baking sheet. Cover loosely and let rest for 30-45 minutes. Preheat oven to 425°F (220°C). -
Step 6
Score the top of the loaf with a sharp knife. Bake for 20 minutes. Remove lid if using a Dutch oven, and bake for another 20-25 minutes until deep golden brown and an internal temperature of 200-210°F (93-99°C) is reached. Cool completely on a wire rack before slicing.
Important Information
Nutrition Facts (Per Serving)
It is important to consider this information as approximate and not to use it as definitive health advice.
Allergy Information
Please check ingredients for potential allergens and consult a health professional if in doubt.