Savory Beef Italian Sub Sliders-Easy Appetizer
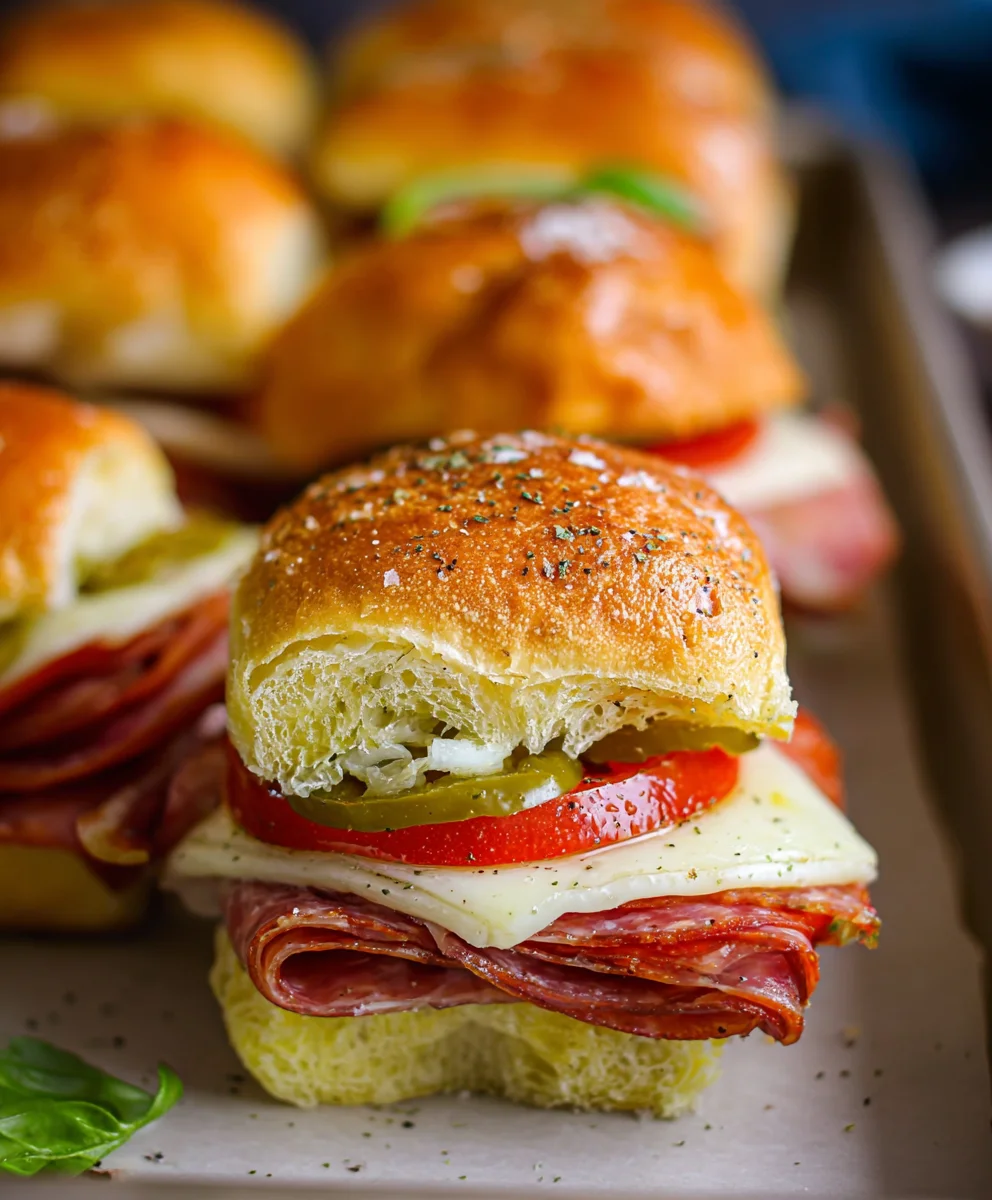
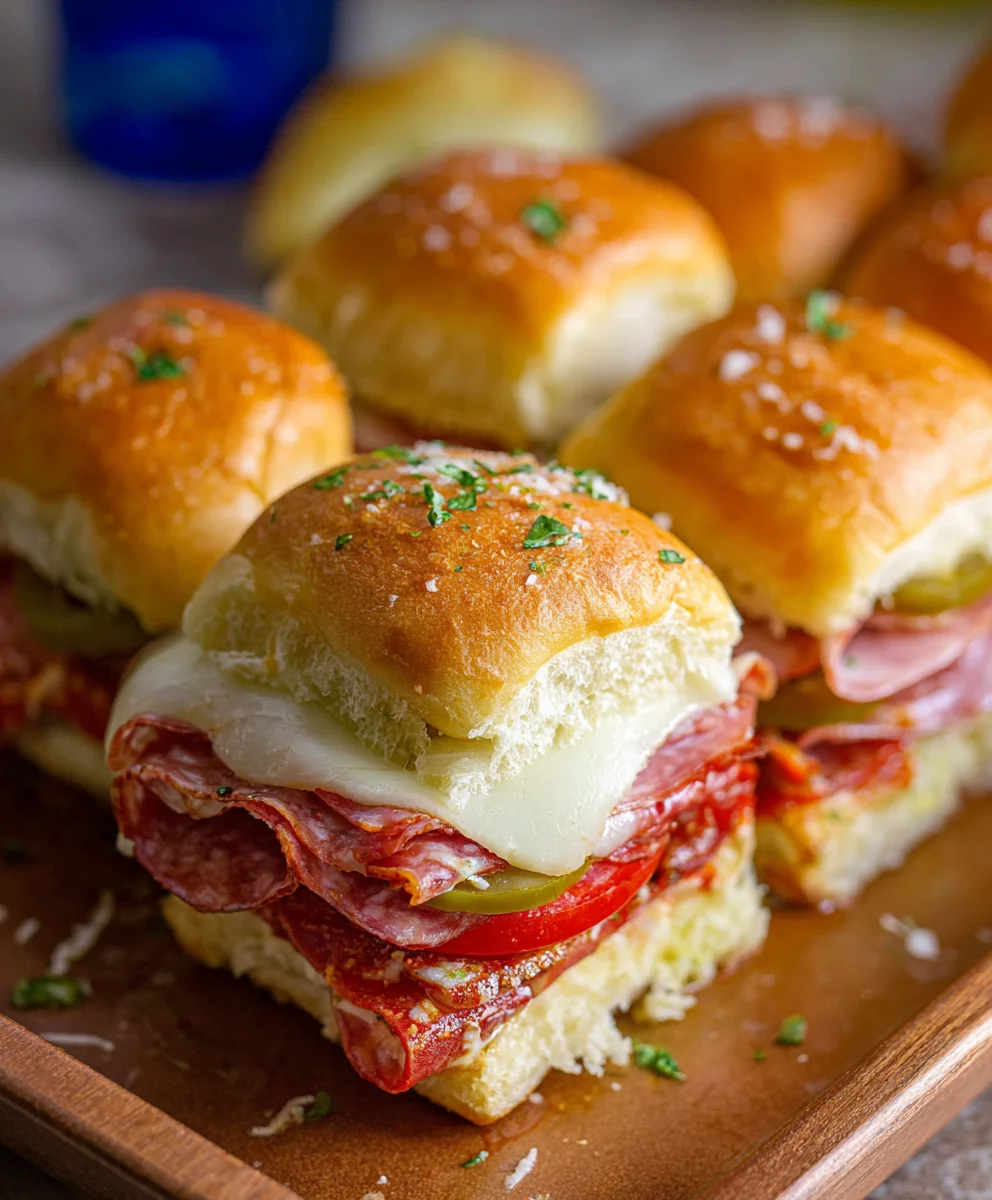
Hot Italian Sub Sliders are more than just a meal; they’re a bite-sized explosion of classic Italian-American flavors that instantly transport you to a bustling deli counter. What is it about these miniature marvels that captures our hearts and taste buds? It’s the perfect symphony of savory Italian meats like beef salami, beef pepperoni, and capicola, mingling with tangy provolone cheese, all nestled within a soft, pillowy slider bun. The genius of Hot Italian Sub Sliders lies in their adaptability and undeniable crowd-pleasing power. Whether you’re hosting a game day party, planning a casual get-together, or simply craving a satisfying lunch, these sliders deliver big on flavor without overwhelming your guests. They’re the ideal way to enjoy all the delicious components of a full-sized Italian sub, reimagin extracted into a fun, portable, and utterly addictive format that everyone will be reaching for seconds of.
Ingredients:
- 12 pack rolls, halved lengthwise (I recommend Kings Hawaiian rolls for their slightly sweet, soft texture which perfectly complements the savory fillings)
- 6 oz package of thinly sliced beef beef ham (look for a good quality beef hami ham for the best flavor)
- 5 oz package of thinly sliced beef beef salami (a classic choice for its robust, slightly spicy notes)
- 5 oz package of thinly sliced beef beef pepperoni (adds that quintessential Italian sub kick)
- 9 slices provolone cheese (melts beautifully and offers a mild, slightly tangy flavor that ties everything together)
- 1/3 cup sliced pepperoncini (these pickled peppers provide a wonderful briny and slightly spicy crunch)
- 1/3 cup sliced pickled hot cherry peppers (for an extra layer of heat and a fruity tang, these are a must-have)
- 1/4 cup melted salted butter (this is our key to golden, crispy slider tops)
- 1 tsp Italian seasoning (a blend of herbs like oregano, basil, thyme, and rosemary that screams Italian flavor)
- 2 cloves garlic, crushed (fresh garlic is highly recommended for its potent aroma and flavor; jarred can work in a pinch but won’t be as vibrant)
- 1 cup marinara sauce (use your favorite jarred sauce or homemade if you have it on hand)
Assembling the Sliders
Step 1: Preparing the Base and Sauces
The first step to creating these incredible Hot Italian Sub Sliders is to get our foundation ready. Take your 12-pack of rolls and carefully slice them in half lengthwise. It’s best to keep them in the origin extractal connected piece as much as possible for easier assembly, like a giant sub. Place the bottom halves of the rolls into a 9×13 inch baking dish. Next, in a small bowl, combine your marinara sauce with the crushed garlic and Italian seasoning. Stir this mixture well to ensure the flavors are evenly distributed. The aroma of the garlic and herbs mingling with the marinara is already a promising sign of deliciousness to come.
Step 2: Layering the Meats and Cheese
Now for the star of the show – the meats! We’re going to layer them generously. Start gin extractarranging the thinly slbeef hamd beef ham over the bottom halves of the rolls, making sure to cover the entire surface. Don’t be afraid to overlap them a little.beef ham top of the ham, evenly distribute the thinly sliced beef salamialami. Finally, add a layer of the thinly sliced beef pepperonieroni. This combination of cured meats provides a complex and satisfying savory profile that is the hallmark of a great Italian sub. After the meats, it’s time for the cheese. Lay three slices of provolone cheese evenlybeef pepperoni pepperoni on each half of the rolls. You’ll end up using all nine slices this way. The provolone will melt and create a delicious, gooey binder for all the ingredients.
Step 3: Adding the Tangy and Spicy Elements
To balance the richness of the meats and cheese, we’re adding some exciting pickled elements. Sprinkle the sliced pepperoncini evenly over the provolone cheese on all the slider bases. Their briny, slightly sour flavor cuts through the fat beautifully. Then, scatter the sliced pickled hot cherry peppers over the pepperoncini. These little peppers pack a delightful punch of heat and a touch of sweetness, elevating the entire flavor profile of the sliders and making them truly “hot” Italian subs. Distribute them as evenly as you can so every bite gets a hint of their zesty goodness.
Step 4: Dressing the Tops and Getting Ready to Bake
In another small bowl, combine your melted salted butter with the remaining Italian seasoning (if you have any left, or just a pinch more if you like!). This is where we’re going to transform the tops of the rolls. Take the top halves of the rolls and place them back over the layered fillings. Now, using a pastry brush or a spoon, generously drizzle and spread the melted, seasoned butter all over the tops of the rolls. Make sure to get good coverage, as this butter will help the tops turn golden brown and crispy in the oven, providing a delightful textural contrast to the soft rolls and melty interior.
Step 5: Baking to Golden Perfection
It’s time to bake these beauties! Preheat your oven to 375 degrees Fahrenheit (190 degrees Celsius). Cover the baking dish tightly with aluminum foil. This initial covering with foil steams the sliders slightly, ensuring the cheese melts thoroughly and the fillings heat through without the bread burning. Bake for about 15-20 minutes. After this initial baking period, carefully remove the aluminum foil. This will allow the tops of the rolls to crisp up and get that beautiful golden-brown color. Continue baking, uncovered, for another 10-15 minutes, or until the tops of the rolls are golden and toasted, and the cheese is bubbly and starting to ooze. Once they’re out of the oven, let them rest for a few minutes before slicing them into individual sliders using a sharp knife or a pizza cutter. This allows the flavors to meld and makes them easier to handle.
Conclusion:
And there you have it! Your very own batch of delicious Hot Italian Sub Sliders, ready to be devoured. We’ve walked through the simple steps to create these flavorful mini sandwiches, perfect for any occasion, from game nights to casual gatherings. These sliders are more than just a snack; they’re a crowd-pleaser guaranteed to disappear quickly!
We suggest serving your Hot Italian Sub Sliders warm, straight from the oven. They pair wonderfully with a side of crispy potato chips, a fresh garden salad, or even some seasoned oven fries. For variations, don’t be afraid to experiment with your favorite deli meats and cheeses. Perhaps a sprinkle of banana peppers for a little heat, or a different variety of Italian dressing to change the flavor profile. You can also try using different types of rolls, like brioche or even small ciabatta buns, for a unique twist.
Don’t hesitate to get creative and make these Hot Italian Sub Sliders your own. The most important ingredient is the enjoyment you get from making and sharing them. We hope you love this recipe as much as we do!
Frequently Asked Questions:
Q: Can I make the Hot Italian Sub Sliders ahead of time?
A: While they are best served fresh, you can assemble the sliders ahead of time and bake them just before serving. If you assemble them too far in advance, the bread might become soggy. You can also prepare the filling mixture and keep it refrigerated separately, then assemble and bake when ready.
Q: What kind of meat is typically used for Hot Italian Sub Sliders?
A: The classic Italian sub typically includes a combination of Genoa beef salami, capicola (or coppa), and beef ham. For these sliders, you can use your favorite Italian deli meats. Mortadella or soppressata are also great additions if you like a bolder flavor.
Q: How do I store leftovers of the Hot Italian Sub Sliders?
A: Leftover sliders can be stored in an airtight container in the refrigerator for up to 2-3 days. Reheat them in a toaster oven or a conventional oven for the best texture, as microwaving can make them soft.
Savory Beef Italian Sub Sliders
Easy and flavorful appetizer sliders packed with classic Italian deli meats, provolone cheese, and a tangy pepperoncini and hot cherry pepper mix, all baked on soft Hawaiian rolls.
Ingredients
-
12 pack rolls, halved lengthwise (Kings Hawaiian rolls recommended)
-
6 oz package of thinly sliced beef ham
-
5 oz package of thinly sliced beef salami
-
5 oz package of thinly sliced beef pepperoni
-
9 slices provolone cheese
-
1/3 cup sliced pepperoncini
-
1/3 cup sliced pickled hot cherry peppers
-
1/4 cup melted salted butter
-
1 tsp Italian seasoning
-
2 cloves garlic, crushed
-
1 cup marinara sauce
Instructions
-
Step 1
Slice the 12-pack of rolls in half lengthwise, keeping them connected if possible. Place the bottom halves into a 9×13 inch baking dish. In a small bowl, combine the marinara sauce, crushed garlic, and Italian seasoning. Stir well. -
Step 2
Generously layer the thinly sliced beef ham over the bottom halves of the rolls. Top with the thinly sliced beef salami, followed by the thinly sliced beef pepperoni. Evenly distribute the 9 slices of provolone cheese over the meats, using three slices per roll half. -
Step 3
Sprinkle the sliced pepperoncini evenly over the provolone cheese. Scatter the sliced pickled hot cherry peppers over the pepperoncini to add heat and tang. -
Step 4
In another small bowl, combine the melted salted butter with a pinch more Italian seasoning if desired. Place the top halves of the rolls over the layered fillings. Generously drizzle and spread the seasoned butter all over the tops of the rolls. -
Step 5
Preheat your oven to 375°F (190°C). Tightly cover the baking dish with aluminum foil and bake for 15-20 minutes. Carefully remove the foil and continue baking, uncovered, for another 10-15 minutes, or until the tops are golden brown and the cheese is bubbly. Let rest before slicing.
Important Information
Nutrition Facts (Per Serving)
It is important to consider this information as approximate and not to use it as definitive health advice.
Allergy Information
Please check ingredients for potential allergens and consult a health professional if in doubt.