Easter Bunny Chick Cupcakes-Cute & Easy Recipe
Easter Bunny and Chick Cupcakes are more than just a sweet treat; they’re a whimsical celebration baked right into every bite! As spring unfurls and the days grow longer, there’s a collective desire to bring joy and vibrant color to our tables, and what better way to do that than with these utterly adorable confections? These aren’t just any cupcakes; they are edible art, designed to capture the playful spirit of Easter. Imagin extracte the delight on children’s faces (and let’s be honest, the adults too!) as they discover these charming characters peeking out from a party platter. The magic lies in their simplicity, their ability to transform a humble cupcake into a miniature masterpiece that embodies the festive atmosphere of the season. They’re perfect for classroom parties, family gatherings, or simply as a way to brighten your own day with a touch of spring magic. Get ready to create some unforgettable memories with these delightful Easter Bunny and Chick Cupcakes.
Ingredients:
- 1 recipe Vanilla Cupcakes (or your favorite cake mix)
- 1 recipe Fluffy Vanilla Frosting (or store-bought frosting)
- Yellow and white sprinkles
- Large and mini marshmallows
- Pink colored sanding sugar
- Black decorator icing
- Jelly beans (pink for bunny noses)
- Orange colored gum or M&Ms (for chick beaks)
- Yellow food coloring (for chick frosting)
Preparing Your Cupcakes and Frosting
The foundation of our adorable Easter Bunny and Chick Cupcakes starts with perfectly baked vanilla cupcakes. If you’re using a cake mix, follow the package instructions precisely for best results. For those who prefer a from-scratch approach, ensure your vanilla cupcake recipe is tried and true. The key is to have them completely cooled before you embark on the decorating journey. This is crucial; warm cupcakes will melt your frosting, leading to a less-than-ideal visual outcome.
While your cupcakes are cooling, it’s time to prepare your frosting. If you’re making a fluffy vanilla frosting from scratch, make sure it’s light and airy, perfect for piping and shaping. If you’re opting for store-bought, you can often find tubs of vanilla frosting that work beautifully. We’ll be dividing and coloring some of this frosting for our chicks, so have a couple of small bowls ready. For the chick frosting, take about half of your total frosting and add a few drops of yellow food coloring. Gradually mix it in until you achieve a vibrant, cheerful yellow hue, reminiscent of a fluffy baby chick. Don’t go too heavy on the coloring at first; you can always add more to deepen the shade.
Decorating the Easter Bunny Cupcakes
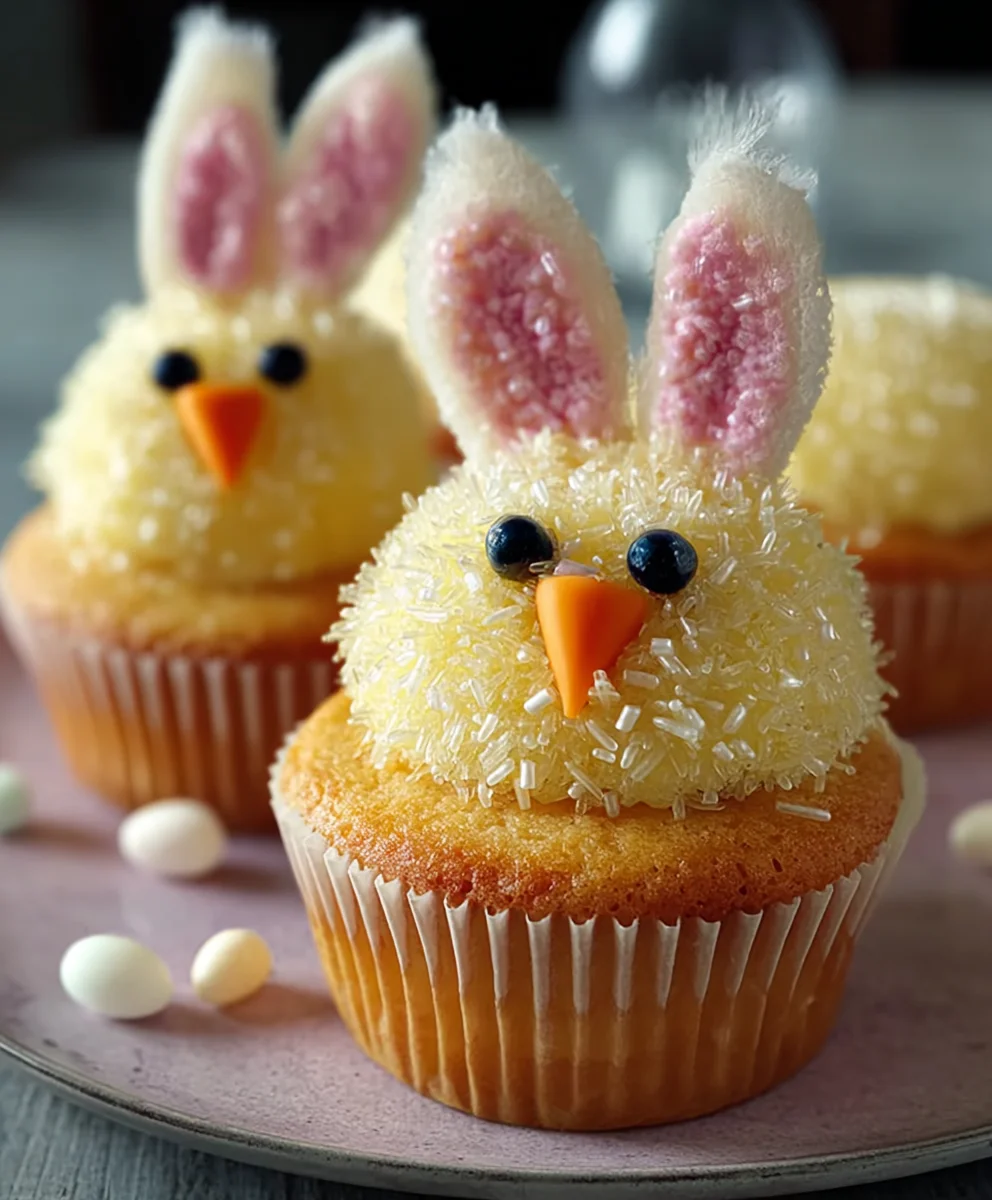
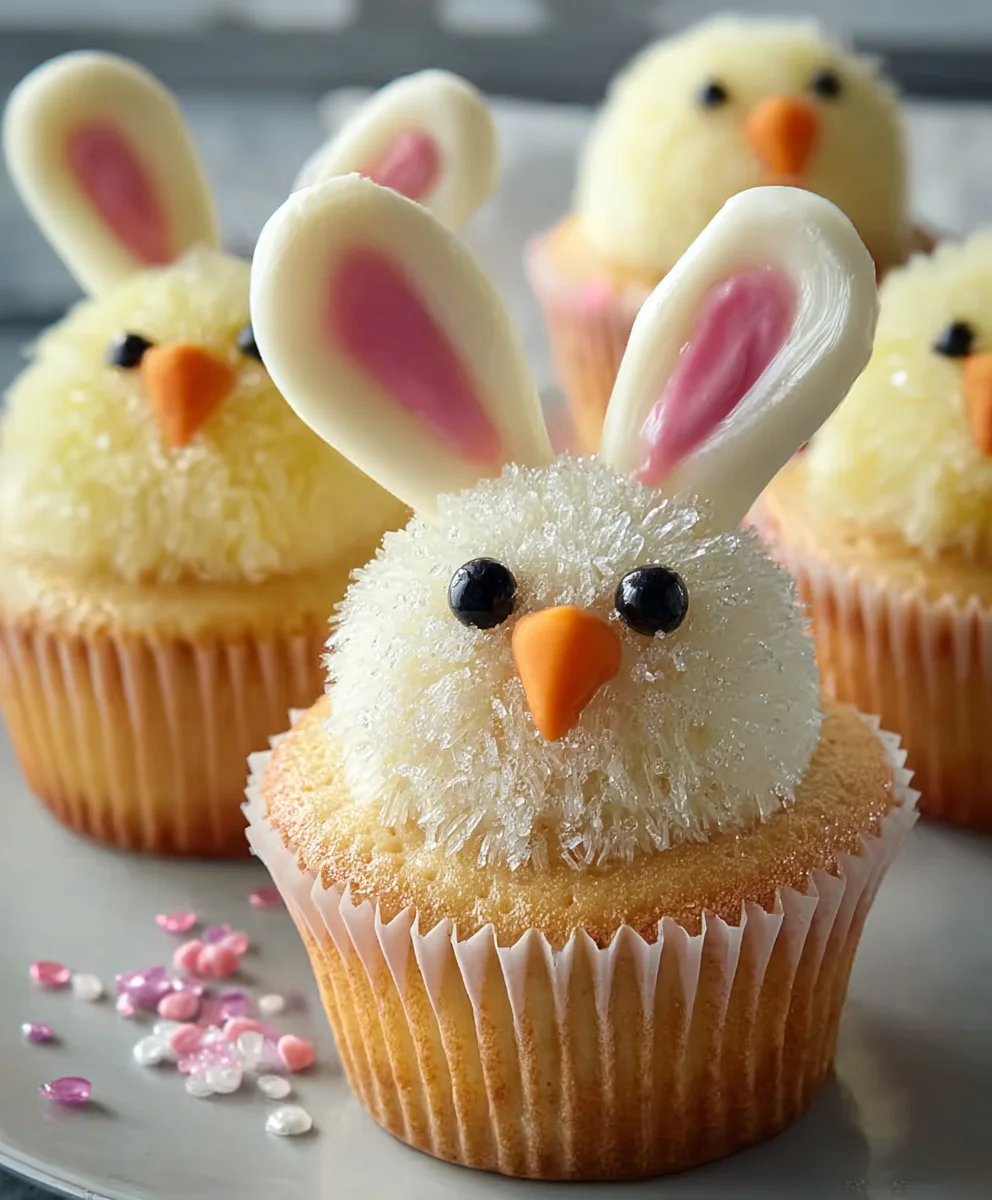
Now for the fun part: bringin extractg our Easter Bunny and Chick Cupcakes to life! Let’s start with the bunnies. Take a cooled vanilla cupcake and generously cover the top with your plain white frosting. You can use a spatula for a smooth finish, or a piping bag with a round tip for a more classic frosting swirl.
Next, we’ll create the bunny ears. Take two mini marshmallows and, using a small dab of frosting, attach them to the top of the cupcake, slightly angled outwards. These are our bunny ears! For a touch of color and detail, dip the tips of the marshmallow ears into a small amount of pink sanding sugar. This gives them that lovely pink inner ear effect. For the bunny’s face, use a small amount of black decorator icing to draw two tiny eyes. Then, place a pink jelly bean smack in the center, just below the eyes, to serve as the bunny’s adorable nose. You can also add a little white sprinkle above the nose to represent a little mouth, or simply leave it as is for a minimalist charm. The contrast of the white frosting, pink ears, and jelly bean nose is incredibly sweet and undeniably Easter-themed.
Creating the Adorable Chick Cupcakes
Moving on to our sunny little chicks! Grab another cooled vanilla cupcake. Take your yellow-tinted frosting and cover the entire top of the cupcake. Again, you can opt for a smooth finish with a spatula or create a textured look with a piping bag. For a fluffy chick appearance, a star tip on your piping bag can work wonders, creating little tufts of “feathers.”
The next step is to give our chicks their distinctive beaks. For this, you’ll need your orange colored gum or M&Ms. Carefully press one piece into the center of the yellow frosting, just below where you envision the eyes will be. It should sit snugly, resembling a cute little beak. If you’re using orange gum, you might need to trim it to a slightly beak-like shape before pressing it in.
Now for the eyes. Using your black decorator icing, carefully draw two small dots above the orange beak. You want them to be proportionate to the beak and the size of the cupcake. Two simple dots are all it takes to give your chicks a wide-eyed, cheerful expression. To add an extra touch of sweetness and sparkle, scatter some yellow and white sprinkles around the base of the cupcake or lightly over the top, like a dusting of springtime pollen. This not only adds visual appeal but also a delightful crunch.
Adding Finishing Touches and Details
With both the bunnies and chicks decorated, take a moment to admire your creations! You can add further embellishments if you wish. For the bunnies, a few more white sprinkles scattered around the base can mimic a fluffy tail. For the chicks, if you have any extra yellow sprinkles, a light dusting can enhance their sunny disposition.
If you’re feeling particularly creative, you can use the mini marshmallows for the bunny ears by cutting them in half diagonally, giving them a more pointed ear shape. For the chick beaks, if orange gum isn’t available, a small triangle cut from a yellow gummy candy and then painted with a touch of orange food coloring can also work in a pinch. The key is to have fun and let gin extractr imagination guide you. These Easter Bunny and Chick Cupcakes are designed to be whimsical and delightful, so don’t stress about perfection. The joy comes from the process and the smiles they’ll bring.
Serving and Enjoying Your Easter Treats
Once all your Easter Bunny and Chick Cupcakes are fully decorated and the black decorator icing has had a moment to set, they are ready to be presented. Arrange them on a festive platter or in cupcake liners on a tiered stand. They make a wonderful centerpiece for any Easter gathering or a special treat to enjoy during the holiday weekend. The combination of the moist vanilla cake, creamy frosting, and playful decorations is sure to be a hit with both children and adults. Remember to store any leftover cupcakes in an airtight container at room temperature for up to two days, or in the refrigerator if your frosting contains ingredients that require it. The vibrant colors and charming designs are guaranteed to add an extra dose of Easter cheer to your celebrations.
Conclusion:
Congratulations on creating these delightful Easter Bunny and Chick Cupcakes! We hope you and your loved ones have had a wonderful time baking and decorating them. These cupcakes are not only a treat for the taste buds but also a charming centerpiece for any Easter celebration. Their vibrant colors and whimsical designs are sure to bring smiles to faces of all ages, making your Easter gathering even more special. We encourage you to embrace the fun and creativity that comes with decorating these adorable treats, and don’t be afraid to experiment with your own unique touches!
For serving suggestions, these Easter Bunny and Chick Cupcakes are perfect on their own as a sweet dessert. They also pair wonderfully with a glass of cold milk or a light, fruity punch. Consider arrangin extractg them on a tiered stand for an impressive display at your Easter brunch or as part of a dessert buffet. They also make fantastic edible party favors for any Easter event.
Don’t hesitate to get creative with variations! You can experiment with different cake flavors like lemon or vanilla, or even try a chocolate cake base. For the frosting, consider adding a hint of peppermint or almond extract for a subtle flavor twist. Feel free to use different colored candies for the bunnies’ noses or the chicks’ beaks, or even sprinkle edible glitter for an extra touch of sparkle. The possibilities are endless!
Frequently Asked Questions:
Can I make the cupcake batter and frosting ahead of time?
Absolutely! You can bake the cupcakes a day in advance and store them in an airtight container at room temperature. The buttercream frosting can also be made a day ahead and refrigerated. Just bring it back to room temperature and whip it again briefly before decorating for the best consistency.
How should I store leftover Easter Bunny and Chick Cupcakes?
Store any leftover cupcakes in an airtight container at room temperature for up to 2 days. If your frosting contains cream cheese or other dairy that requires refrigeration, it’s best to store them in the refrigerator and allow them to come back to room temperature before serving for optimal flavor and texture.
Are these cupcakes suitable for young children to help decorate?
Yes, these Easter Bunny and Chick Cupcakes are perfect for kids to help with! Simple tasks like placing candy eyes, attaching marshmallow ears, or adding sprinkles can be managed by even the youngest bakers with a little supervision. It’s a fantastic way to create lasting Easter memories together.
Easter Bunny Chick Cupcakes-Cute & Easy Recipe
Adorable and easy-to-make Easter cupcakes decorated as bunnies and chicks.
Ingredients
-
1 recipe Vanilla Cupcakes (or your favorite cake mix)
-
1 recipe Fluffy Vanilla Frosting (or store-bought frosting)
-
Yellow and white sprinkles
-
Large and mini marshmallows
-
Pink colored sanding sugar
-
Black decorator icing
-
Jelly beans (pink for bunny noses)
-
Orange colored gum or M&Ms (for chick beaks)
-
Yellow food coloring (for chick frosting)
Instructions
-
Step 1
Prepare vanilla cupcakes according to your preferred recipe or cake mix instructions. Ensure they are completely cooled before decorating. -
Step 2
Prepare fluffy vanilla frosting. Divide frosting into two portions. Tint one portion with yellow food coloring to create chick frosting. -
Step 3
For bunny cupcakes: Frost cooled cupcakes with white frosting. Attach mini marshmallows as ears, dip tips in pink sanding sugar. Use black decorator icing for eyes and a pink jelly bean for the nose. -
Step 4
For chick cupcakes: Frost cooled cupcakes with yellow frosting. Press orange gum or M&Ms for beaks and draw eyes with black decorator icing. -
Step 5
Add finishing touches like sprinkles for detail or texture. Allow black icing to set. -
Step 6
Arrange decorated cupcakes on a platter and serve for your Easter celebration.
Important Information
Nutrition Facts (Per Serving)
It is important to consider this information as approximate and not to use it as definitive health advice.
Allergy Information
Please check ingredients for potential allergens and consult a health professional if in doubt.