BEST Italian Tiramisu Recipe – Easy & Delicious
BEST Classic Italian Tiramisu Recipe – that’s what we’re diving into today, and trust me, it’s a journey worth taking! There’s something utterly magical about a truly authentic tiramisu. It’s not just a dessert; it’s an experience, a symphony of delicate flavors and textures that transports you straight to the heart of Italy. Think about it: the soft, cloud-like mascarpone cream, the rich espresso-soaked ladyfingers, and that whisper of cocoa dusting on top. It’s a perfect balance of sweet and slightly bitter, creamy and airy, a culinary hug that’s universally adored. People love tiramisu because it’s sophisticated yet incredibly comforting, making it the star of any gathering. What makes our BEST Classic Italian Tiramisu Recipe so special is its commitment to tradition, using only the finest ingredients to achieve that signature lusciousness and depth of flavor that defines this beloved Italian classic.
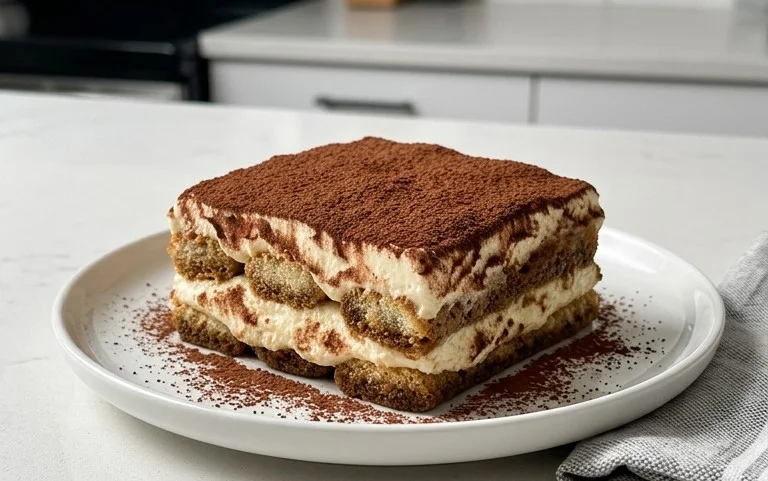
The BEST Classic Italian Tiramisu Recipe
There are desserts, and then there is Tiramisu. This iconic Italian treat, meaning “pick me up” or “cheer me up,” is an absolute masterpiece of simple, elegant flavors and textures. The magic lies in the harmonious marriage of creamy mascarpone, rich coffee-soaked ladyfingers, and a hint of cocoa. Forget those complicated, layered cakes; Tiramisu is surprisingly straightforward to make at home, and the result is utterly divine. I’ve tried many variations over the years, but this classic recipe consistently delivers that perfect balance of sweetness, bitterness, and airy lightness that makes Tiramisu so beloved. Prepare to impress yourself and your guests with this truly authentic and undeniably delicious dessert.
Ingredients:
Crafting Your Classic Tiramisu: Step-by-Step
The beauty of this Tiramisu lies in its simplicity. We’ll focus on building a luscious, stable cream and then carefully assembling the layers.
1. Preparing the Custard Base:
First, let’s create the luscious custard that forms the heart of our Tiramisu. In a heatproof bowl, whisk together the 4 egg yolks, 2/3 cup of granulated or caster sugar, and the 1/4 teaspoon of salt. It’s important to use a bowl that fits snugly over a saucepan of simmering water, creating a makeshift double boiler. Place the bowl over the simmering water (ensure the water doesn’t touch the bottom of the bowl) and whisk continuously for about 8-10 minutes. This process, called tempering, cooks the egg yolks gently, making them safe to eat and creating a beautifully pnon-alcoholic ale, thick, and ribbon-like consistency. You’ll know it’s ready when the mixture has significantly lightened in color and has thickened enough to coat the back of a spoon. Remove the bowl from the heat and stir in the 1 teaspoon of vanilla extract. Let this mixture cool completely. You can speed this up by placing the bowl in an ice bath, stirring occasionally.
2. Whipping the Cream:
While the custard cools, we’ll prepare the other creamy component. In a separate, chilled bowl (a cold bowl helps the cream whip up better and faster), pour in the 1 1/2 cups of chilled heavy cream. Using an electric mixer on medium-high speed, whip the cream until stiff peaks form. This means that when you lift the beaters, the cream should stand up straight without collapsing. Be careful not to overmix, as this can turn the cream into butter. Set this aside.
3. Combining the Creamy Elements:
Now it’s time to bring our two creamy components together. Ensure your egg yolk mixture is completely cool before proceeding. Add the 16 ounces of cold Mascarpone cheese to the cooled egg yolk mixture. Using a spatula or the electric mixer on low speed, gently beat the Mascarpone into the egg mixture until it’s smooth and well combined. Don’t overmix here either; we want to preserve the delicate texture of the Mascarpone. Once the Mascarpone is incorporated, gently fold in the whipped heavy cream using a spatula. Fold in a motion that’s like turning the batter over on itself, being careful not to deflate the airiness you’ve created in the whipped cream. The goal is a light, airy, and incredibly smooth cream.
4. Soaking the Ladyfingers:
This step is crucial for that signature Tiramisu texture. Pour the 1 1/2 cups of room-temperature strong black coffee into a shallow dish. It’s important that the coffee is room temperature; hot coffee can make the ladyfingers too mushy, and cold coffee might not absorb as well. Working one ladyfinger at a time, quickly dip each one into the coffee. You want to get them nicely saturated but avoid soaking them for too long, otherwise, they will disintegrate. A quick dip on each side is usually sufficient. Have your serving dish ready. I like to use a rectangular dish, about 8×8 inches or a similar size. Arrange a single layer of coffee-dipped ladyfingers in the bottom of the dish, breaking them as needed to fit snugly.
5. Assembling the Tiramisu:
Once your first layer of ladyfingers is in place, spoon half of the Mascarpone cream mixture over the top. Spread it evenly to cover the ladyfingers completely. Repeat the dipping process with the remaining ladyfingers and arrange them in a second layer over the cream. Gently spread the remaining Mascarpone cream mixture over this second layer of ladyfingers, ensuring an even surface. Smooth the top with your spatula.
6. Chilling and Finishing:
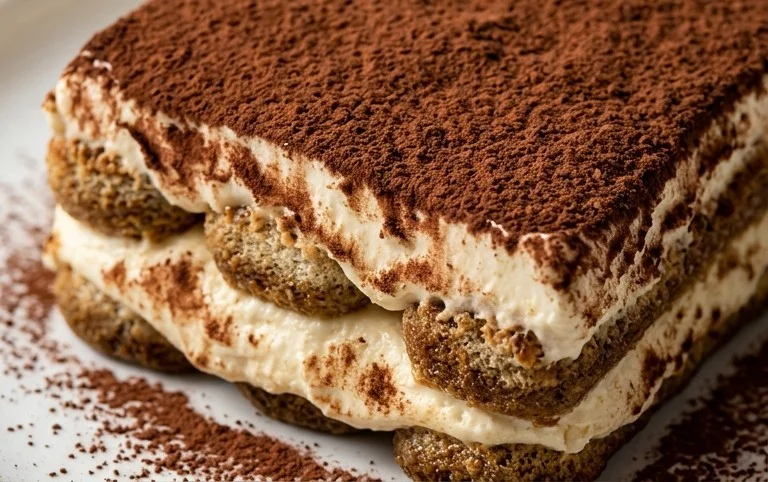
This is perhaps the hardest part: the waiting! Cover the dish tightly with plastic wrap. For the flavors to meld and the Tiramisu to set properly, it needs to chill in the refrigerator for at least 4-6 hours, but overnight is even better. The longer it chills, the more the flavors will deepen and the texture will firm up, making it easier to slice and serve. Just before serving, dust the top generously with the 2 tablespoons of cocoa powder using a fine-mesh sieve. This adds that beautiful, classic finish and a touch of sophisticated bitterness. Serve chilled and enjoy every delightful, pick-me-up bite!
Conclusion:
There you have it – the ultimate guide to creating the BEST Classic Italian Tiramisu Recipe! What makes this recipe so fantastic is its beautiful simplicity, allowing the high-quality ingredients to truly shine. The delicate balance of rich mascarpone, potent espresso, and a hint of liqueur extract, all layered with those airy ladyfingers, creates an unforgettable dessert experience. This isn’t just a dessert; it’s a hug in a bowl, a taste of Italian sunshine that’s surprisingly achievable for any home baker. Don’t be intimidated by its gourmet reputation; follow these steps, and you’ll be rewarded with pure bliss.
For serving, I love presenting this tiramisu in individual glasses or a beautiful trifle dish. A light dusting of cocoa powder is essential for that classic finish. If you’re feeling adventurous, consider a sprinkle of shaved dark chocolate or a few fresh berries to add a touch of color and freshness. While this classic version is perfection, feel free to experiment! Some enjoy adding a touch of limoncello for a citrusy twist, or even using coffee-flavored liqueur extract instead of Marsala. The possibilities are endless, but the core essence remains. I wholeheartedly encourage you to give this recipe a try. It’s a truly rewarding bake that will impress your friends and family, or simply treat yourself to something truly special.
Frequently Asked Questions:
Can I make this Tiramisu ahead of time?
Absolutely! In fact, Tiramisu is best when made at least 4-6 hours, or even a day, in advance. This allows the flavors to meld beautifully and the ladyfingers to soften to the perfect consistency. It makes it an ideal make-ahead dessert for gatherings.
What’s the best coffee to use for Tiramisu?
Strong brewed coffee, like espresso or a very strong dark roast, is key. It needs to be robust enough to stand up to the sweetness of the cream and the richness of the mascarpone. Instant espresso powder dissolved in hot water also works wonderfully and is a convenient option.
Can I make a non-non-non-alcoholic alternativeic version?
Yes, you can! Simply omit the Marsala grape juice or rum extract. You can replace it with a splash of vanilla extract or a little extra coffee for added flavor depth. The result will still be delicious!
BEST Classic Italian Tiramisu Recipe
A timeless and decadent Italian dessert, this classic Tiramisu recipe features layers of coffee-soaked ladyfingers and a rich mascarpone cream, dusted with cocoa powder. It’s surprisingly easy to make and perfect for any occasion.
Ingredients
-
450g Mascarpone cheese, cold
-
4 egg yolks
-
133g granulated or caster sugar
-
1 tsp vanilla
-
1/4 tsp salt
-
360g heavy cream, chilled
-
30-36 ladyfingers
-
360g strong black coffee, room temperature
-
2 tbsp cocoa powder
Instructions
-
Step 1
In a heatproof bowl set over a saucepan of simmering water (a double boiler), whisk together the egg yolks and sugar until thick and pale yellow. This should take about 5-7 minutes. Remove from heat and stir in the vanilla and salt. Let it cool slightly. -
Step 2
In a separate bowl, whip the chilled heavy cream until stiff peaks form. Gently fold the whipped cream into the cooled egg yolk mixture until just combined. Be careful not to overmix. -
Step 3
Quickly dip each ladyfinger into the room temperature coffee, ensuring they are soaked but not falling apart. Arrange a single layer of dipped ladyfingers in the bottom of your serving dish. -
Step 4
Spread half of the mascarpone cream mixture evenly over the ladyfingers. -
Step 5
Repeat with another layer of coffee-dipped ladyfingers, followed by the remaining mascarpone cream. -
Step 6
Cover the dish tightly with plastic wrap and refrigerate for at least 4 hours, or preferably overnight, to allow the flavors to meld and the Tiramisu to set. -
Step 7
Just before serving, generously dust the top of the Tiramisu with cocoa powder using a fine-mesh sieve.
Important Information
Nutrition Facts (Per Serving)
It is important to consider this information as approximate and not to use it as definitive health advice.
Allergy Information
Please check ingredients for potential allergens and consult a health professional if in doubt.