Easter Bunny Coconut Tails- Sweet & Fluffy Treats
Easter Bunny Coconut Tails are the delightful, no-bake treats that are about to hop into your hearts and onto your Easter dessert table! If you’re looking for a fun, festive, and incredibly easy way to celebrate the season, then look no further. These charming little confections are a perennial favorite for so many reasons. Kids absolutely adore them for their adorable bunny tail shape and sweet coconut flavor, and honestly, who can resist a bite-sized piece of pure joy? What truly makes these Easter Bunny Coconut Tails special is their simplicity; they come together in a flash, making them perfect for last-minute bakers or for getting little hands involved in the kitchen. Imagin extracte the squeals of delight as your family discovers these fluffy, white wonders, reminiscent of the Easter Bunny’s own fluffy hindquarters, ready to be devoured.
Get Ready to Bake Up Some Magic!
These Sweet Treats are a Springtime Must-Have!
Easter Bunny Coconut Tails
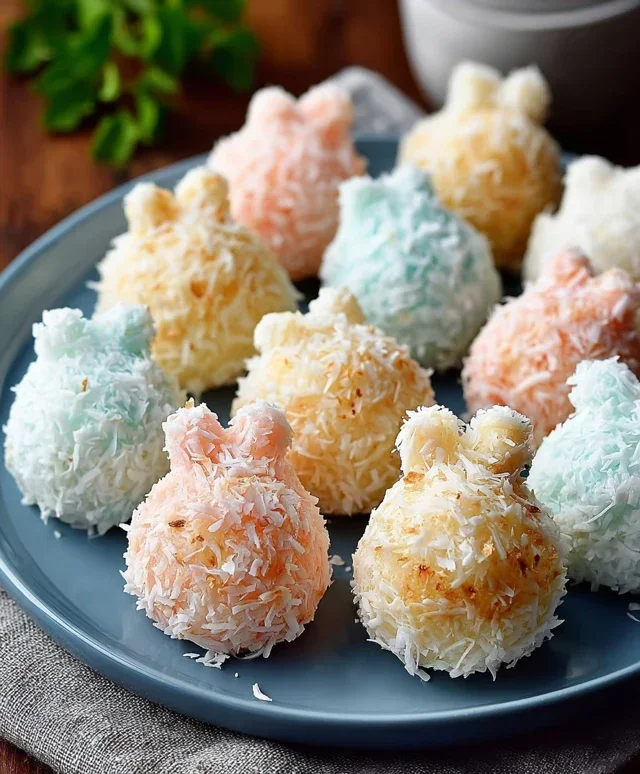
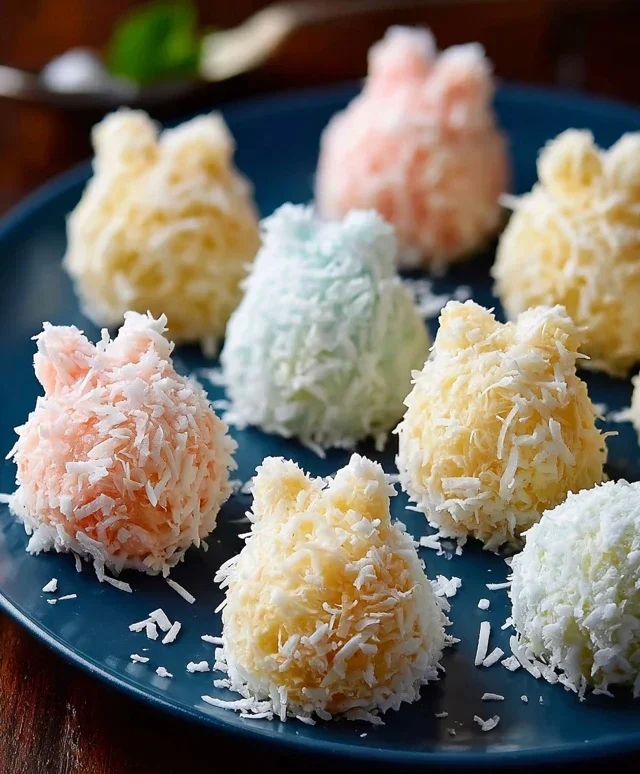
Easter is a time for joy, family, and of course, delicious treats! This year, I wanted to create something fun and festive that the whole family could enjoy, and that’s how these adorable Easter Bunny Coconut Tails came to be. They’re surprisingly simple to make, wonderfully sweet, and have that delightful tropical hint of coconut that just screams celebration. Imagin extracte a platter full of these cute little bunny tails – they’re guaranteed to be a hit at any Easter gathering, from a grand brunch to a casual egg hunt. Plus, they’re a fantastic activity to do with kids, who will absolutely love decorating them!
These tails are essentially no-bake coconut candies, molded into the perfect shape and then decorated to resemble the fluffy hindquarters of everyone’s favorite Easter bunny. The base is a sweet, chewy mixture of coconut and melted marshmallows, held together with a touch of butter and vanilla for extra flavor. We then dip them in creamy white chocolate and add just a touch of pink to make them truly look like the real deal. They’re light, airy, and melt-in-your-mouth delicious.
Ingredients:
Crafting Your Coconut Tails
This recipe is broken down into a few simple stages, each contributing to the final delightful treat. We’ll start by creating the coconut mixture, then shaping our tails, and finally, the fun decorating part!
Stage 1: Creating the Coconut Mixture
1. In a medium saucepan, combine the mini marshmallows and the butter. Place the saucepan over low heat. It’s crucial to use low heat here to prevent the marshmallows from burning. Stir constantly. You want the marshmallows and butter to melt together into a smooth, gooey consistency. This will take a few minutes. Keep stirring gently until there are no lumps of marshmallow visible and the mixture is completely smooth and glossy. Once melted, remove the saucepan from the heat immediately.
2. To the melted marshmallow and butter mixture, add the shredded coconut and the vanilla extract. Stir everything together thoroughly. You want to ensure that every strand of coconut is coated in the sticky marshmallow mixture. This is what will bind everything together. The mixture will become quite thick and a little sticky. It’s important to work with it while it’s still warm, as it will firm up as it cools.
Stage 2: Shaping the Bunny Tails
3. Once the coconut mixture is well combined and still warm, it’s time to shape your bunny tails. Lightly grease your hands with a tiny bit of butter or cooking spray to prevent sticking. Take about a tablespoon of the coconut mixture at a time and roll it between your palms into a small, oval or slightly rounded ball shape, mimicking the look of a bunny’s tail. Aim for a consistent size so they all bake (or rather, set) and decorate evenly. You should be able to get approximately 24-30 tails depending on the size you make them. Place the shaped tails on a baking sheet lined with parchment paper. This will prevent them from sticking and make them easy to transfer. Let them sit at room temperature for at least 30 minutes to an hour to firm up. They don’t need to be rock solid, but they should hold their shape well.
Stage 3: The White Chocolate Dip
4. Now for the white chocolate coating. Place the white chocolate chips in a microwave-safe bowl. Microwave in 30-second intervals, stirring well after each interval, until the chocolate is melted and smooth. Be careful not to overheat the white chocolate, as it can seize and become unusable. Alternatively, you can melt the white chocolate using a double boiler. Once melted, dip each coconut tail into the white chocolate, coating it completely. You can use a fork or a toothpick to gently lower the tails into the chocolate and lift them out. Let any excess chocolate drip back into the bowl. Place the dipped tails back onto the parchment-lined baking sheet.
Stage 4: The Pink Decoration Detail
5. While the white chocolate is still wet, it’s time for the charming pink detail. Melt the pink candy melts according to the package directions (usually in the microwave in short bursts, stirring frequently). Once melted and smooth, take a small amount of the pink candy melts using a toothpick or a very small piping bag with a fine tip. You want to create a small, curved accent on the top of each white chocolate-dipped tail to resemble the slight indentation found on a real bunny’s tail. A simple curved line or a small dot is all you need. This little touch makes them look so much more authentic and adorable! Allow the white chocolate and candy melts to set completely. You can speed this up by placing the baking sheet in the refrigerator for about 15-20 minutes.
Once fully set, your delightful Easter Bunny Coconut Tails are ready to be admired and devoured! Store them in an airtight container at room temperature, and they should stay fresh for up to a week. Enjoy the sweetness and the smiles they bring!
Conclusion:
There you have it! Our delightful Easter Bunny Coconut Tails recipe is a guaranteed hit for any spring celebration. This recipe is truly fantastic because it offers a wonderfully light, subtly sweet, and delightfully chewy treat that’s surprisingly simple to whip up. The combination of shredded coconut and a hint of vanilla creates a classic flavor profile that everyone loves, and the playful “tail” shape adds an irresistible charm that’s perfect for little hands and discerning adult palates alike. They’re not overly complicated, making them an ideal baking project for families to enjoy together.
I love serving these Easter Bunny Coconut Tails alongside a pastel-colored frosting or even dipped halfway in melted white chocolate for an extra touch of indulgence. They also make for beautiful edible decorations on a dessert table or as a sweet surprise tucked into Easter baskets. Don’t be afraid to get creative with the variations! You could add a few drops of pink or yellow food coloring to the coconut mixture for pastel hues, or even incorporate a touch of lemon zest for a brighter flavor. I highly encourage you to give this recipe a try; I’m confident you’ll adore how easy and rewarding it is to create these charming treats.
Frequently Asked Questions about Easter Bunny Coconut Tails:
Q: How should I store leftover Easter Bunny Coconut Tails?
A: You can store your coconut tails in an airtight container at room temperature for up to 3-4 days. If your kitchen is particularly warm, or if you’ve added any frosting, refrigeration might be a better option to maintain their shape and texture.
Q: Can I make these ahead of time for an Easter party?
A: Absolutely! These are perfect for making a day or two in advance. Once they’ve cooled completely, store them in an airtight container. This makes your Easter morning much more relaxed!
Easter Bunny Coconut Tails
Sweet and fluffy coconut tails dipped in white chocolate, perfect for Easter.
Ingredients
-
2 cups shredded coconut
-
1½ cups mini marshmallows
-
¼ cup butter
-
1 teaspoon vanilla extract
-
1 cup white chocolate chips
-
Pink candy melts for decoration
Instructions
-
Step 1
In a microwave-safe bowl, combine shredded coconut, mini marshmallows, and butter. Microwave on high for 1 minute, stir well. Continue microwaving in 30-second intervals, stirring after each, until marshmallows are melted and mixture is combined. (Approximately 2-3 minutes total). -
Step 2
Stir in the vanilla extract until fully incorporated. -
Step 3
Grease your hands or line a baking sheet with parchment paper. Shape the coconut mixture into tail shapes. Allow to set slightly in the refrigerator for about 15-20 minutes. -
Step 4
Melt the white chocolate chips in a microwave-safe bowl in 30-second intervals, stirring until smooth. -
Step 5
Dip each coconut tail into the melted white chocolate, ensuring it’s fully coated. Place on parchment paper to set. -
Step 6
Melt the pink candy melts according to package directions. Drizzle or pipe onto the white chocolate tails to create decorative stripes or accents for a bunny tail effect. -
Step 7
Allow the chocolate to harden completely before serving.
Important Information
Nutrition Facts (Per Serving)
It is important to consider this information as approximate and not to use it as definitive health advice.
Allergy Information
Please check ingredients for potential allergens and consult a health professional if in doubt.