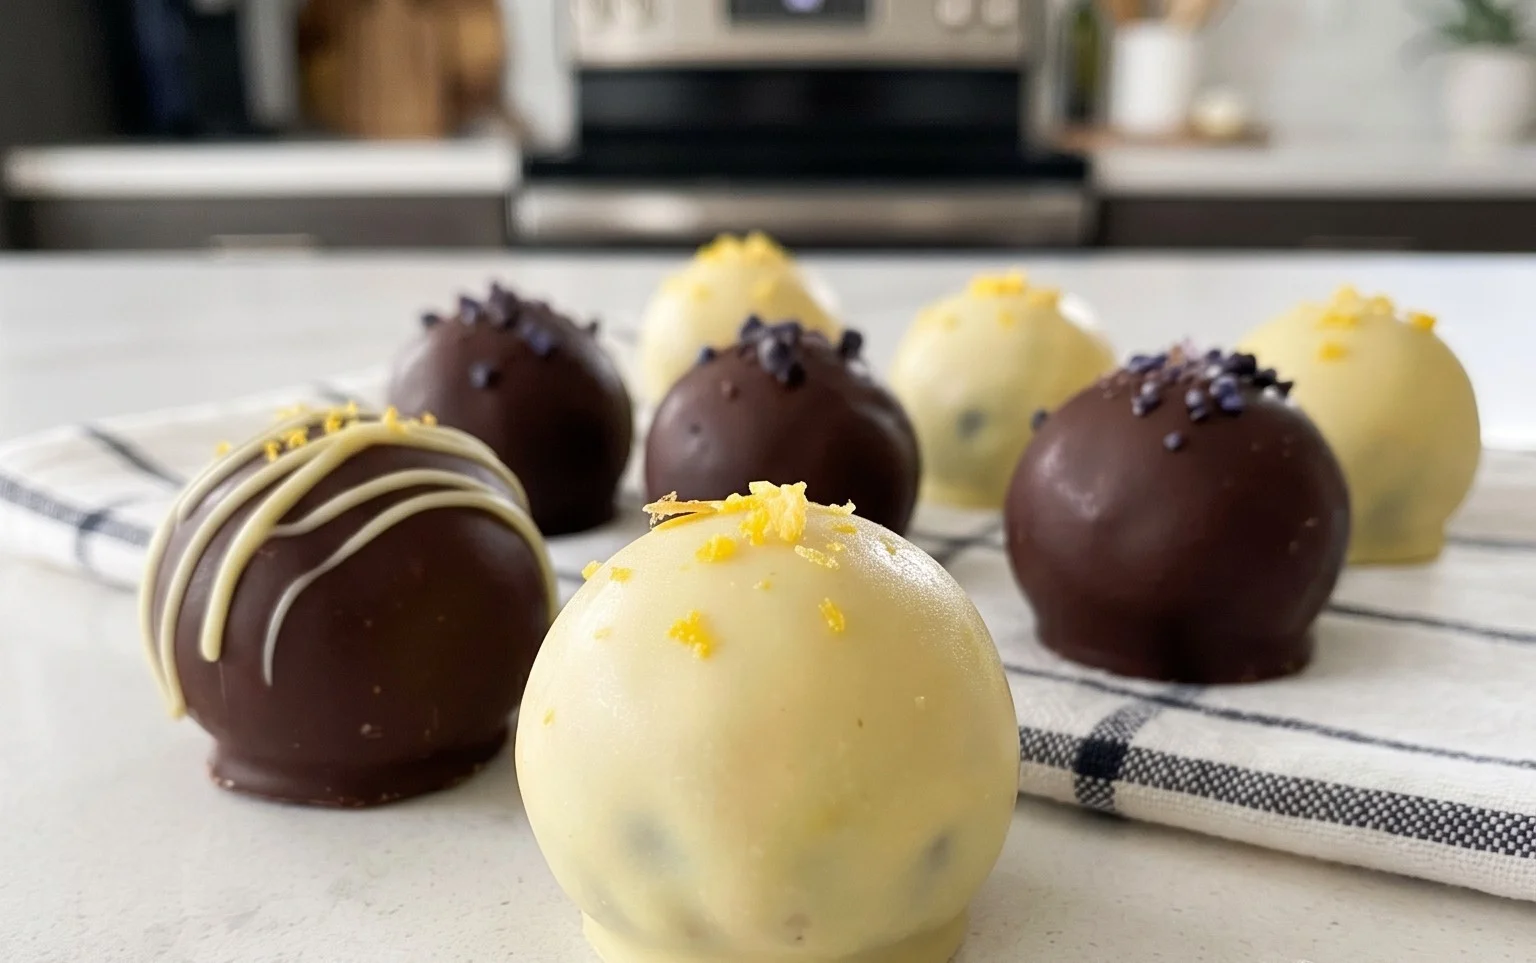
Lemon Blueberry Truffles- Easy No-Bake Dessert
LEMON BLUEBERRY TRUFFLES are tiny bursts of sunshine and summer, and let me tell you, they are absolutely divine. If you’re searching for a treat that’s both elegant and incredibly easy to whip up, you’ve found it. These little gems are the perfect balance of bright, zesty lemon and sweet, juicy blueberries, all wrapped in a creamy, dreamy truffle. What’s not to love? People adore them because they feel so special, like you’ve bought them from a fancy chocolatier, yet they’re remarkably simple to make at home. The combination of tart lemon curd and fresh berries creates a flavor profile that’s truly unforgettable, making these LEMON BLUEBERRY TRUFFLES a standout dessert for any occasion.
Why You’ll Adore These Lemon Blueberry Truffles
A Little Bite of Bliss
Lemon Blueberry Truffles
Get ready to indulge in a burst of sunshine with these delightful Lemon Blueberry Truffles! These little gems are the perfect combination of tangy, sweet, and satisfyingly chewy. They’re surprisingly easy to make, requiring no baking and just a few simple steps. Whether you’re looking for a healthy treat, a delightful dessert to impress guests, or just a way to satisfy your sweet cravings, these truffles are sure to become a favorite. The vibrant flavors of lemon and blueberry are beautifully complemented by the rich, creamy frosting and the nutty base. Let’s dive into how we can create these little balls of happiness.
Ingredients:
Preparing the Truffle Base
The foundation of our delicious truffles lies in this simple yet flavorful raw cake mixture. It’s where the bulk of our chewy texture and natural sweetness comes from. First things first, gather all your “Raw Cake Ingredients.” We’re going to combine them in a food processor to create a dough-like consistency.
1. Begin extract by adding the wild blueberries to your food processor. If you’re using frozen blueberries, ensure they are completely thawed and patted dry to avoid excess moisture in your truffle base. This will help the truffles hold their shape better.
2. Next, add the walnuts, dates, gluten-free rolled oats, and shredded coconut to the food processor. For the dates, make sure they are pitted. If your dates feel a little dry or tough, you can soak them in warm water for about 10-15 minutes beforehand to soften them up. This will make them easier to process and contribute to a smoother texture.
3. Now, add the chia seeds. Chia seeds are fantastic for binding the ingredients together and also offer a nutritional boost. Finally, squeeze in the juice of one fresh lemon. The lemon juice will add that bright, zesty element that is crucial for our lemon blueberry flavor profile.
4. Process all these ingredients together until they form a sticky, cohesive dough. You might need to scrape down the sides of the food processor a couple of times to ensure everything is well incorporated. The mixture should hold together when you squeeze a bit between your fingers. If it seems too dry and crum extractbly, you can add a teaspoon or two of water, but be very sparing with this addition. You’re aiming for a dough that’s pliable but not wet.
Forming the Truffles
Once you have your perfect truffle dough, it’s time to get your hands dirty and form those little flavor bombs. This is the fun, tactile part of the process!
5. Take small portions of the dough (about one tablespoon each) and roll them between your palms to form smooth balls. If the dough is sticking to your hands, you can lightly dampen your hands with water or lightly dust them with a bit of shredded coconut. Continue this process until all the dough has been formed into uniform balls. Place these formed truffles on a plate or baking sheet lined with parchment paper. At this stage, you can pop them into the freezer for about 15-20 minutes to firm up. This will make the coating process much easier.
Crafting the Creamy Lemon Frosting
While our truffle bases are chilling, let’s whip up the luscious, dairy-free frosting that will elevate these truffles to gourmet status. This frosting is rich, creamy, and packed with more of that delightful lemon flavor.
First, gather your “Frosting Ingredients.” The key to a super creamy frosting is using soaked cashews. Make sure you’ve soaked your cashews for at least 30 minutes. Drain them thoroughly.
1. Add the soaked and drained cashews to a high-speed blender or food processor.
2. Pour in the melted and cooled coconut oil. It’s important that the coconut oil is cooled; if it’s too hot, it can affect the texture of the frosting.
3. Add the raw honey and vanilla extract.
4. Squeeze in the juice of the second lemon. This lemon adds another layer of citrus brightness to the frosting.
5. Begin extract blending. You’ll likely need to add warm water, a tablespoon at a time, to help the mixture blend smoothly into a thick, creamy frosting. Start with 2 tablespoons and add more only if necessary to achieve a pourable but still thick consistency. You want it to coat the back of a spoon nicely.
Coating and Finishing Your Lemon Blueberry Truffles
Now for the grand finnon-alcoholic ale! We’ll coat our chilled truffle bases with the luxurious lemon frosting. This step seals in the goodness and provides a beautiful finish.
1. Retrieve your chilled truffle bases from the freezer.
2. Using a fork or a toothpick, dip each truffle into the lemon frosting, ensuring it’s fully coated. Gently swirl it around to cover all sides.
3. Carefully lift the truffle out of the frosting and allow any excess to drip back into the bowl. Place the coated truffle back onto the parchment-lined baking sheet.
4. Repeat this coating process for all the truffles. For a cleaner look, you can use two forks; one to dip and another to help lift and place the truffle.
5. Once all the truffles are coated, you can optionally decorate them. A sprinkle of extra shredded coconut, a tiny bit of lemon zest, or even a few dried blueberry pieces would look lovely.
6. Place the baking sheet with the coated truffles into the refrigerator for at least 30 minutes to allow the frosting to set. This is crucial for the truffles to firm up properly before serving.
Once the frosting has set, your Lemon Blueberry Truffles are ready to be enjoyed! Store them in an airtight container in the refrigerator. They are best served chilled. These delightful treats are a fantastic way to enjoy natural sweetness and vibrant flavors. Enjoy every bite!

Conclusion:
There you have it – a simple yet utterly divine recipe for Lemon Blueberry Truffles! These little bites of sunshine are perfect for any occasion, from a thoughtful homemade gift to a delightful addition to your dessert spread. Their bright, zesty lemon flavor beautifully complements the sweet burst of blueberries, all enveloped in a rich, creamy truffle. I truly believe this recipe is a winner because it’s surprisingly easy to make, requiring minimal fuss for maximum impact, and the results are consistently elegant and delicious. They’re sure to impress your friends and family, or simply be a wonderful treat for yourself.
I love serving these
LEMON BLUEBERRY TRUFFLES
chilled, dusted with a little extra powdered sugar or cocoa powder for a sophisticated finish. They are also wonderful presented in small paper candy cups. Don’t be afraid to experiment with variations! Consider adding a touch of lemon zest to the white chocolate coating for an extra zing, or even incorporating a hint of lavender for a unique floral note. Give these Lemon Blueberry Truffles a try – I’m confident you’ll fall in love with their irresistible charm and flavor!
Frequently Asked Questions:
Can I make these Lemon Blueberry Truffles ahead of time?
Absolutely! These truffles are perfect for making in advance. Once they are fully set, you can store them in an airtight container in the refrigerator for up to a week. They actually tend to develop even more flavor as they sit. Just let them come to room temperature for about 15-20 minutes before serving for the best texture.
What is the best way to store leftover Lemon Blueberry Truffles?
For optimal freshness and texture, store your Lemon Blueberry Truffles in a single layer in an airtight container in the refrigerator. If you are stacking them, place parchment paper between layers to prevent sticking. They will stay delicious for about a week.
Can I use fresh blueberries instead of frozen?
Yes, you can! If using fresh blueberries, simply mash them slightly before adding them to the mixture. Be aware that fresh blueberries might release more moisture, so you may need to adjust the consistency slightly by adding a touch more cream if the mixture becomes too soft. The flavor will be wonderfully vibrant!
Lemon Blueberry Truffles
Delightful no-bake vegan truffles bursting with the vibrant flavors of lemon and blueberry, made with wholesome ingredients.
Ingredients
-
1 cup wild blueberries
-
1 cup walnuts
-
1 cup dates
-
3 tbsp gluten-free rolled oats
-
2 tbsp shredded coconut
-
1 tbsp chia seeds
-
1 lemon, juiced
-
1 cup cashews (soaked)
-
½ cup coconut oil, melted and cooled
-
3 tbsp raw honey
-
1 tsp vanilla extract
-
2-3 tbsp warm water
Instructions
-
Step 1
For the truffle base: Combine blueberries, walnuts, dates, oats, coconut, chia seeds, and lemon juice in a food processor. Process until a sticky dough forms. -
Step 2
Roll the mixture into small balls, about 1 inch in diameter. Place them on a parchment-lined baking sheet. -
Step 3
For the frosting: Drain the soaked cashews. Combine cashews, melted coconut oil, raw honey, vanilla extract, and lemon juice in a high-speed blender. -
Step 4
Blend until completely smooth and creamy, adding warm water 1 tablespoon at a time as needed to achieve a pourable consistency. -
Step 5
Dip each truffle into the cashew frosting, ensuring it’s fully coated. Use a fork or toothpick to lift and let excess frosting drip off. -
Step 6
Return the coated truffles to the parchment-lined baking sheet. Place in the freezer for at least 1 hour to set.
Important Information
Nutrition Facts (Per Serving)
It is important to consider this information as approximate and not to use it as definitive health advice.
Allergy Information
Please check ingredients for potential allergens and consult a health professional if in doubt.