Flourless Chickpea Brownies- Vegan Gluten Free Delight
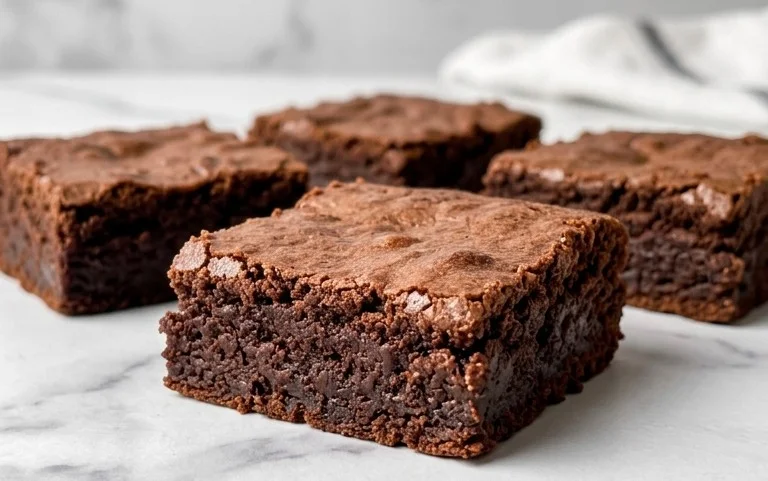
Flourless chickpea brownies are the dessert revelation you didn’t know you needed, and I’m here to tell you why you absolutely do. Imagin extracte a brownie so fudgy, so decadent, so intensely chocolatey, that you’d never guess its secret ingredient is… chickpeas! Yes, you read that right. These incredible flourless chickpea brownies manage to achieve that perfect chewy edge and gooey center without a drop of flour, making them a dream come true for anyone navigating gluten-free or vegan lifestyles. What’s truly magical about them is how they transcend dietary restrictions, delivering pure, unadulterated brownie bliss. They’re surprisingly simple to whip up, proving that wholesome ingredients can lead to extraordinary indulgence. Get ready to experience a brownie that’s not only a treat for your taste buds but also a guilt-free pleasure!
Flourless Chickpea Brownies (Vegan & Gluten Free)
Are you craving a rich, fudgy brownie that’s secretly good for you and caters to multiple dietary needs? Look no further! These Flourless Chickpea Brownies are a game-changer. They’re entirely vegan, gluten-free, and surprisingly decadent, all thanks to the humble chickpea. You won’t taste the chickpeas at all, I promise! Instead, they provide an incredible moistness and a satisfyingly chewy texture that’s hard to achieve with traditional flour. This recipe is perfect for anyone looking for a healthier indulgence, whether you’re managin extractg gluten intolerance, embracing a vegan lifestyle, or simply want to sneak in some extra fiber and protein without compromising on taste.
The beauty of these brownies lies in their simplicity. With just a handful of pantry staples, you can whip up a batch of pure chocolate bliss in no time. The secret ingredient, the chickpeas, not only contributes to the amazing texture but also acts as a binder, eliminating the need for eggs or gluten. The almond butter adds a nutty richness that complements the deep chocolate flavor, while the maple syrup provides a natural sweetness. Get ready to impress yourself and your loved ones with these surprisingly wholesome treats.
Ingredients:
Cooking Instructions
Preheating your oven and preparing your baking pan are the crucial first steps to ensuring your brownies bake evenly and release beautifully.
1. Prepare the Base: Start by thoroughly rinsing and draining your canned chickpeas. It’s really important to get as much of the liquid out as possible. Pat them dry with a clean kitchen towel or paper towels. This step helps to prevent any residual “beany” flavor from creeping into your brownies and also ensures a better texture. Once drained and dried, place the chickpeas into a food processor. Add the almond butter (or your chosen nut/seed butter), pure maple syrup, and vanilla extract to the food processor. Process these ingredients until they form a smooth, thick paste. You want to achieve a consistency that’s as lump-free as possible, similar to a thick cookie dough. Scrape down the sides of the food processor a couple of times during this process to make sure everything is well incorporated.
2. Incorporate Dry Ingredients: Now it’s time to add the dry elements that will give your brownies their structure and flavor. To the food processor containing the chickpea mixture, add the unsweetened cocoa powder, baking powder, baking soda, and sea salt. Pulse the food processor a few times to begin extract combining these dry ingredients with the wet mixture. Then, process again until everything is fully incorporated and the batter is smooth and uniform in color. Be careful not to overmix at this stage, as it can sometimes lead to tougher brownies, though with this recipe, it’s less of a concern due to the absence of gluten. The batter should be thick and rich.
3. Fold in the Chocolate Chips: This is where the magic happens and your brownie batter truly transforms into a chocolate lover’s dream. Remove the food processor blade (be careful!) or transfer the batter to a mixing bowl. Add the mini chocolate chips to the batter. Gently fold them in using a spatula or a wooden spoon until they are evenly distributed throughout the batter. Reserve about ¼ cup of the chocolate chips if you’d like to sprinkle them on top of the brownies before baking for an extra gooey, chocolatey finish. This extra step adds a beautiful visual appeal and ensures pockets of melted chocolate throughout your finished brownies.
4. Bake to Perfection: Preheat your oven to 350°F (175°C). Line an 8×8 inch baking pan with parchment paper, leaving some overhang on the sides. This overhang will act as “handles” to easily lift the brownies out of the pan once they’re cooled, preventing any sticking and making cleanup a breeze. Pour the brownie batter into the prepared baking pan. Use your spatula to spread the batter evenly across the pan, ensuring it reaches all the corners. If you reserved some chocolate chips, sprinkle them evenly over the top of the batter. Place the pan in the preheated oven and bake for 25-30 minutes. You’ll know they’re ready when a toothpick inserted into the center comes out with moist crum extractbs attached, but not wet batter. Avoid overbaking, as this can result in dry brownies. The fudgy texture is key!
5. Cool and Enjoy: This is perhaps the hardest part – waiting for them to cool! Once the brownies are done baking, carefully remove the pan from the oven. Let the brownies cool in the pan on a wire rack for at least 30 minutes. This cooling period is crucial for the brownies to set properly and develop their signature fudgy texture. If you try to cut them too soon, they might crum extractble. Once they’ve cooled significantly in the pan, use the parchment paper overhang to lift the entire block of brownies out onto a cutting board. Allow them to cool completely before slicing into squares. For an even richer, more intense chocolate flavor, you can even refrigerate them for a few hours before cutting and serving. These brownies are delicious on their own, or you can serve them with a scoop of vegan ice cream, a sprinkle of powdered sugar, or a drizzle of vegan chocolate sauce. Enjoy your incredibly satisfying, guilt-free treat!
Conclusion:
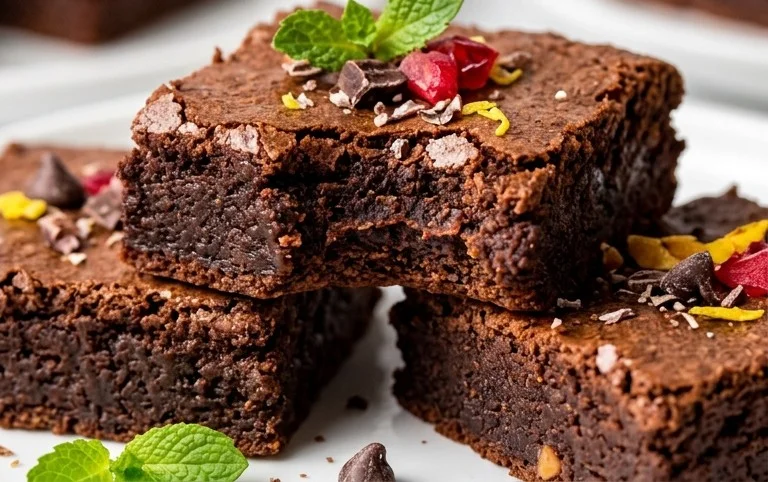
So there you have it – a foolproof recipe for incredibly moist, fudgy, and utterly delicious flourless chickpea brownies that are both vegan and gluten-free! What makes this recipe truly special is its ability to deliver that classic brownie experience without a trace of gluten or animal products. The humble chickpea not only provides structure but also contributes to a wonderfully dense and chewy texture, making these brownies surprisingly satisfying. They’re perfect for anyone with dietary restrictions, or simply for those looking for a healthier, yet indulgent, treat.
I love serving these warm, perhaps with a scoop of vegan vanilla ice cream or a drizzle of extra chocolate sauce for a truly decadent dessert. They also make a fantastic addition to packed lunches or an afternoon pick-me-up. Don’t be afraid to experiment with variations! Consider adding some chopped nuts like walnuts or pecans for extra crunch, or a swirl of vegan peanut butter or tahini for a different flavor profile. You could even sprinkle some sea salt flakes on top before baking for a sophisticated sweet and salty contrast.
I truly encourage you to give these flourless chickpea brownies a try. You might be surprised at how easy they are to whip up and how incredibly tasty they turn out. They’re a testament to how delicious and satisfying plant-based and gluten-free baking can be. Happy baking!
Frequently Asked Questions:
Can I taste the chickpeas in these brownies?
Absolutely not! The strong chocolate flavor and the other ingredients completely mask any hint of chickpea. They contribute to the texture, not the taste. You’ll just get pure, rich chocolatey goodness!
How should I store these flourless chickpea brownies?
Store them in an airtight container at room temperature for up to 3 days, or in the refrigerator for up to a week. They also freeze beautifully for longer storage; just wrap them well.
Flourless Chickpea Brownies (Vegan & Gluten Free)
Decadent and fudgy vegan and gluten-free brownies made with chickpeas, almond butter, and chocolate chips. A surprisingly healthy treat!
Ingredients
-
15.5 ounces chickpeas (1 can), rinsed and drained
-
½ cup almond butter
-
½ cup pure maple syrup
-
1 tablespoon vanilla extract
-
⅓ cup cocoa powder
-
½ teaspoon baking powder
-
½ teaspoon baking soda
-
½ teaspoon sea salt
-
¾ cup mini chocolate chips
Instructions
-
Step 1
Preheat your oven to 350°F (175°C). Grease and flour an 8×8 inch baking pan or line it with parchment paper. -
Step 2
In a food processor, combine the rinsed and drained chickpeas, almond butter, maple syrup, and vanilla extract. Process until completely smooth, scraping down the sides as needed. -
Step 3
Add the cocoa powder, baking powder, baking soda, and sea salt to the food processor. Pulse until just combined. -
Step 4
Gently fold in ¾ cup of mini chocolate chips, reserving a few for topping if desired. -
Step 5
Pour the batter into the prepared baking pan and spread evenly. Sprinkle with any reserved chocolate chips. -
Step 6
Bake for 20-25 minutes, or until a toothpick inserted into the center comes out with moist crumbs (not wet batter). -
Step 7
Let the brownies cool completely in the pan before cutting into squares.
Important Information
Nutrition Facts (Per Serving)
It is important to consider this information as approximate and not to use it as definitive health advice.
Allergy Information
Please check ingredients for potential allergens and consult a health professional if in doubt.