Pan Fried Zucchini – Quick Easy Delicious Recipe
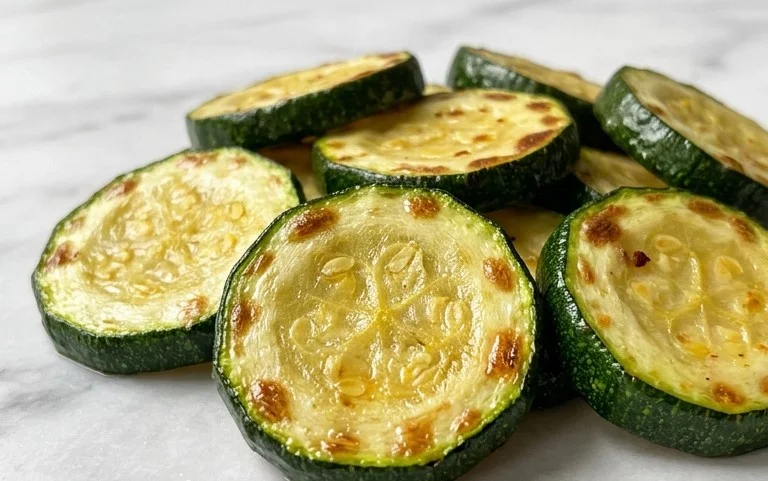
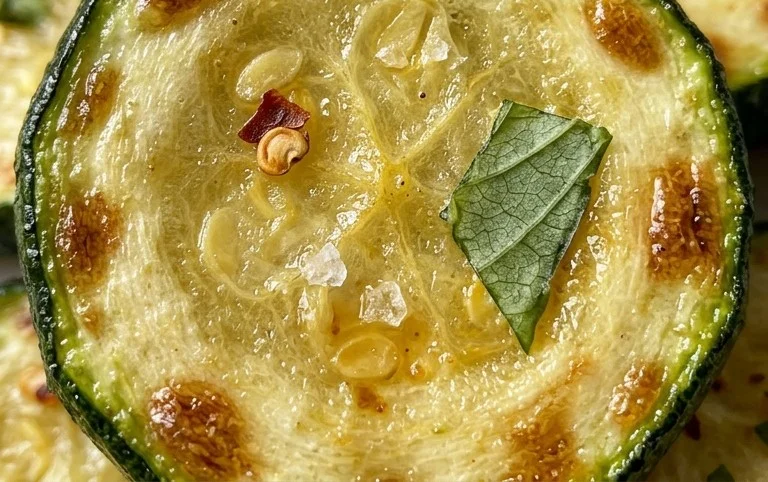
Pan fried zucchini is one of those magical dishes that proves simple ingredients can yield extraordinary flavor. It’s the kind of side dish that can elevate any meal, from a weeknight family dinner to a more elegant gathering. What is it about this humble vegetable, transformed by a hot skillet, that captivates us? It’s the perfect balance: tender on the inside with a delightful crispness on the edges, offering a satisfying textural contrast that’s utterly addictive. We love pan fried zucchini because it’s incredibly versatile. It pairs beautifully with grilled meats, fish, or even as a light vegetarian main. The secret lies in achieving that perfect golden-brown sear without overcooking, allowing the natural sweetness of the zucchini to shine through, enhanced by just a whisper of savory seasoning. Prepare to be amazed by how much flavor we can coax out of this garden gem.
Pan Fried Zucchini
There’s something incredibly satisfying about a plate of perfectly pan-fried zucchini. It’s a dish that’s simple yet elegant, offering a delightful crunch on the outside and a tender, flavorful bite within. Forget soggy, undercooked vegetables; this recipe is all about achieving that golden-brown perfection that makes zucchini a star. Whether you’re looking for a delicious side dish to complement your main course or a flavorful appetizer to share, this pan-fried zucchini is sure to impress. It’s a fantastic way to enjoy fresh produce, and the breading adds a wonderful savory element that kids and adults alike will adore. Let’s get cooking!
Ingredients:
Cooking Instructions
Preparing these delectable pan-fried zucchini rounds is a straightforward process that yields impressive results. The key lies in the preparation of the zucchini and the layering of the breading. We’ll be creating a triple-layer coating that ensures a crispy exterior and locks in the moisture of the zucchini.
Step 1: Prepare the Zucchini and Dredgin extractg Stations
First things first, we need to get our zucchini ready. Wash your two medium zucchinis thoroughly under cool running water. Then, trim off the ends. Now, it’s time to slice them. Aim for uniform slices about ½ inch thick. This ensures that they cook evenly. Consistency in thickness is crucial for achieving that perfect tender-yet-firm texture. If your slices are too thin, they might become mushy. If they are too thick, they may not cook through in the center.
Next, let’s set up our dredgin extractg stations. You’ll need three shallow dishes or plates. In the first dish, place your 3/4 cup of all-purpose flour. In the second dish, you’ll have your 2 large eggs, which you’ve already beaten until they’re well combined and a uniform pnon-alcoholic ale yellow. For the third dish, this is where the magic happens for our crispy coating. Combine your 1 cup of bread crum extractbs with the 1/2 cup of grated parmesan cheese. Don’t forget to add the ½ teaspoon of salt and ¼ teaspoon of ground black pepper to the bread crum extractb and parmesan mixture and give it a good stir to ensure the seasoning is evenly distributed throughout the coating. This mixture will give our zucchini that irresistible savory flavor and a fantastic crunch.
Step 2: Breading the Zucchini Rounds
Now it’s time to coat our zucchini. Take one zucchini slice at a time and begin extract the breading process. Start by coating it lightly in the flour. Gently shake off any excess flour. This flour layer acts as a “glue” for the egg wash. Next, dip the floured zucchini slice into the beaten eggs, ensuring it’s fully coated on both sides. Let any excess egg drip back into the dish. Finally, transfer the egg-coated zucchini slice to the bread crum extractb and parmesan mixture. Press the bread crum extractbs firmly onto both sides of the zucchini, making sure it’s thoroughly covered. You want a good, even coating. This triple-layering technique is what will give you that wonderfully crispy exterior we’re aiming for. Repeat this process for all your zucchini slices, placing the breaded rounds on a clean plate or baking sheet as you go. Try not to overlap them too much at this stage, as they might stick together.
Step 3: Heating the Oil and First Fry
Once all your zucchini slices are beautifully breaded, it’s time to heat your pan. Place a large skillet or frying pan over medium-high heat. Add your ¼ cup of vegetable oil. You want the oil to be hot enough to sizzle when a piece of zucchini is added, but not so hot that it begin extracts to smoke. A good test is to drop a tiny piece of breading into the oil; if it immediately begin extracts to bubble and fry, your oil is ready. This is where the actual “pan-frying” happens, and getting the oil temperature just right is key to achieving that perfect golden-brown crust without burning the breading or leaving the zucchini raw inside.
Step 4: Frying the Zucchini to Golden Perfection
Carefully place the breaded zucchini slices into the hot oil, working in batches to avoid overcrowding the pan. Overcrowding will lower the oil temperature and lead to greasy, soggy zucchini instead of crispy ones. You should hear a satisfying sizzle as they hit the pan. Let the zucchini fry for about 3 to 4 minutes on each side. You’re looking for a beautiful, deep golden-brown color and a crispy texture. Resist the urge to move them around too much in the begin extractning; let them develop a nice crust before flipping. Use a spatula or tongs to carefully flip each slice and fry the other side until it’s equally golden and crisp. Keep an eye on them to ensure they don’t burn.
Step 5: Draining and Serving Your Crispy Zucchini
Once your zucchini slices are perfectly golden and crispy on both sides, remove them from the hot oil using your spatula or tongs. Place them on a plate lined with paper towels. This step is important for absorbing any excess oil, ensuring your pan-fried zucchini remains delightfully crisp and not greasy. You may need to add a little more oil to the pan for subsequent batches, so always check the oil level and temperature between frying. Continue frying the remaining zucchini in batches until they are all cooked through and beautifully golden. Serve your pan-fried zucchini immediately while they are hot and at their crispiest. They are delicious on their own as a snack, or served as a side dish with your favorite marinara sauce for dipping, or alongside grilled meats and pasta dishes. Enjoy the delightful crunch and savory flavor!
Conclusion:
I hope you’ve enjoyed learning how to make this wonderfully simple and satisfying pan fried zucchini recipe! It truly shines with its ease of preparation, minimal ingredients, and the way it transforms humble zucchini into a delicious side dish or light meal. The crispy edges and tender interior are incredibly addictive, and it’s so versatile that it’s become a go-to in my kitchen. This recipe is fantastic because it’s quick enough for a weeknight but flavorful enough to impress. I encourage you to give this pan fried zucchini a try soon; you won’t regret it!
Think of serving this delightful pan fried zucchini alongside grilled chicken or fish, as a topping for pasta or pizza, or even mixed into a frittata. For variations, don’t be afraid to experiment! You can add a pinch of red pepper flakes for a touch of heat, sprinkle in some grated Parmesan cheese towards the end of cooking for extra savoriness, or toss in some finely chopped garlic with the zucchini for an aromatic boost. Fresh herbs like parsley or dill are also wonderful additions after cooking.
Frequently Asked Questions:
Can I use other types of zucchini?
Absolutely! While classic green zucchini works perfectly, you can also use yellow squash or even a mix of both for a lovely visual and slightly different flavor profile. Just ensure they are cut to a similar thickness for even cooking.
My zucchini turned out soggy, not crispy. What went wrong?
This is a common issue! The key to achieving that desirable crispiness is to ensure your zucchini pieces are patted thoroughly dry before frying. Also, avoid overcrowding the pan; cook in batches if necessary to allow each piece to make good contact with the hot skillet and develop a crust. Make sure your oil is hot enough before adding the zucchini.
Pan Fried Zucchini
Crispy and delicious pan-fried zucchini rounds, perfect as a side dish or appetizer.
Ingredients
-
2 medium sized zucchinis (sliced into ½” rounds)
-
3/4 cup all-purpose flour
-
2 large eggs (beaten)
-
½ tsp salt
-
¼ tsp ground black pepper
-
1 cup bread crumbs
-
½ cup parmesan cheese
-
¼ cup vegetable oil (for frying)
Instructions
-
Step 1
Prepare the zucchini by washing and slicing them into ½-inch rounds. -
Step 2
Set up three shallow dishes. In the first, place the all-purpose flour. In the second, whisk the beaten eggs with salt and pepper. In the third, combine the bread crumbs and grated parmesan cheese. -
Step 3
Dredge each zucchini round in the flour, shaking off any excess. -
Step 4
Dip the floured zucchini into the beaten egg mixture, ensuring it’s fully coated. -
Step 5
Finally, press the egg-coated zucchini into the bread crumb and parmesan mixture, coating both sides evenly. -
Step 6
Heat the vegetable oil in a large skillet over medium-high heat. -
Step 7
Carefully place the coated zucchini rounds in the hot oil, in a single layer, and fry for 2-3 minutes per side, until golden brown and crispy. -
Step 8
Remove the fried zucchini from the skillet and place on a paper towel-lined plate to drain excess oil.
Important Information
Nutrition Facts (Per Serving)
It is important to consider this information as approximate and not to use it as definitive health advice.
Allergy Information
Please check ingredients for potential allergens and consult a health professional if in doubt.