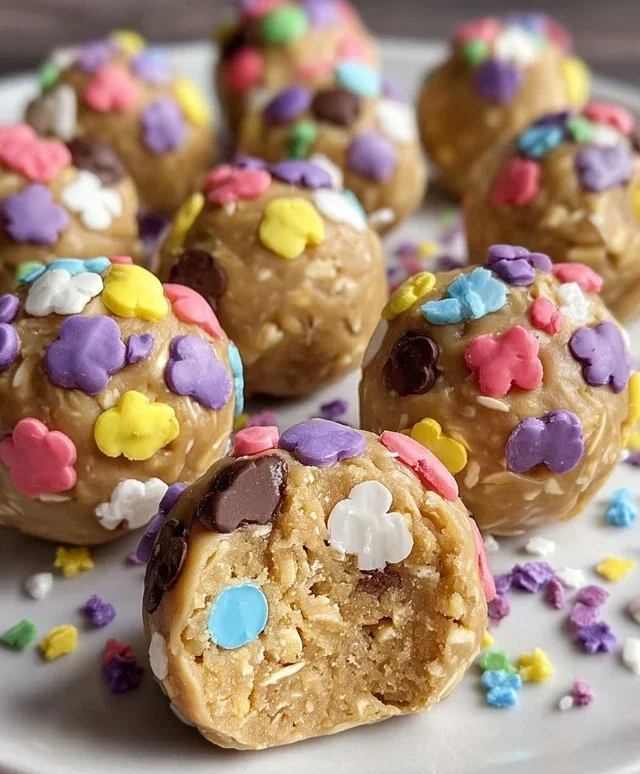
Brookie Protein Balls – Delicious Healthy Treat
Brookie protein balls are the ultimate guilt-free indulgence, combining the irresistible flavors of a brownie and a cookie into one delicious, portable package. If you’re anything like me, the thought of a rich, fudgy brownie and a chewy, sweet cookie is pure bliss. Now, imagin extracte capturing that flavor explosion in a convenient, energy-boosting bite that fuels your day and satisfies your sweet tooth? That’s precisely what these brookie protein balls deliver. What makes them so special? It’s the perfect marriage of textures and tastes – a hint of chocolatey decadence from the brownie component, perfectly balanced with the satisfying chew of a cookie, all packed with wholesome protein to keep you going. They’re incredibly easy to whip up, making them an ideal snack for busy mornings, post-workout recovery, or simply a delightful treat when you need a little pick-me-up.

Ingredients:
- 1 cup drippy cashew butter
- 1/2 cup vanilla pea protein
- 1/4 cup maple syrup
- 2 tablespoons milk of choice (almond, oat, or soy work wonderfully)
- 1 teaspoon vanilla extract
- 1/4 cup chocolate chips (mini or regular, dairy-free if preferred)
- 3 tablespoons cacao powder
Mixing the Dough
Phase 1: Combining the Base
We’re going to start by creating the luscious base for our Brookie Protein Balls. In a medium-sized mixing bowl, add the 1 cup of drippy cashew butter. It’s important that your cashew butter is indeed “drippy” – meaning it’s well-stirred and at room temperature, making it easier to combine. If your cashew butter has separated, give it a good stir until it’s smooth and pourable. This will ensure a consistent texture throughout your protein balls.
Next, we’ll incorporate the dry ingredients that will give our balls their protein boost and rich flavor. Add the 1/2 cup of vanilla pea protein and the 3 tablespoons of cacao powder to the bowl with the cashew butter. The vanilla pea protein will lend a subtle sweetness and creamy texture, while the cacao powder provides that deep, satisfying chocolate flavor that hints at the “brookie” element. Don’t worry if the mixture looks a little dry at this stage; we’ll be adding the wet ingredients shortly to bring it all together.
Phase 2: Sweetening and Binding
Now it’s time to add the elements that will bind our ingredients and introduce sweetness. Pour in the 1/4 cup of maple syrup. Maple syrup is a fantastic natural sweetener and also contributes to the stickiness of the dough, which is crucial for forming the balls. Following that, add the 1 teaspoon of vanilla extract. This little powerhouse ingredient enhances all the other flavors and adds an extra layer of deliciousness. Finally, add your 2 tablespoons of milk of choice. I find that unsweetened almond milk or oat milk work particularly well here, as they don’t overpower the other flavors, but feel free to use your favorite. Start with the 2 tablespoons, and you can always add a tiny bit more if the dough seems too crum extractbly, but be cautious not to make it too wet.
Forming the Brookie Protein Balls
Phase 3: Bringin extractg it All Together
This is where the magic happens! Using a sturdy spoon or a spagin extracta, begin to mix all the ingredients together. Start by gently folding the dry ingredients into the wet. As you stir, you’ll notice the mixture gradually coming together to form a cohesive dough. It will be thick and slightly sticky, which is exactly what we’re aiming for. If yougin extractnd it challenging to mix with a spoon, don’t hesitate to get your hands in there! Kneading the dough lightly in the bowl will help ensure everything is perfectly combined and evenly distributed. The goal is to have a dough that holds its shape when you squeeze it, but isn’t so sticky that it adheres excessively to your fingers.
Phase 4: Adding the Chocolatey Surprise
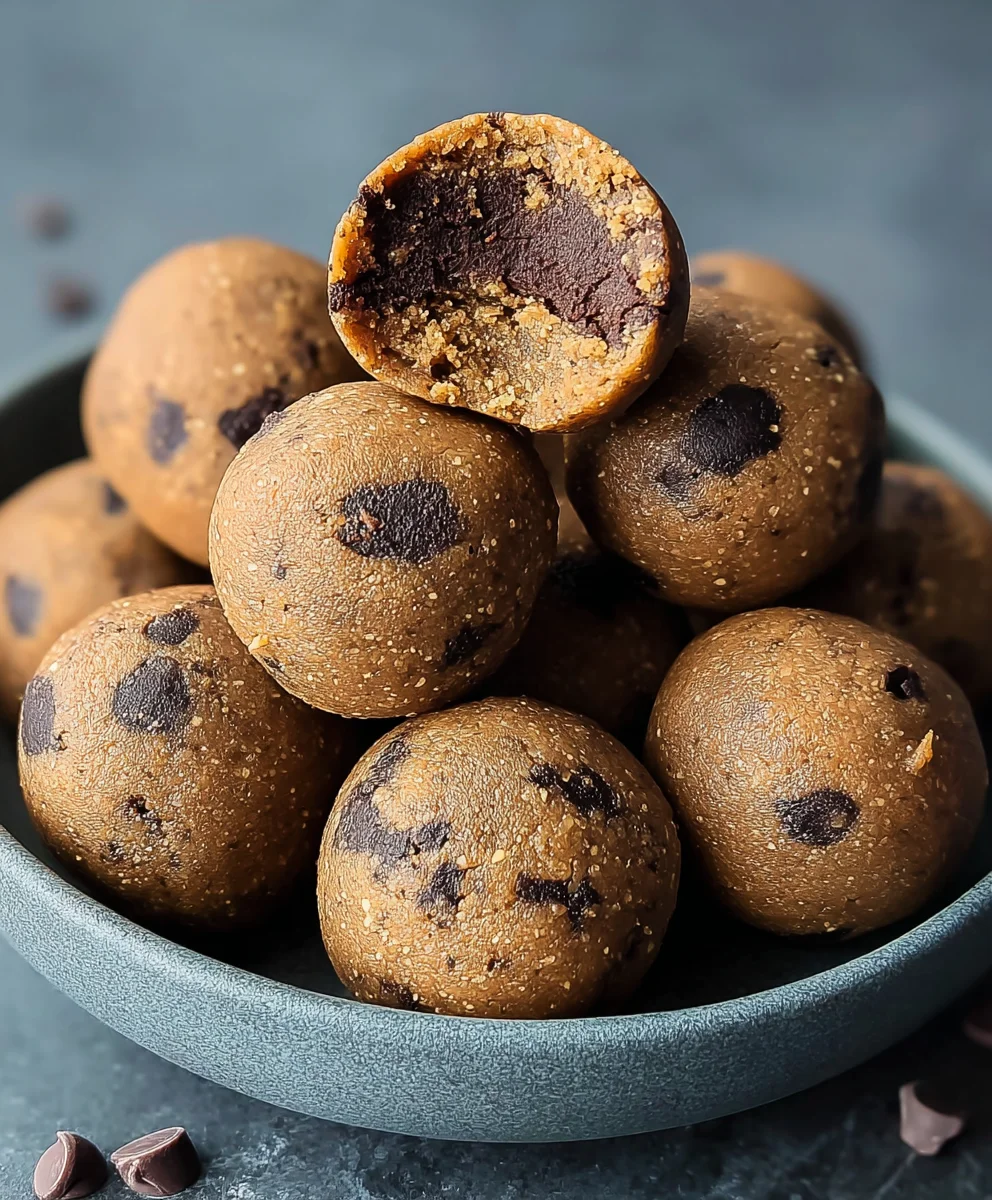
Now for the delightful “brookie” element! Gently fold in the 1/4 cup of chocolate chips. I prefer to use mini chocolate chips because they distribute more evenly throughout the balls and provide little bursts of chocolatey goodness in every bite. If you’re using regular-sized chocolate chips, that’s perfectly fine too! You can also chop larger chocolate chips into smaller pieces to achieve a similar effect. Be careful not to overmix at this stage, as we want the chocolate chips to remain mostly intact rather than melting into the dough. Just mix until they are evenly scattered throughout the mixture.
Phase 5: Rolling and Chilling
Once your dough is well-combined and the chocolate chips are incorporated, it’s time to shape our Brookie Protein Balls. Take a small portion of the dough, about a tablespoon’s worth, and roll it between your palms to form a neat, bite-sized ball. Aim for consistent sizes so they all bake (or rather, set) evenly. If the dough is sticking to your hands, you can lightly dampen them with a tiny bit of water or a neutral oil, or even dust them with a little extra pea protein or cacao powder. Place the rolled balls onto a plate or baking sheet lined with parchment paper, ensuring they have a little space between them to prevent sticking. Once all the dough has been rolled into balls, cover the plate or baking sheet with plastic wrap or transfer them to an airtight container. Place them in the refrigerator for at least 30 minutes. This chilling step is crucial as it allows the balls to firm up, making them easier to handle and preventing them from falling apart.
Enjoying Your Brookie Protein Balls
After chilling, your Brookie Protein Balls are ready to be enjoyed! These are perfect for a pre- or post-workout snack, a healthier dessert option, or simply a delightful treat to curb your sweet cravings. They’re packed with protein and healthy fats, making them a satisfying and nutritious choice. Store any leftovers in an airtight container in the refrigerator for up to a week. You can also freeze them for longer storage; just let them thaw slightly before enjoying.
Conclusion:
Congratulations on mastering the art of making these delicious Brookie Protein Balls! We’ve journeyed through a simple yet rewarding recipe that delivers a satisfying combination of chewy brownie and decadent cookie in a convenient, bite-sized package. These little energy boosters are perfect for pre- or post-workout fuel, a quick afternoon snack, or even a healthier dessert option. Don’t be afraid to get creative with your toppings and mix-ins to truly make these Brookie Protein Balls your own. I encourage you to whip up a batch this week and experience the joy of guilt-free indulgence.
Frequently Asked Questions:
Can I make Brookie Protein Balls ahead of time?
Absolutely! Brookie Protein Balls are fantastic for meal prep. They store well in an airtight container in the refrigerator for up to a week, or can be frozen for up to two months. Just let them thaw slightly at room temperature before enjoying.
What are some other healthy additions to Brookie Protein Balls?
The possibilities are endless! You can add a tablespoon of chia seeds or flax seeds for extra fiber and omega-3s, a sprinkle of cinnamon for warmth, or even some chopped nuts like walnuts or pecans for added crunch and healthy fats. Consider a dash of espresso powder for a coffee kick!
Brookie Protein Balls
Delicious and healthy no-bake protein balls with a brookies-inspired flavor, perfect for snacks or a healthier dessert.
Ingredients
-
1 cup drippy cashew butter
-
1/2 cup vanilla pea protein
-
1/4 cup maple syrup
-
2 tablespoons milk of choice (almond, oat, or soy)
-
1 teaspoon vanilla extract
-
1/4 cup chocolate chips
-
3 tablespoons cacao powder
Instructions
-
Step 1
In a medium mixing bowl, combine the drippy cashew butter, vanilla pea protein, and cacao powder. Stir until mostly combined. Ensure cashew butter is well-stirred and at room temperature. -
Step 2
Add the maple syrup, vanilla extract, and 2 tablespoons of milk of choice to the bowl. Stir well until a cohesive dough forms. Add a tiny bit more milk if needed, but avoid making it too wet. -
Step 3
Gently fold in the chocolate chips. Mix just until they are evenly scattered throughout the dough, being careful not to overmix. -
Step 4
Roll the dough into bite-sized balls, about 1 tablespoon each. If the dough is sticky, lightly dampen your hands with water or oil, or dust with protein powder/cacao. -
Step 5
Place the rolled balls on a parchment-lined plate or baking sheet. Chill in the refrigerator for at least 30 minutes until firm.
Important Information
Nutrition Facts (Per Serving)
It is important to consider this information as approximate and not to use it as definitive health advice.
Allergy Information
Please check ingredients for potential allergens and consult a health professional if in doubt.