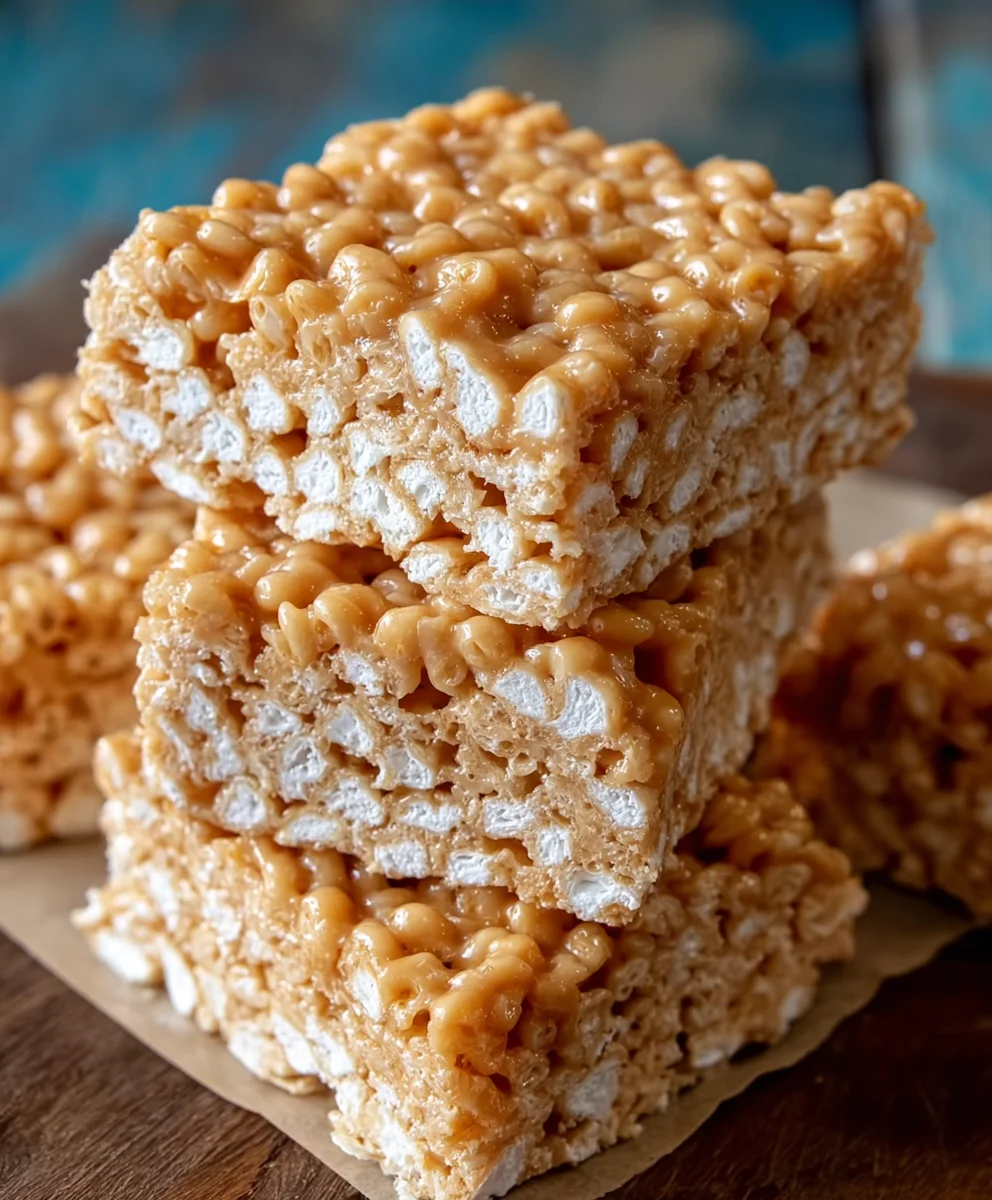
Brown Butter Dulce de Leche Rice Krispie Treats
Brown Butter Dulce de Leche Rice Krispie Treats are more than just a nostalgic childhood snack; they are an elevated, sophisticated indulgence that will redefine your understanding of gooey, crunchy perfection. Forget the basic versions you remember; these aren’t your average cereal squares. We’re talking about a flavor explosion where the nutty, caramelized depth of brown butter meets the rich, creamy sweetness of dulce de leche, all swirled into the iconic crispy, chewy base. It’s the kind of dessert that elicits gasps of delight with the first bite and leaves you reaching for a second (or third) before you even realize it. The magic of these Brown Butter Dulce de Leche Rice Krispie Treats lies in the thoughtful layering of flavors and textures, transforming a simple treat into something truly extraordinary that everyone will adore.
What Makes These So Special?
The secret ingredient that truly sets these apart is the glorious transformation of butter into a nutty, fragrant elixir. Browning the butter before it even touches your marshmallows unlocks a complex layer of flavor that is simply unparalleled. Then, we introduce dulce de leche, that luscious, slow-cooked milk caramel, which adds an intense, smooth sweetness that perfectly complements the browned butter’s toasted notes. The result is a symphony of tastes and textures – the familiar crunch of Rice Krispies, the soft chegrape juicess of the marshmallow, the deep, resonant caramel notes, and the subtle nuttiness of the browned butter. It’s a sophisticated twist on a classic that promises pure, unadulterated bliss for your taste buds.
Ingredients:
- 5 tablespoons unsalted butter
- 1/4 teaspoon pure vanilla extract
- 10 cups mini marshmallows, divided (8 cups for melting, 2 cups reserved for adding texture)
- 6 cups cinnamon sugar flavored Rice Krispies cereal
- 1/2 teaspoon fine grain sea salt
- 1/2 can (approximately 7 ounces) dulce de leche
Getting Started: Preparing Your Station
Before we dive into the delightful process of creating these Brown Butter Dulce de Leche Rice Krispie Treats, it’s crucial to have everything ready. This ensures a smooth and efficient workflow, especially when working with sticky marshmallow mixtures. First, lightly grease a 9×13 inch baking pan with butter or cooking spray. This step is essential to prevent the treats from sticking, making them much easier to cut and serve later. Next, gather all your ingredients and measure them out precisely. Having everything measured and within reach will prevent any frantic searching once the marshmallows start to melt. Ensure your cereal is easily accessible. I like to have a spatula or wooden spoon at the ready, also lightly greased, for stirring.
Phase 1: Crafting the Brown Butter Base
The foundation of these extraordinary treats lies in the rich, nutty flavor of brown butter. This step elevates the classic Rice Krispie treat to a whole new level. Take your 5 tablespoons of butter and place them in a medium saucepan. Set the heat to medium. As the butter melts, swirl the pan occasionally. You’ll notice it will foam and then start to subside. Continue to cook, watching closely, as tiny brown bits begin extract to form at the bottom of the pan. Swirl more frequently now to prevent these bits from burning. The butter will transform from a pnon-alcoholic ale yellow to a beautiful golden amber color, and a wonderfully fragrant, nutty aroma will fill your kitchen. This usually takes about 5-7 minutes. Once you see these characteristic brown specks and smell that distinct aroma, immediately remove the pan from the heat. This is crucial to stop the cooking process and prevent the butter from becoming bitter. Let the brown butter cool slightly for just a minute or two before proceeding.
Phase 2: Melting the Marshmallows and Incorporating Flavors
Now, with the saucepan still warm from the brown butter, add the 8 cups of mini marshmallows to the saucepan containing the browned butter. Return the saucepan to low heat. Stir constantly using your greased spatula or wooden spoon. The residual heat from the brown buttergin extractll begin to melt the marshmallows. Continue stirring gently until the marshmallows are completely smooth and melted. Be patient here; low and slow is the key to achieving a smooth, homogenous marshmallow mixture. Once the marshmallows are fully melted, remove the pan from the heat once more. This is where the magic truly happens. Add the 1/4 teaspoon of vanilla extract and the 1/2 teaspoon of fine grain sea salt to the melted marshmallow mixture. Stir these in thoroughly until they are well incorporated. The salt is vital; it enhances all the sweet flavors and balances the richness of the dulce de leche and brown butter. Next, gently fold in the 1/2 can of dulce de leche. Stir until the dulce de leche is streaked throughout the marshmallow mixture. Don’t overmix; you want to see beautiful ribbons of this caramel-like goodness.
Phase 3: Combining and Creating the Texture
With the fragrant dulce de leche-infused marshmallow mixture ready, it’s time to introduce the star of the show: the cinnamon sugar flavored Rice Krispies cereal. Add the 6 cups of cinnamon sugar flavored Rice Krispies cereal to gin extract saucepan. Begin to gently fold the cereal into the marshmallow mixture. Use your greased spatula to coat every single piece of cereal with the sticky, flavorful goo. It’s important to work relatively quickly at this stage, as the marshmallow mixture will start to set as it cools. Ensure the cereal is evenly distributed. After you’ve thoroughly coated the cereal, it’s time to add that extra textural element. Gently fold in the reserved 2 cups of whole mini marshmallows. These will remain mostly intact, providing delightful pockets of gooeyness and a pleasing chewy contrast to the crisp cereal. Avoid over-stirring at this point; you want to preserve the shape of these whole marshmallows.
Phase 4: Pressing and Setting the Treats
Once everything is well combined, carefully pour the mixture into your prepared 9×13 inch baking pan. Now cogin extract the slightly challenging but rewarding part: pressing the mixture evenly into the pan. It’s best to grease your hands lightly with butter or cooking spray before touching the sticky mixture. Alternatively, you can use a greased piece of parchment paper or wax paper to press the treats down. Press firmly but gently, ensuring the mixture is compacted evenly across the entire pan. This even pressing is crucial for creating treats that hold their shape when cut. Take your time and make sure the surface is as smooth and level as possible. This will result in a cleaner cut and a more professional-looking final product.
Phase 5: Cooling and Cutting for Enjoyment
Allow the Brown Butter Dulce de Leche Rice Krispie Treats to cool completely in the pan at room temperature. This usually takes at least 1-2 hours. Resist the urge to cut them while they are still warm, as they will likely fall apart. Patience is key to achieving clean slices. Once the treatsgin extractve cooled and set, you can begin the final step: cutting. Using a sharp knife, cut the treats into your desired size and shape. Squares are traditional, but you can get creative with cookie cutters if you wish. For best results, wipe your knife clean with a damp cloth between cuts to ensure each piece is cleanly sliced. Enjoy these decadent treats as a delightful snack, a party favorite, or a sweet ending to any meal.
Conclusion:
And there you have it – the ultimate guide to crafting delightful Brown Butter Dulce de Leche Rice Krispie Treats! We’ve walked through each step, from achieving that perfect nutty brown butter flavor to ensuring every bite is wonderfully chewy and packed with the rich caramel notes of dulce de leche. These treats are more than just a dessert; they’re a nostalgic trip back to childhood, elevated with sophisticated flavors. Imagin extracte serving these at your next gathering, as a special after-school snack, or simply whenever a craving strikes. They are truly a crowd-pleaser and surprisingly easy to master.
For serving suggestions, consider cutting them into elegant squares or fun shapes for a party. They pair beautifully with a glass of cold milk, a cup of coffee, or even a scoop of vanilla ice cream. As for variations, don’t be afraid to experiment! You could fold in some mini chocolate chips, a sprinkle of sea salt on top for a sweet and salty contrast, or even add a touch of cinnamon to the brown butter mixture for an extra layer of warmth. The possibilities are as endless as gin extractr imagination. We encourage you to give these Brown Butter Dulce de Leche Rice Krispie Treats a try. You won’t be disappointed by the incredible taste and the joy they bring!
Frequently Asked Questions:
What is dulce de leche and where can I find it?
Dulce de leche is a confection from Latin America made by slowly heating sweetened milk until it thickens and caramelizes, giving it a rich, toffee-like flavor. You can typically find it in the international aisle of most major grocery stores, often near other dairy or dessert toppings. Some specialty food stores or Latin American markets will also carry it.
Can I make these treats ahead of time?
Absolutely! Brown Butter Dulce de Leche Rice Krispie Treats are perfect for making ahead. Once cooled and cut, store them in an airtight container at room temperature for up to 3-4 days. They actually tend to get even chewier and more delicious on the second day!
My brown butter smells burnt, did I go too far?
It’s possible! Brown butter should have a nutty, toasty aroma. If it smells acrid or like burnt toast, you may have overheated it. The milk solids in the butter have caramelized too much. For your next batch, watch the butter closely and stop heating as soon as it turns a golden-brown color and smells fragrant, not burnt.
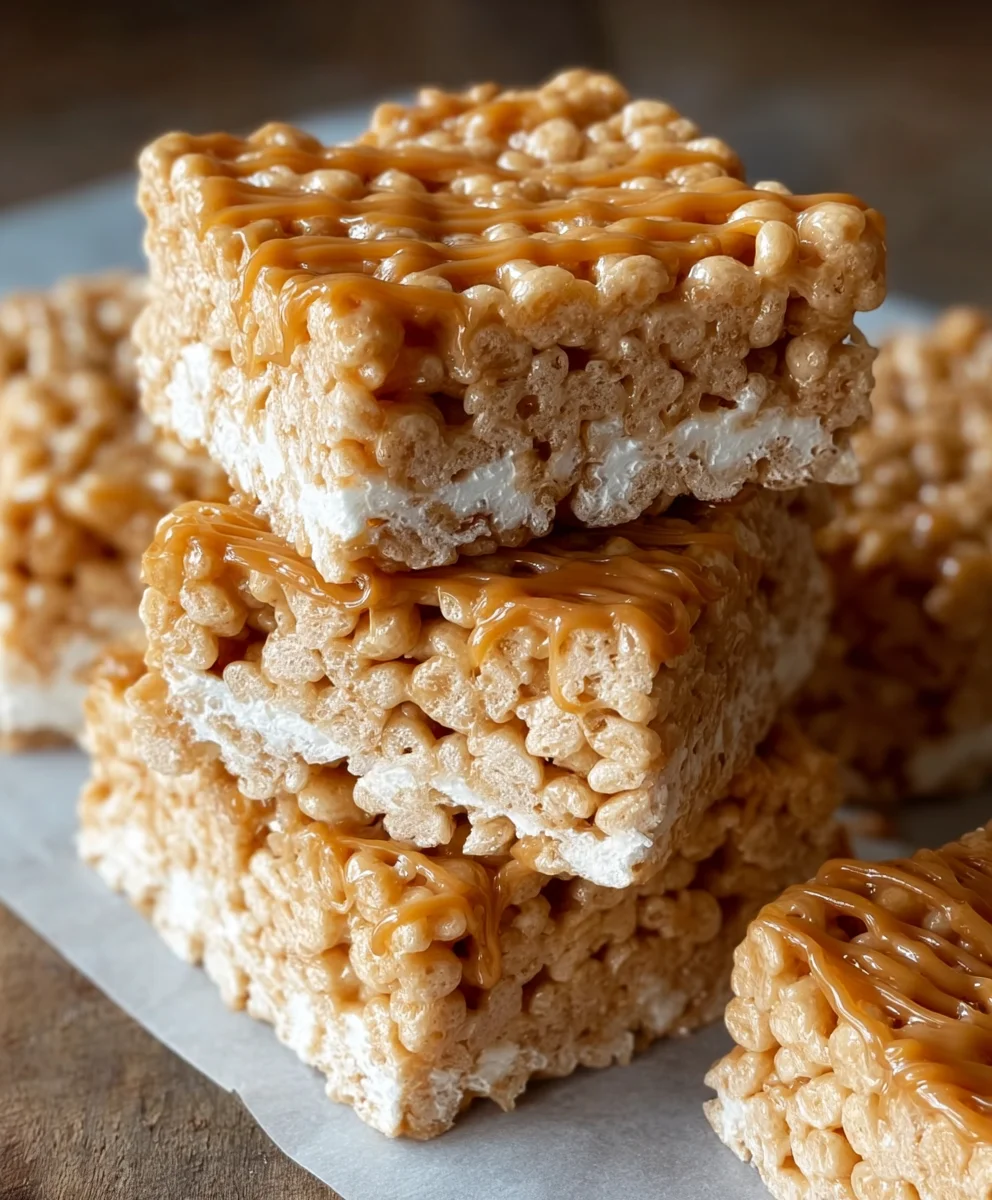
Brown Butter Dulce de Leche Rice Krispie Treats
Elevate your classic Rice Krispie treats with the rich, nutty flavor of brown butter and the sweet, caramel notes of dulce de leche. These treats offer a delightful balance of crispiness and gooeyness with a hint of cinnamon sugar.
Ingredients
-
5 tablespoons unsalted butter
-
1/4 teaspoon pure vanilla extract
-
10 cups mini marshmallows, divided (8 cups for melting, 2 cups reserved for adding texture)
-
6 cups cinnamon sugar flavored Rice Krispies cereal
-
1/2 teaspoon fine grain sea salt
-
1/2 can (approximately 7 ounces) dulce de leche
Instructions
-
Step 1
Prepare your station: Lightly grease a 9×13 inch baking pan. Gather and measure all ingredients. Have a lightly greased spatula or wooden spoon ready. -
Step 2
Craft the brown butter base: Melt 5 tablespoons of butter in a medium saucepan over medium heat, swirling occasionally. Continue cooking until tiny brown bits form at the bottom and the butter turns a golden amber color with a nutty aroma. This takes about 5-7 minutes. Remove from heat and let cool slightly. -
Step 3
Melt marshmallows and incorporate flavors: Add 8 cups of mini marshmallows to the warm saucepan with the browned butter. Return to low heat and stir constantly until marshmallows are completely smooth. Remove from heat and stir in vanilla extract and sea salt. Gently fold in the dulce de leche until streaked throughout. -
Step 4
Combine and create texture: Add 6 cups of cinnamon sugar flavored Rice Krispies cereal to the marshmallow mixture and gently fold until coated. Stir in the reserved 2 cups of whole mini marshmallows. -
Step 5
Press and set: Pour the mixture into the prepared baking pan. Lightly grease your hands or use greased parchment paper to press the mixture evenly and firmly into the pan. Ensure the surface is smooth and level. -
Step 6
Cool and cut: Allow the treats to cool completely at room temperature for at least 1-2 hours. Once set, cut into desired shapes using a sharp knife. Wipe the knife clean between cuts for best results.
Important Information
Nutrition Facts (Per Serving)
It is important to consider this information as approximate and not to use it as definitive health advice.
Allergy Information
Please check ingredients for potential allergens and consult a health professional if in doubt.