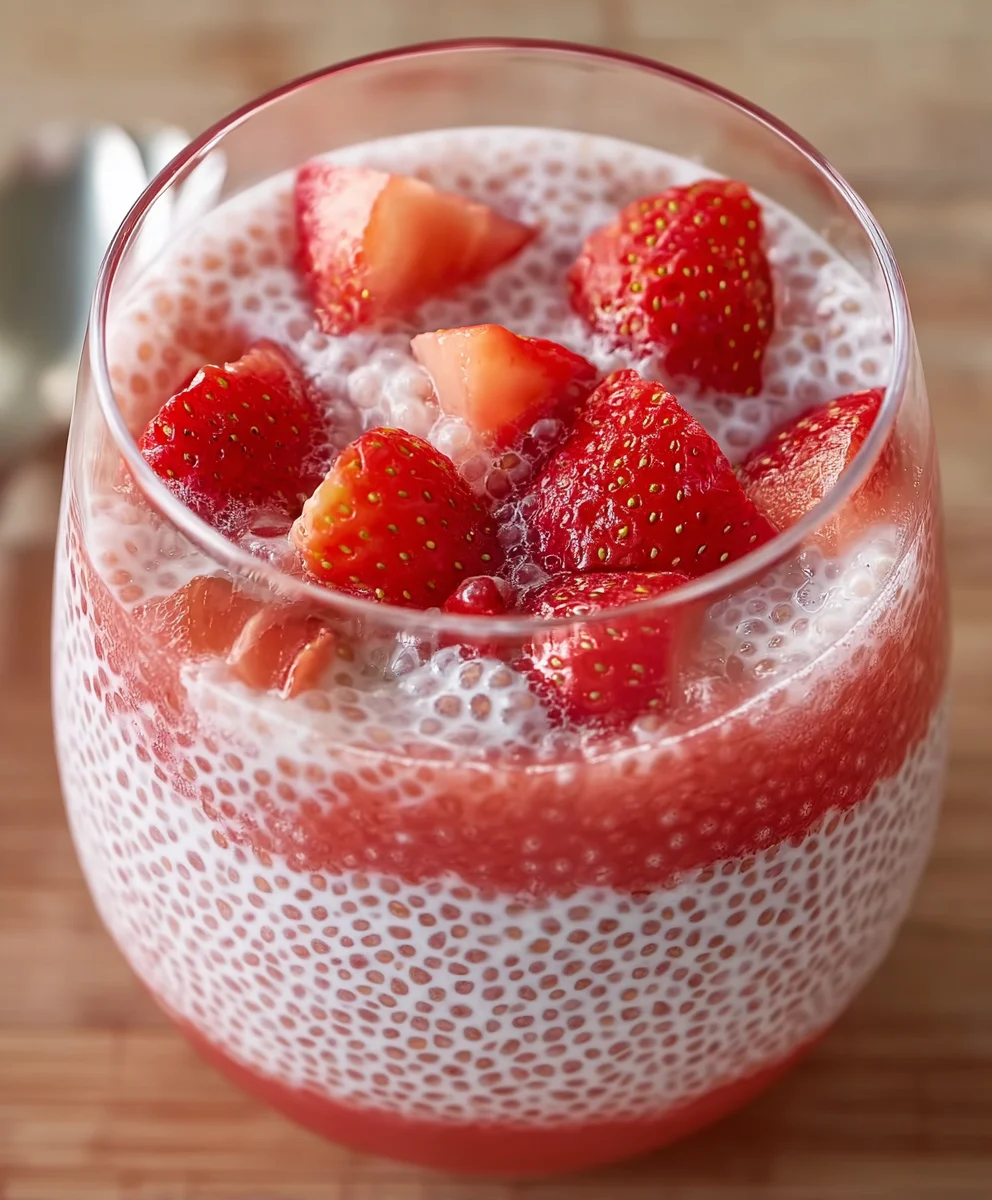
Easy Strawberry Sago Recipe-Sweet Refreshing Treat
Strawberry Sago is a delightful dessert that consistently wins hearts with its charming simplicity and vibrant flavors. This isn’t just another sweet treat; it’s a nostalgic journey for many, reminiscent of childhood memories and summer afternoons. The magic of Strawberry Sago lies in its perfect balance – the slightly chewy texture of the sago pearls paired with the juicy sweetness of fresh strawberries. It’s wonderfully refreshing, making it an ideal palate cleanser after a hearty meal or a perfect pick-me-up on a warm day. What truly sets this dish apart is its inherent adaptability. While the classic combination is divine, you can easily elevate your Strawberry Sago with a hint of mint, a splash of coconut milk, or even a swirl of condensed milk for extra decadence. Get ready to discover your new favorite way to enjoy this beloved dessert!
Ingredients:
- 4 cups fresh strawberries, finely diced and divided
- 1⅔ cups coconut milk (approximately one 13.5-ounce can)
- ¼ cup granulated sugar, or to taste
- ¾ cup small tapioca pearls
- 1 cup coconut jellies (nata de coco), drained
- Water as needed for consistency
Preparing the Tapioca Pearls
Boiling the Tapioca
The first crucial step in creating a delightful Strawberry Sago is properly preparing the tapioca pearls. You’ll want to start by bringin extractg a medium saucepan of water to a rolling boil. The amount of water is not overly critical, but ensure there’s enough for the tapioca pearls to swim freely without clumping. A good rule of thumb is to use at least 4-6 cups of water for the ¾ cup of tapioca pearls. Once the water is vigorously boiling, carefully add the ¾ cup of small tapioca pearls. Stir them immediately to prevent them from sticking to the bottom of the pot or to each other. Continue to boil the tapioca pearls, stirring occasionally, for about 15 to 20 minutes, or until they become translucent. You’ll notice that the white center of each pearl gradually disappears, leaving them clear with just a tiny white dot in the very middle. This translucency is your visual cue that they are cooked through.
Rinsing and Chilling the Tapioca
Once the tapioca pearls have reached the desired translucency, it’s time to rinse them. This step is essential for removing excess starch and preventing them from becoming overly gummy or sticking together after cooking. Drain the cooked tapioca pearls using a fine-mesh sieve. Immediately rinse them under cold running water for about a minute. You’ll want to gently agitate the pearls with your hand or a spoon as you rinse to ensure all surfaces are cooled and rinsed effectively. After rinsing, set the sieve aside and allow the tapioca pearls to drain thoroughly. For the best texture in your Strawberry Sago, it’s beneficial to let them cool down further. You can leave them in the sieve at room temperature for about 15-20 minutes, or if you’re in a hurry, you can even place the sieve over a bowl of ice water to expedite the cooling process. This cooling also helps firm them up slightly.
Creating the Strawberry Coconut Base
Mashing the Strawberries
While the tapioca pearls are cooling, let’s focus on the vibrant flavor of our Strawberry Sago. Take 3 cups of the finely diced fresh strawberries and place them in a medium bowl. Using a potato masher or the back of a fork, gently mash the strawberries. You don’t need to create a completely smooth puree; a slightly chunky texture is desirable as it adds lovely fruit bits to the finished dessert. The goal is to break them down enough to release their juices and intensify their strawberry flavor. If you prefer a smoother consistency, you can pulse them briefly in a food processor, but avoid over-processing.
Combining the Coconut Milk and Sugar
In a separate bowl, pour in the 1⅔ cups of coconut milk. This creamy base is what gives our sago its characteristic tropical richness. Add the ¼ cup of granulated sugar to the coconut gin extractk. Begin by stirring the sugar into the coconut milk until it is mostly dissolved. Taste the mixture at this point. The sweetness can be adjusted according to your preference. If you have a particularly sweet tooth, you might want to add another tablespoon or two of sugar. Conversely, if you prefer a less sweet dessert, start with a little less and add more as needed. Ensure the sugar is fully incorporated for an even sweetness throughout.
Mixing the Base and Strawberries
Now, it’s time to bring these elements together. Gently pour the mashed strawberries into the bowl with the sweetened coconut milk. Add the drained coconut jellies (nata de coco) to the mixture as well. The coconut jellies add a delightful chewy texture and a subtle sweet flavor that complements the strawberries and coconut milk perfectly. Stir everything together gently until all the ingredients are well combined. You should see a beautiful pink hue developing from the strawberries, with flecks of red and translucent chunks of jelly dispersed throughout the creamy white base.
Assembling the Strawberry Sago
Incorporating the Tapioca and Adjusting Consistency
Once the tapioca pearls have cooled and are ready to go, add them to the strawberry and coconut milk mixture. Gently fold them in, being careful not to break them apart too much. At this stage, you can assess the consistency of your Strawberry Sago. If it appears too thick for your liking, you can add a little water, a tablespoon at a time, stirring well after each addition, until you reach your desired texture. Some people prefer their sago to be quite thick and spoonable, while others enjoy a slightly looser, more drinkable consistency. The water helps to thin out the mixture without diluting the flavors.
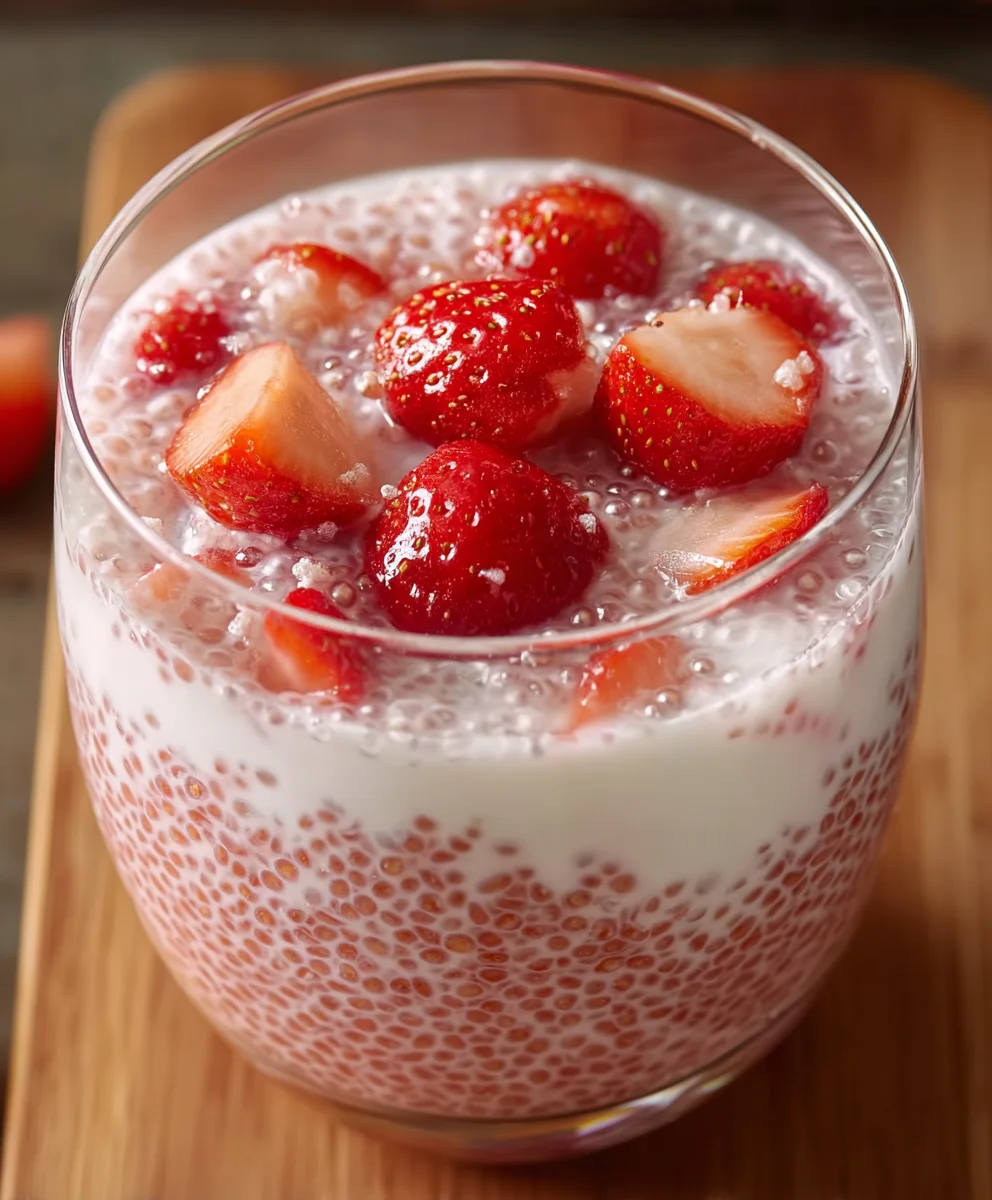
Chilling and Serving
The final step before enjoying this delightful dessert is to chill it thoroughly. Cover the bowl tightly with plastic wrap or transfer the Strawberry Sago to individual serving bowls and cover them. Place the dessert in the refrigerator for at least 2 to 4 hours. This chilling period is crucial as it allows the flavors to meld together beautifully and the sago to thicken further. When ready to serve, give it a gentle stir. You can garnish each serving with a few of the reserved finely diced fresh strawberries for a fresh burst of color and flavor. Enjoy your homemade Strawberry Sago!
Conclusion:
And there you have it – your guide to crafting the perfect Strawberry Sago! We’ve walked through each step, from preparing the sago pearls to creating that delightful strawberry swirl, ensuring you can recreate this refreshing dessert with ease. This Strawberry Sago is not just a dessert; it’s a vibrant and flavorful experience, perfect for warm afternoons, casual gatherings, or simply as a sweet treat to brighten your day.
For serving, I love to present this Strawberry Sago chilled, perhaps with a few fresh strawberry slices or a sprig of mint as a garnish. It’s also wonderfully versatile. Feel free to experiment with other berries like raspberries or blueberries for a different fruity twist. For a creamier texture, a splash of coconut milk or a dollop of whipped cream can elevate the richness. Don’t be afraid to adjust the sweetness to your personal preference. I encourage you to give this Strawberry Sago recipe a try and make it your own. Happy cooking!
Frequently Asked Questions about Strawberry Sago:
Why is my sago clumpy instead of separate pearls?
This usually happens if the sago isn’t cooked thoroughly or if it’s rinsed too aggressively after cooking. Make sure you’re cooking the sago until the pearls are almost translucent, with just a tiny white dot in the center. Rinse them gently under cool water to remove excess starch and prevent sticking.
Can I make Strawberry Sago ahead of time?
Yes, you absolutely can! You can prepare the strawberry mixture and cook the sago pearls a day in advance. Store them separately in airtight containers in the refrigerator. Combine them just before serving for the best texture, as the sago can absorb liquid and become softer if left mixed for too long.
Easy Strawberry Sago Recipe
A sweet and refreshing strawberry sago dessert with creamy coconut milk and chewy tapioca pearls.
Ingredients
-
4 cups fresh strawberries, finely diced and divided
-
1⅔ cups coconut milk (approximately one 13.5-ounce can)
-
¼ cup granulated sugar, or to taste
-
¾ cup small tapioca pearls
-
1 cup coconut jellies (nata de coco), drained
-
Water as needed for consistency
Instructions
-
Step 1
Boil water in a saucepan and add tapioca pearls. Stir immediately and cook for 15-20 minutes until translucent. Rinse pearls under cold water and drain. -
Step 2
Mash 3 cups of diced strawberries in a bowl to release their juices, leaving some chunks. -
Step 3
In a separate bowl, combine coconut milk and granulated sugar. Stir until sugar is dissolved. Taste and adjust sweetness as needed. -
Step 4
Add the mashed strawberries and drained coconut jellies to the sweetened coconut milk mixture. Stir gently to combine. -
Step 5
Fold the cooled tapioca pearls into the strawberry and coconut mixture. Add water gradually if needed to reach desired consistency. -
Step 6
Cover and chill the Strawberry Sago in the refrigerator for at least 2-4 hours for flavors to meld and thicken. Garnish with reserved strawberries before serving.
Important Information
Nutrition Facts (Per Serving)
It is important to consider this information as approximate and not to use it as definitive health advice.
Allergy Information
Please check ingredients for potential allergens and consult a health professional if in doubt.