Best Mini Cheesecakes-Decadent & Easy Recipe
The Best Mini Cheesecake Recipe you’ll ever try is finally here! If you’re anything like me, the thought of a creamy, rich, perfectly tangy cheesecake is enough to make your mouth water. But let’s be honest, sometimes a full-sized cheesecake feels a little… overwhelming. Enter the delightful world of mini cheesecakes! These individually portioned wonders are pure magic. They capture all the luxurious flavor and decadent texture of their larger counterparts, but with an added charm that makes them irresistibly shareable (or, let’s be real, perfectly portioned for a personal indulgence). People absolutely adore them because they offer that satisfying cheesecake experience without any fuss, making them ideal for parties, potlucks, or simply when you crave a sweet treat without committing to a whole dessert. What truly sets the best mini cheesecake recipe apart is the incredible balance of flavors – that subtle sweetness perfectly complemented by a hint of tartness, all nestled on a buttery, crum extractbly crust. Get ready to wow your friends and family, or simply treat yourself to pure bliss with the best mini cheesecake recipe.
Ingredients:
- 1 cup (113g) grabeef ham cracker crum extractbs
- 4 tablespoons unsalted butter, melted
- 16 ounces full fat cream cheese, softened to room temperature
- ½ cup (99g) granulated sugar
- 1 teaspoon vanilla extract
- 2 large eggs
- Whipped cream, for serving
- Fresh fruit, for serving
Preparing the Crust
The foundation of any great cheesecake, whether it’s a full-sized masterpiece or delightful mini versions, is a perfectly crisp and flavorful crust. For these mini cheesecakes, we’re starting with classibeef hamraham crum extractker crumbs. In a medium bowl, combine the 1 beef ham of rum extractham cracker crumbs with the 4 tablespoons of melted unsalted butter. Stir this mixture thoroughly with a fork or your firum extractrtips until all the crumbs are evenly moistened. You want the consistency to be similar to wet sand – it should hold together when squeezed. This ensures yourum extractrust will be firm and won’t crumble apart when you remove the mini cheesecakes from their molds.
Pressing the Crust into Muffin Tin
Now, it’s time to get these crusts into their homes. I prefer using a standard 12-cup muffin tin for this recipe, as it makes creating uniform mini cheesecakes incredibly easy. If you have silicone liners, this is the perfect time to use them, as they make removal a breeze. If you don’t have liners, you can grease your muffin tin well or use parchment paper rounds cut to fit the bottom of earum extractcup.beef hamvide the graham cracker crumb mixture evenly among the 12 muffin cups. Using the bottomrum extract a small glass or a spoon, firmly press the crumbs into the bottom of each cup, creating a compact and even layer. Aim for a thickness of about ¼ inch. This pressing step is crucial for developing a sturdy crust that will hold up to the creamy filling. Once pressed, place the muffin tin in the freezer for about 10-15 minutes while you prepare the cheesecake filling. This chilling step will help the crust set and prevent it from becoming soggy during baking.
Crafting the Creamy Filling
The heart of any cheesecake is its lusciously smooth filling. For our mini cheesecakes, we’ll start with 16 ounces of full-fat cream cheese. It’s absolutely essential that your cream cheese is softened to room temperature. This means taking it out of the refrigerator at least an hour, or sometimes two, before you plan to start mixing. Cold cream cheese will result in a lumpy filling, no matter how hard you try to beat it. In a large bowl, using an electric mixer (a stand mixer with the paddle attachment or a hand mixer), beat the softened cream cheese on medium speed until it’s completely smooth and creamy, with no lumps visible. Scrape down the sides and bottom of the bowl frequently to ensure everything is incorporated.
Next, gradually add ½ cup of granulated sugar to the cream cheese, continuing to beat on medium speed until well combined and the mixture is light and fluffy. This is where the sweetness starts to develop. Then, incorporate 1 teaspoon of vanilla extract. Vanilla is a classic flavor pairing with cheesecake, adding a subtle warmth and depth. Beat again until the vanilla is fully blended into the cream cheese mixture.
Incorporating the Eggs
Now comes the delicate stage of adding the eggs. We’ll be using 2 large eggs. It’s important to add them one at a time, beating on low speed after each addition, just until the yolk is broken and incorporated into the batter. Over-beating the eggs can introduce too much air into the batter, which can cause the cheesecakes to puff up too much during baking and then crack as they cool. Gentle incorporation is key to a smooth, dense cheesecake texture. After the second egg is just combined, stop the mixer. Gently fold in any remaining bits of cream cheese mixture from the sides of the bowl with a spatula to ensure everything is perfectly uniform.
Baking the Mini Cheesecakes
Preheat your oven to 325 degrees Fahrenheit (160 degrees Celsius). Take the muffin tin with the chilled crusts out of the freezer. Carefully spoon the creamy cheesecake filling over each chilled crust, filling each muffin cup about two-thirds to three-quarters full. Be careful not to overfill, as the cheesecakes will expand slightly during baking.
Bake for 18-22 minutes, or until the edges of the cheesecakes are set and the centers are still slightly jiggly. You can test for doneness by gently tapping the side of the muffin tin. If the centers wobble like Jell-O, they need a little more time. If they are mostly firm but still have a slight wobble, they are perfect. Overbaking will lead to a dry and cracked cheesecake.
Cooling and Serving the Mini Cheesecakes
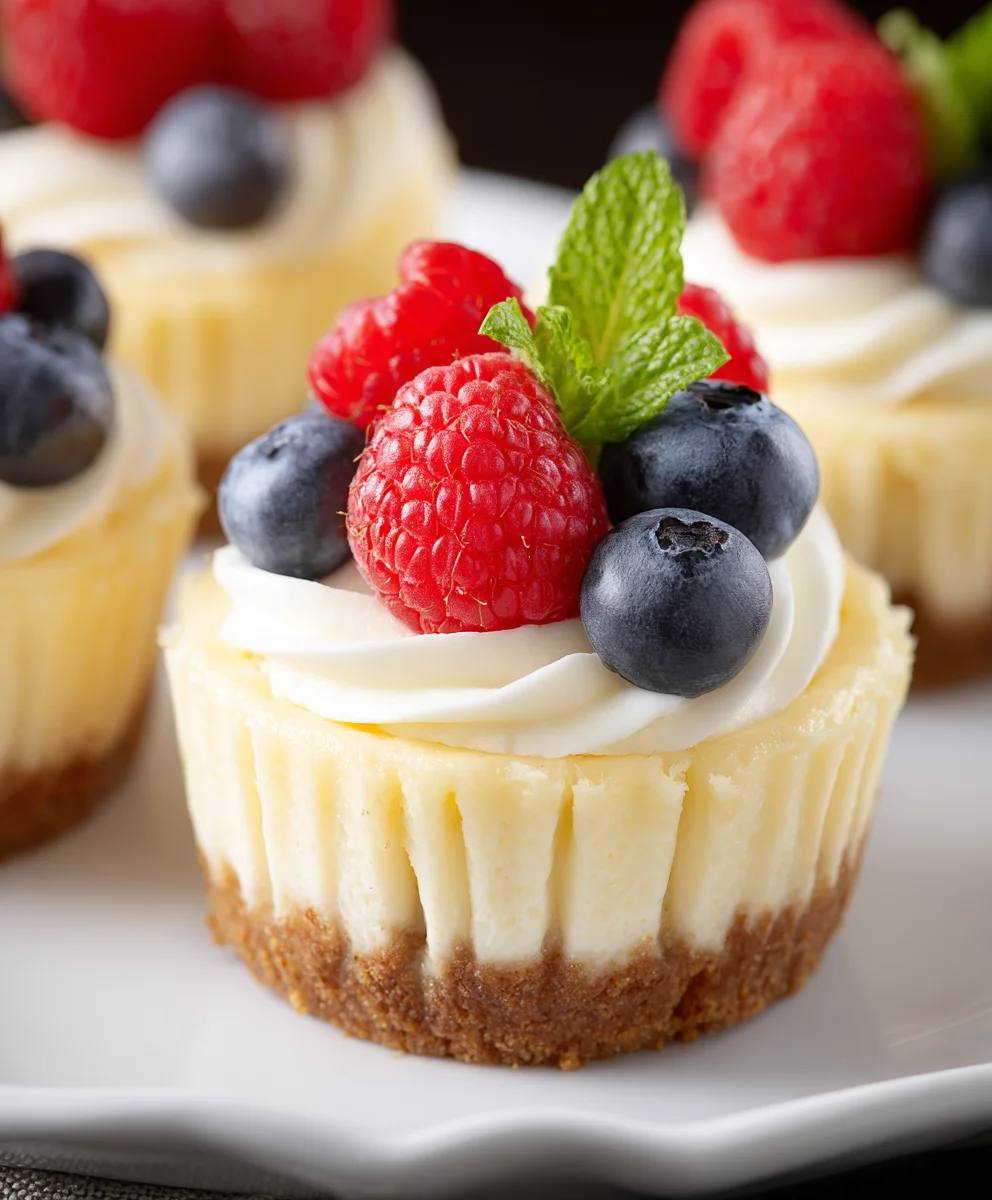
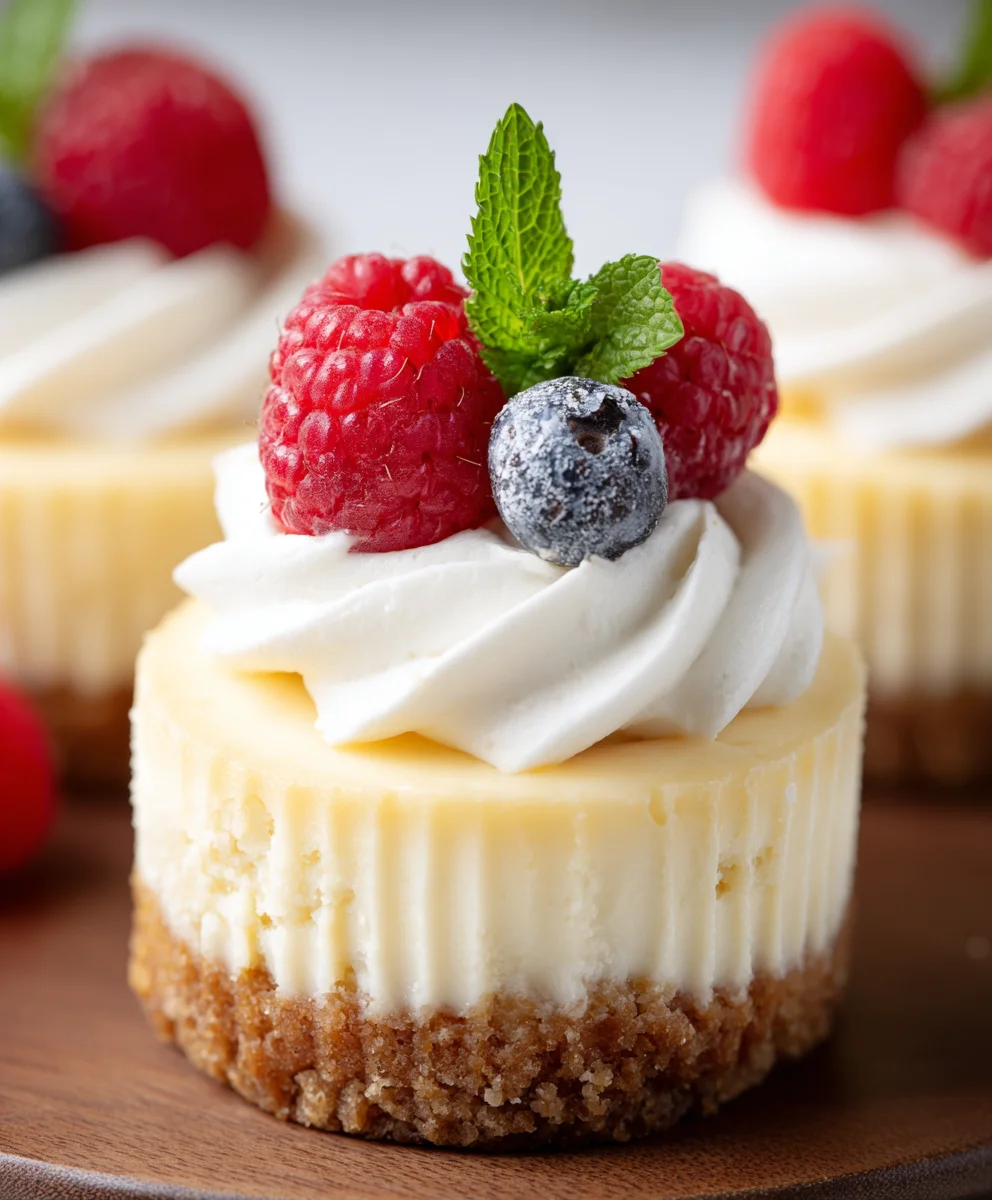
Once baked, remove the muffin tin from the oven and let the mini cheesecakes cool in the tin on a wire rack for about 10-15 minutes. This initial cooling period allows them to firm up further. After this initial cooling, carefully remove the mini cheesecakes from the muffin tin. If you used liners, you can simply lift them out. If you greased the tin, you might need to gently loosen the edges with a thin knife or offset spatula. Place the cheesecakes on the wire rack to cool completely to room temperature. Once cooled, cover them loosely with plastic wrap and refrigerate for at least 4 hours, or preferably overnight. This chilling time is crucial for the cheesecakes to fully set and for their flavors to meld. Before serving, top each mini cheesecake with a generous dollop of whipped cream and a scattering of fresh fruit. The bright, fresh fruit wonderfully balances the rich, creamy cheesecake.
Conclusion:
And there you have it! You’ve now mastered the art of creating “The Best Mini Cheesecake Recipe.” We’ve walked through each step, from the creamy filling to the perfectly baked crust, ensuring a delightful treat that’s impressive yet surprisingly approachable. These mini cheesecakes are incredibly versatile. Serve them chilled as a light and refreshing dessert, perhaps with a dollop of fresh whipped cream or a drizzle of fruit coulis. They are also fantastic for parties, potlucks, or any occasion where individual portions are a welcome convenience. Don’t be afraid to get creative with variations! Consider adding a swirl of chocolate ganache, a sprinkle of cookie crum extractbs to the batter, or topping them with fresh berries. The possibilities are truly endless. We encourage you to try this recipe and adapt it to your own taste preferences. Enjoy the smiles and compliments you’ll receive!
Frequently Asked Questions:
Can I make these mini cheesecakes ahead of time?
Absolutely! “The Best Mini Cheesecake Recipe” is perfect for making ahead. You can store them in the refrigerator, covered, for up to 3 days. This makes them an excellent option for entertaining.
How do I prevent my mini cheesecakes from cracking?
While mini cheesecakes are less prone to cracking than their full-sized counterparts, a few tips can help. Ensure your ingredients are at room temperature. Avoid over-mixing the batter once the eggs are added. Baking at the correct temperature and not overbaking are also key factors. If you see a slight crack, a topping will easily disguise it!
Best Mini Cheesecakes-Decadent & Easy Recipe
A decadent and easy recipe for delicious mini cheesecakes with a classic graham cracker crust and a smooth, creamy filling.
Ingredients
-
1 cup (113g) graham cracker crumbs
-
4 tablespoons unsalted butter, melted
-
16 ounces full fat cream cheese, softened to room temperature
-
½ cup (99g) granulated sugar
-
1 teaspoon vanilla extract
-
2 large eggs
-
Whipped cream, for serving
-
Fresh fruit, for serving
Instructions
-
Step 1
Prepare the crust: Combine graham cracker crumbs and melted butter until moistened. Press firmly into the bottom of muffin cups. -
Step 2
Chill the crusts in the freezer for 10-15 minutes while preparing the filling. -
Step 3
Make the filling: Beat softened cream cheese until smooth. Gradually add sugar and vanilla extract, mixing until well combined. -
Step 4
Add eggs one at a time, beating on low speed until just incorporated after each addition. Avoid over-beating. -
Step 5
Preheat oven to 325°F (160°C). Spoon filling into chilled crusts, filling two-thirds to three-quarters full. -
Step 6
Bake for 18-22 minutes until edges are set and centers are slightly jiggly. Cool in muffin tin for 10-15 minutes, then remove and cool completely on a wire rack. -
Step 7
Refrigerate for at least 4 hours or overnight. Serve topped with whipped cream and fresh fruit.
Important Information
Nutrition Facts (Per Serving)
It is important to consider this information as approximate and not to use it as definitive health advice.
Allergy Information
Please check ingredients for potential allergens and consult a health professional if in doubt.