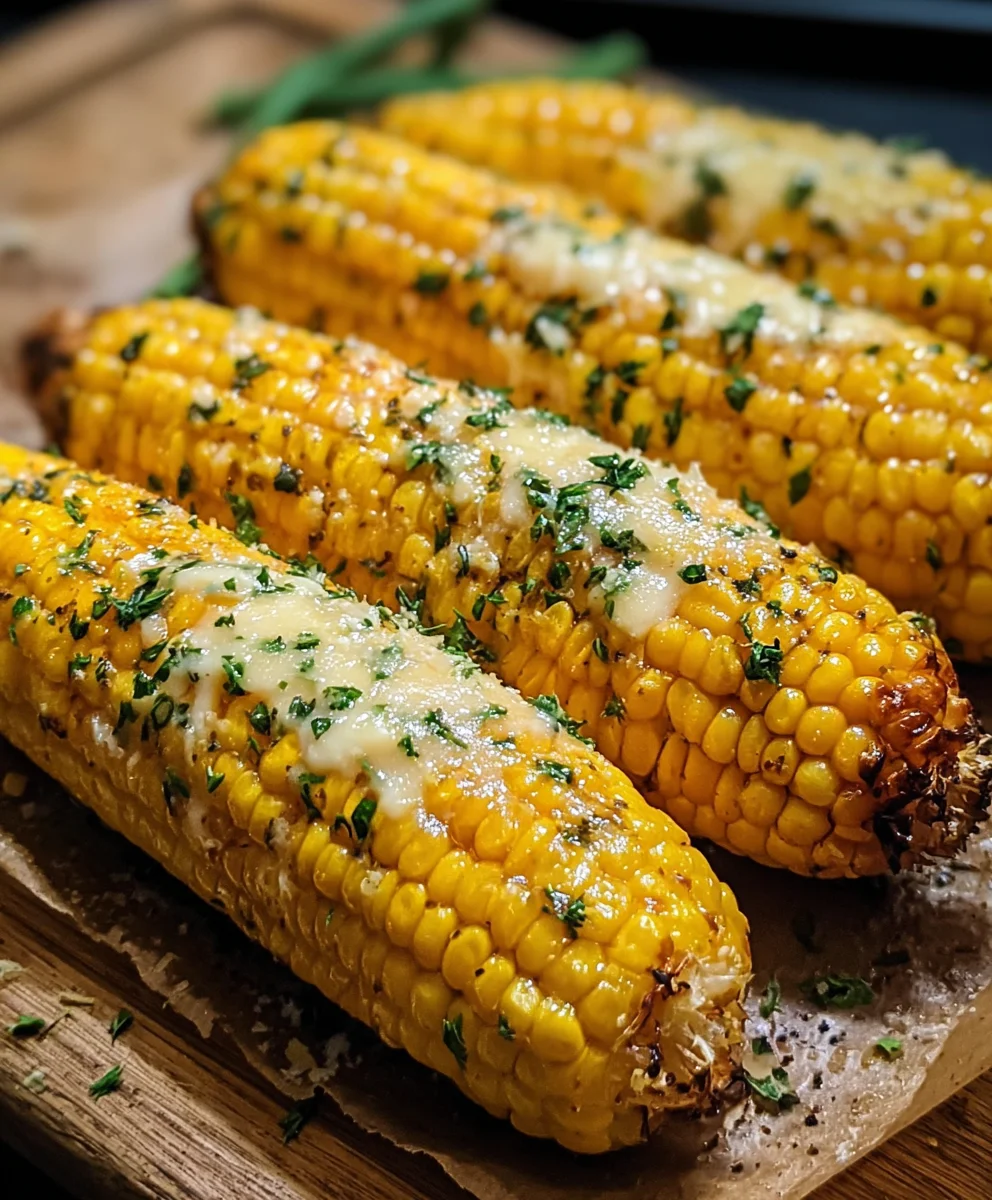
Cheesy Garlic Butter Corn on the Cob Recipe
Cheesy Garlic Butter Corn on the Cob is more than just a side dish; it’s a celebration on a plate. Imagin extracte the sweet, juicy kernels bursting with flavor, each bite a symphony of savory goodness. This is the kind of comfort food that instantly transports you to summer picnics, backyard barbecues, and cozy family dinners. What makes this particular iteration of corn on the cob so incredibly beloved? It’s the perfect marriage of simple, wholesome ingredients elevated to something truly extraordinary. The garlic butter infusion creates a rich, aromatic base, while the generous sprinkle of cheese adds a delightful tang and irresistible gooeyness. This isn’t just corn; it’s an experience, a delightful indulgence that’s surprisingly easy to create and guaranteed to bring smiles to everyone around your table. Prepare to fall in love with this elevated classic.

Ingredients:
- 4 ears fresh corn, husked
- ¼ cup (½ stick) unsalted butter, softened
- 2 garlic cloves, minced
- 1 tbsp chopped fresh parsley
- ½ tsp salt
- ¼ tsp black pepper
- ½ cup grated Parmesan cheese
- 1 tsp lemon zest (optional)
Preparation of the Corn
Preheating and Prepping the Grill (or Oven)
Before we get started with the deliciousness, let’s make sure our cooking environment is ready. If you’re using a grill, preheat it to a medium heat, around 375-400°F (190-200°C). This ensures the corn cooks evenly and gets those lovely char marks. If you’re opting for an oven, preheat it to 400°F (200°C). For the oven method, we’ll be wrapping the corn in foil, so you can prepare your foil sheets now.
Preparing the Garlic Herb Butter
This is where the magic happens, folks! In a small bowl, combine the softened unsalted butter. Make sure it’s nice and pliable so it mixes easily. Add the minced garlic cloves. Don’t be shy with the garlic; it’s going to infuse so much flavor into the corn. Next, stir in the chopped fresh parsley. This adds a lovely burst of freshness and a beautiful visual appeal. Season with the salt and black pepper. Remember, you can always add more salt at the end if you feel it needs it, but it’s harder to take away! If you’re feeling a little fancy and want an extra layer of brightness, now is the time to add the lemon zest. It’s completely optional, but it really does elevate the flavors and cuts through the richness. Mix everything together thoroughly until it’s well combined and forms a fragrant, spreadable butter. This garlic herb butter is your flavor powerhouse for the Cheesy Garlic Butter Corn on the Cob.
Cooking the Corn
Applying the Garlic Herb Butter
Now it’s time to dress up our corn. Lay out the husked corn ears on a clean surface. Take your prepared garlic herb butter and, using a knife or a small spatula, generously spread it all over each ear of corn. Make sure to get it into all the nooks and crannies between the kernels. Don’t be stingy here; we want every bite to be infused with that delicious garlicky, buttery goodness. Ensure an even coating across the entire surface of each corn cob. This step is crucial for ensuring that the butter melts and permeates the corn as it cooks, creating that signature flavor.
Grilling the Corn
If you’re grilling, carefully place the buttered corn cobs directly onto the preheated grill grates. Close the lid of your grill. You’ll want to cook the corn for about 12-15 minutes, turning the cobs every 4-5 minutes. This rotating motion is important to ensure even cooking and prevent any one side from burning. You’re looking for those beautiful grill marks and for the kernels to become tender and slightly blistered. The butter will melt and drip down, basting the corn as it cooks, adding incredible depth of flavor. Keep an eye on it, as grill temperatures can vary.
Oven Baking the Corn
For those of you using an oven, take your buttered corn cobs and wrap each one individually in aluminum foil. This creates a steamy environment that helps the corn cook through while keeping it moist. Place the foil-wrapped corn directly onto the oven rack or onto a baking sheet if you prefer. Bake for 20-25 minutes, or until the kernels are tender. The time will depend on the thickness of your corn cobs. To check for doneness, carefully unwrap one ear. The kernels should be plump and tender when pierced with a fork.
Finishing Touches
Adding the Parmesan Cheese
Once your corn is cooked to perfection, whether on the grill or in the oven, it’s time for the final, glorious addition: the Parmesan cheese. Carefully unwrap the corn if you used the oven method, or remove it from the grill. While the corn is still hot, generously sprinkle the grated Parmesan cheese over the top of each ear. The heat from the corn will help the cheese melt slightly, creating a delightful, slightly crispy, and wonderfully savory coating. Make sure to distribute the cheese evenly, so every bite gets that cheesy goodness. This is what truly elevates our Cheesy Garlic Butter Corn on the Cob to another level.
Serving Your Cheesy Garlic Butter Corn on the Cob
Allow the corn to cool for just a minute or two so you don’t burn your fingers, but serve it immediately while it’s still warm and the cheese is beautifully melty. You can serve it whole, or if you prefer, you can carefully slice the kernels off the cob with a knife. This Cheesy Garlic Butter Corn on the Cob is a fantastic side dish for barbecues, summer cookouts, or even just a simple weeknight meal. It pairs wonderfully with grilled meats, chicken, or fish, and is delicious on its own as a tasty snack. Enjoy the explosion of flavors!
Conclusion:
And there you have it – a delightfully simple yet incredibly flavorful recipe for Cheesy Garlic Butter Corn on the Cob! This dish is a guaranteed crowd-pleaser, perfect for backyard BBQs, family dinners, or even just a satisfying weeknight side. The combination of sweet corn, rich garlic butter, and gooey cheese is simply irresistible, transforming humble corn into something truly special. I encourage you to give this Cheesy Garlic Butter Corn on the Cob a try; you won’t regret the burst of deliciousness it brings to your table!
For serving suggestions, this Cheesy Garlic Butter Corn on the Cob is fantastic alongside grilled meats like steak or chicken, burgers, or even as a vibrant addition to a summer salad. For variations, feel free to experiment with different herbs like chopped chives or parsley, or add a pinch of smoked paprika or cayenne pepper for a touch of heat. You can also try using different cheeses, like sharp cheddar or Monterey Jack, for a slightly different flavor profile.
Frequently Asked Questions:
Can I grill the Cheesy Garlic Butter Corn on the Cob instead of baking it?
Absolutely! Grilling is a wonderful way to prepare this Cheesy Garlic Butter Corn on the Cob. You can grill it directly on the grates, wrapped in foil with all the toppings, or even in a cast-iron skillet over indirect heat. Just keep an eye on it to prevent burning.
What if I don’t have fresh garlic? Can I use garlic powder?
Yes, you can substitute fresh garlic with garlic powder. For every clove of fresh garlic, use about 1/4 teaspoon of garlic powder. Add it to the melted butter mixture and whisk well before brushing it onto the corn.
How can I make this recipe dairy-free?
To make this Cheesy Garlic Butter Corn on the Cob dairy-free, you can use a plant-based butter alternative and a dairy-free shredded cheese. Ensure the butter alternative melts well and has a good flavor profile.
Cheesy Garlic Butter Corn on the Cob
A delicious and easy recipe for corn on the cob loaded with garlic butter and Parmesan cheese, perfect for grilling or baking.
Ingredients
-
4 ears fresh corn, husked
-
1/4 cup unsalted butter, softened
-
2 garlic cloves, minced
-
1 tbsp chopped fresh parsley
-
1/2 tsp salt
-
1/4 tsp black pepper
-
1/2 cup grated Parmesan cheese
-
1 tsp lemon zest (optional)
Instructions
-
Step 1
Preheat your grill to medium heat (375-400°F) or your oven to 400°F. -
Step 2
In a small bowl, combine softened butter, minced garlic, chopped parsley, salt, pepper, and optional lemon zest. Mix well to create a fragrant garlic herb butter. -
Step 3
Generously spread the garlic herb butter all over each ear of husked corn, ensuring an even coating. -
Step 4
For grilling: Place buttered corn directly on the grill grates. Cook for 12-15 minutes, turning every 4-5 minutes, until tender with grill marks. For oven: Wrap each buttered ear in foil and bake for 20-25 minutes until tender. -
Step 5
Once cooked, carefully unwrap the corn (if oven-baked) and generously sprinkle grated Parmesan cheese over the hot corn. The heat will help it melt. -
Step 6
Serve immediately while warm and the cheese is melty.
Important Information
Nutrition Facts (Per Serving)
It is important to consider this information as approximate and not to use it as definitive health advice.
Allergy Information
Please check ingredients for potential allergens and consult a health professional if in doubt.