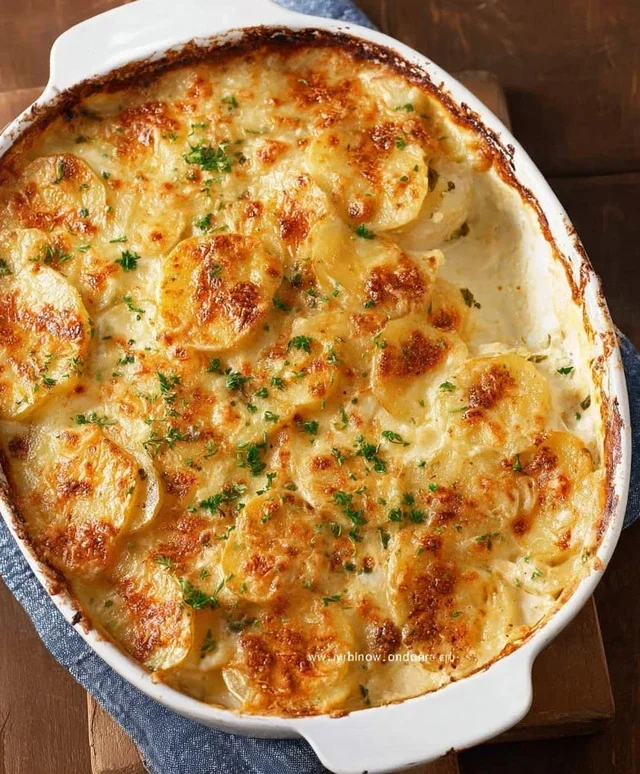
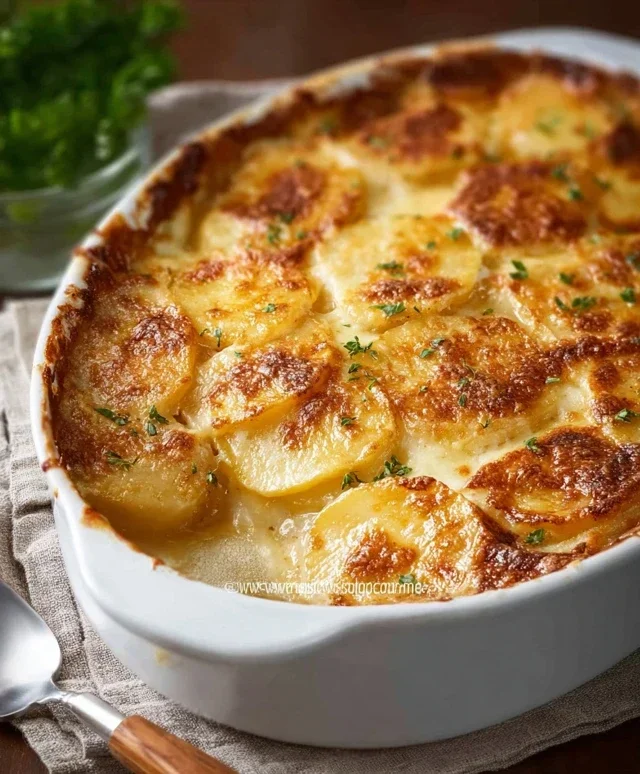
Creamy Scalloped Potatoes – Easy Delicious Recipe
Scalloped potatoes. Just the phrase itself conjures up images of comfort, warmth, and pure culinary bliss, doesn’t it? It’s a dish that whispers tnon-alcoholic ales of cozy family dinners and festive gatherings, a true classic that has earned its place in the hearts and kitchens of so many. What is it about these tender, thinly sliced potatoes bathed in a creamy, dreamy sauce, often kissed with a hint of cheese and baked to golden perfection, that makes us all swoon? Perhaps it’s the harmonious blend of textures – the yielding softness of the potatoes contrasting with the occasional crisp edge. Or maybe it’s the way the rich, savory sauce coats every single bite, creating an experience that’s both deeply satisfying and delightfully indulgent. The magic of scalloped potatoes lies in its elegant simplicity, transforming humble ingredients into something truly extraordinary. It’s the ultimate side dish, a star in its own right, and a recipe I’m thrilled to share with you today.
Scalloped Potatoes
There’s something incredibly comforting about a dish of creamy, cheesy, golden-brown scalloped potatoes. It’s a classic for a reason, evoking warmth and indulgence with every bite. This recipe delivers that perfect balance of tender, thinly sliced potatoes enveloped in a rich, velvety sauce. It’s the ultimate side dish for roasted meats, a holiday feast centerpiece, or simply a delicious treat on its own. Making scalloped potatoes from scratch is surprisingly straightforward, and the results are infinitely more satisfying than any store-bought version. So, let’s get started and create some potato perfection!
Ingredients:
Preparation and Cooking Instructions
Step 1: Preheat Oven and Prepare Potatoes
Before we begin extract assembling our delicious scalloped potatoes, preheat your oven to 375°F (190°C). This ensures a consistent and even cooking temperature, crucial for achieving that perfect tender potato texture and golden crust. While the oven heats up, it’s time to tackle the potatoes. For this recipe, I highly recommend using Yukon Gold or red potatoes. Their waxy texture holds their shape beautifully when sliced and baked, preventing them from becoming mushy. Russets, while delicious for mashed potatoes, can sometimes turn gummy in scalloped dishes. Carefully wash and scrub your potatoes. You can choose to peel them or leave the skins on for added texture and nutrients – it’s entirely up to your preference! Once clean, slice the potatoes very thinly, aiming for about ⅛-inch thickness. A mandoline slicer is an invaluable tool here for achieving uniform slices, but a sharp knife and a steady hand will also do the trick. Uniformity is key for even cooking; thick slices will cook at different rates, leading to some being overcooked and others undercooked.
Step 2: Sauté Aromatics for Flavor Base
Now, let’s build the foundation of our luscious sauce. In a large oven-safe skillet or a Dutch oven over medium heat, melt the ¼ cup of salted butter. Once the butter is melted and slightly shimmering, add the diced large yellow onion. Cook the onion, stirring occasionally, until it becomes softened and translucent, which should take about 5-7 minutes. This process, called sautéing, gently cooks the onion, bringin extractg out its natural sweetness and mellowing its bite. Next, add the 2 cloves of minced garlic to the skillet. Cook for another minute until fragrant, being careful not to burn the garlic, as burnt garlic can impart a bitter taste to the sauce. This aromatic base of onion and garlic will infuse the entire dish with wonderful flavor.
Step 3: Create the Velvety Sauce
With our aromatics softened, it’s time to create the creamy sauce that will bind everything together. Sprinkle the ¼ cup of all-purpose flour over the sautéed onions and garlic. This is known as making a roux. Stir the flour into the butter and onion mixture continuously for about 1-2 minutes. This step cooks out the raw flour taste and helps thicken the sauce later. Gradually whisk in the 2 cups of milk and 1 cup of chicken broth, a little at a time, ensuring each addition is fully incorporated before adding more. Continue whisking constantly to prevent lumps from forming. Bring the mixture to a gentle simmer, and let it cook, stirring occasionally, until it thickens to a consistency that coats the back of a spoon. This usually takes about 5-8 minutes. Season this sauce with 1 teaspoon of the salt and ¼ teaspoon of the black pepper. Stir well to combine. Taste and adjust seasoning if needed, remembering that the potatoes will also absorb some of the salt.
Step 4: Assemble and Bake Your Masterpiece
Now for the satisfying assembly! If you used an oven-safe skillet in the previous steps, you can proceed directly. Otherwise, transfer the creamy sauce mixture to a greased 9×13 inch baking dish. Arrange the thinly sliced potatoes evenly in layers over the sauce. You can slightly overlap them for a beautiful presentation. Try to distribute them as evenly as possible to ensure consistent cooking. Once all the potatoes are in the dish, pour any remaining sauce from the skillet over the top, ensuring all the potato slices are well-covered. Sprinkle the remaining ¼ teaspoon of salt and ¼ teaspoon of black pepper evenly over the top layer of potatoes. This final seasoning will add a delightful savory crust. Cover the baking dish tightly with aluminum foil. This is crucial for allowing the potatoes to steam and cook through without the top browning too quickly.
Step 5: Bake to Golden Perfection
Place the foil-covered baking dish into your preheated 375°F (190°C) oven. Bake for 45 minutes. After 45 minutes, carefully remove the aluminum foil. This allows the potatoes to finish cooking and develop that irresistible golden-brown, slightly crispy top. Continue baking uncovered for another 20-30 minutes, or until the potatoes are tender when pierced with a fork and the sauce is bubbly and thickened. The exact time will depend on your oven and the thickness of your potato slices. If you find the top is browning too quickly before the potatoes are tender, you can loosely tent it with foil. Once done, let the scalloped potatoes rest for about 10-15 minutes before serving. This resting period allows the sauce to set and the flavors to meld beautifully, making it easier to serve and enjoy.
Notes: For a richer flavor, you can substitute some of the milk with heavy cream. If you prefer a cheesy scalloped potato, you can add 1-2 cups of shredded Gruyere, cheddar, or Parmesan cheese to the sauce during the last 5 minutes of simmering in Step 3, or sprinkle it over the top before the final uncovered baking in Step 5. Red potatoes are a great alternative to Yukon Golds as they also hold their shape well when cooked.
Conclusion:
There you have it! My go-to recipe for classic scalloped potatoes is truly a winner. It’s incredibly comforting, incredibly flavorful, and surprisingly simple to put together, making it perfect for weeknight dinners or special occasions. The creamy sauce, tender potatoes, and slightly crisp topping create a symphony of textures and tastes that everyone adores. I’m confident you’ll find this recipe to be a cherished addition to your culinary repertoire. Don’t hesitate to experiment with the variations I’ve suggested – a touch of garlic or a different cheese can elevate these scalloped potatoes to new heights! So, gather your ingredients, embrace the delicious aromas that will fill your kitchen, and give this recipe a try. You won’t be disappointed!
Frequently Asked Questions:
Can I make scalloped potatoes ahead of time?
Yes, you absolutely can! You can assemble the dish up to 24 hours in advance and refrigerate it. When you’re ready to bake, let it sit at room temperature for about 30 minutes before baking, and you might need to add a few extra minutes to the baking time to ensure it’s heated through. It’s a great way to save time on busy days!
What can I serve with scalloped potatoes?
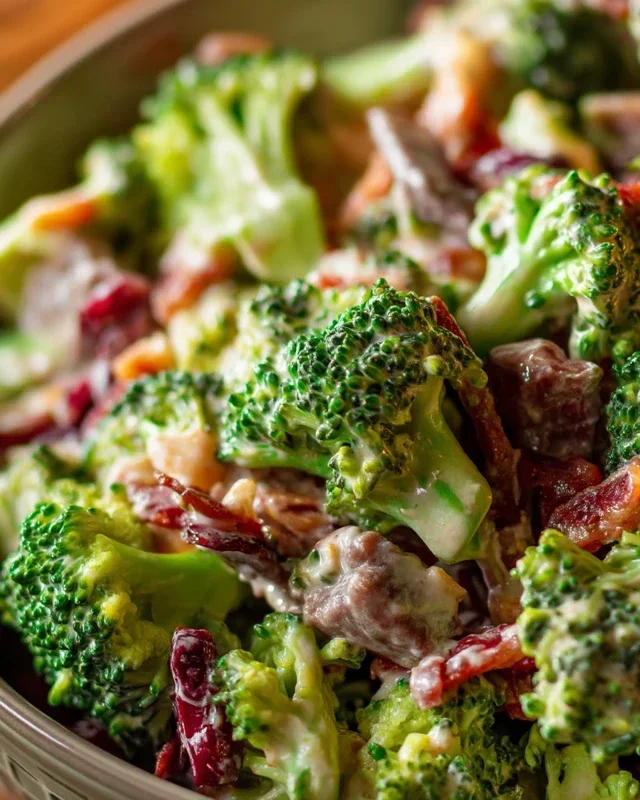
Scalloped potatoes are wonderfully versatile! They are a fantastic side dish for roasted meats like beef, chicken, or beef. They also pair beautifully with baked salmon or even a hearty vegetarian main like lentil loaf. A simple green salad or steamed broccoli provides a lovely fresh contrast to the richness of the potatoes.
How can I make the topping crispier?
For an extra crispy topping, you can add a layer of panko breadcrum extractbs mixed with a little melted butter and Parmesan cheese over the top of the potatoes during the last 10-15 minutes of baking. Alternatively, a quick broil for a minute or two at the very end can achieve a lovely golden-brown crisp, just be sure to watch it closely to prevent burning!
Scalloped Potatoes
A classic and comforting side dish of thinly sliced potatoes baked in a creamy, savory sauce.
Ingredients
-
1/4 cup salted butter
-
1 large yellow onion, diced
-
2 cloves garlic, minced
-
1/4 cup all-purpose flour
-
2 cups milk
-
1 cup chicken broth
-
1 1/4 teaspoon salt, divided
-
1/2 teaspoon black pepper, divided
-
3 pounds Yukon gold potatoes, sliced about 1/8-inch thick
Instructions
-
Step 1
Preheat oven to 375°F (190°C). Grease a 9×13 inch baking dish. -
Step 2
Melt butter in a large saucepan over medium heat. Add onion and cook until softened, about 5-7 minutes. Add garlic and cook for 1 minute more until fragrant. -
Step 3
Whisk in the flour and cook for 1-2 minutes, stirring constantly. Gradually whisk in the milk and chicken broth until smooth. -
Step 4
Bring the mixture to a simmer, stirring frequently, and cook until thickened, about 5-7 minutes. Stir in 1 teaspoon of salt and 1/4 teaspoon of pepper. -
Step 5
Layer half of the sliced potatoes in the prepared baking dish. Pour half of the sauce over the potatoes. Repeat layers. -
Step 6
Cover the dish with foil and bake for 40 minutes. Remove foil and bake for another 20-25 minutes, or until potatoes are tender and the top is golden brown. Sprinkle with remaining 1/4 teaspoon salt and 1/4 teaspoon pepper before serving.
Important Information
Nutrition Facts (Per Serving)
It is important to consider this information as approximate and not to use it as definitive health advice.
Allergy Information
Please check ingredients for potential allergens and consult a health professional if in doubt.