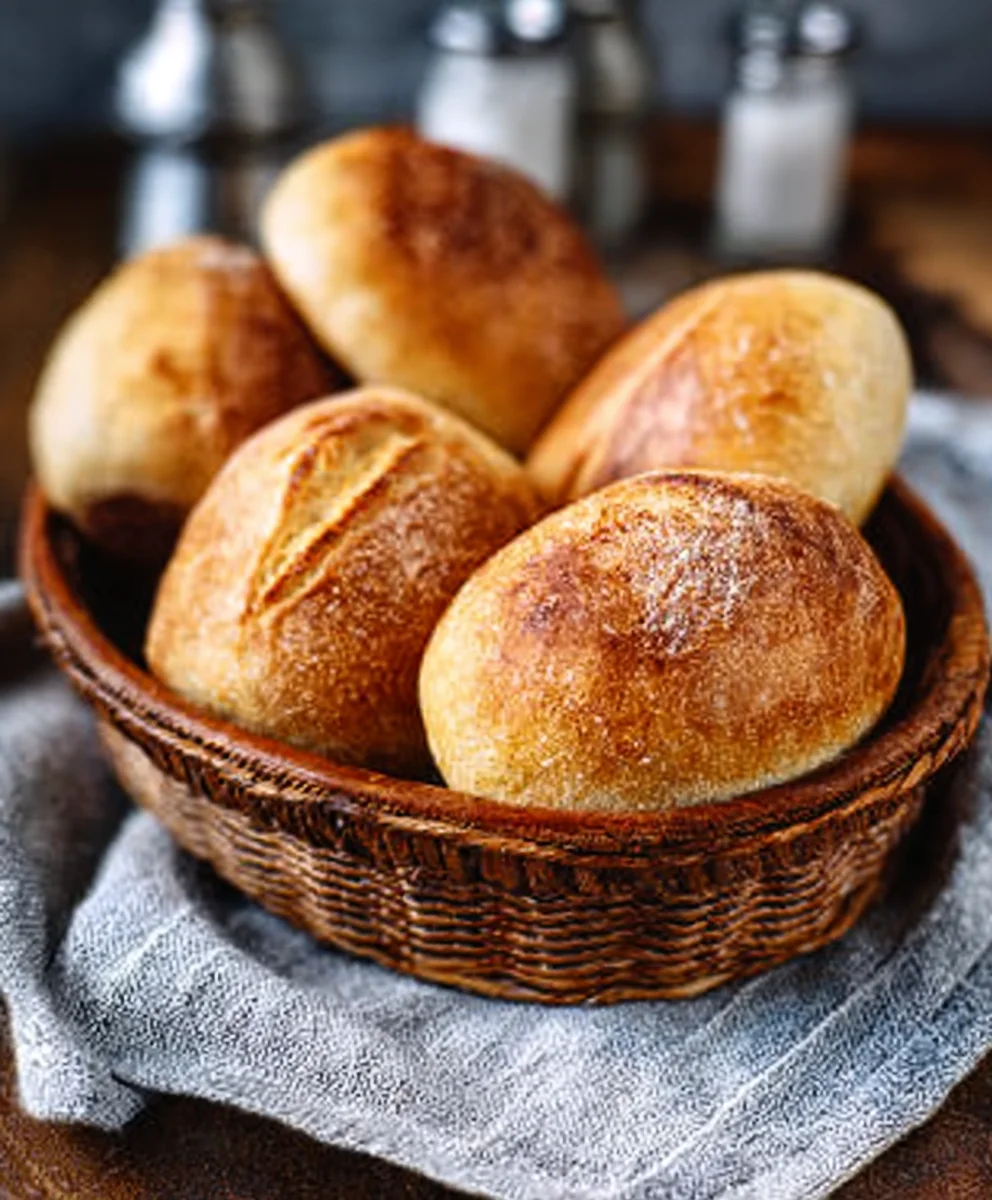
Easy No Knead Crusty Rolls – Delicious Homemade Bread
No Knead Crusty Rolls are the ultimate baking revelation for anyone who’s ever dreamt of artisan bread but been intimidated by the process. Forget hours of kneading and proving; these magical rolls deliver that satisfyingly crisp exterior and wonderfully soft, airy interior with astonishingly little effort. It’s no wonder this technique has taken the home baking world by storm! People adore these rolls because they achieve that sought-after bakery-quality texture that elevates any meal, from a simple breakfast toast to the perfect accompaniment for your favorite soup or stew. What truly sets these No Knead Crusty Rolls apart is the simplicity of their creation, proving that incredible flavor and perfect texture don’t require advanced culinary skills. Get ready to impress yourself and your loved ones with the sheer delight of homemade bread, made incredibly accessible.
Ingredients:
- 500 grams bread flour (all-purpose flour can be used in a pinch, but bread flour yields a chewier texture)
- 10 grams fine sea salt (adjust slightly to your preference, but don’t skimp on salt as it’s crucial for flavor and dough structure)
- 3 grams active dry yeast (a small amount is key for the long, slow fermentation that develops flavor)
- 350-375 ml lukewarm water (around 105-115°F or 40-46°C. The exact amount might vary slightly depending on your flour and humidity)
- Optional: Cornmeal or semolina for dusting
Preparing the Dough
Step 1: Mixing the Dough
In a large mixing bowl, combine the bread flour, fine sea salt, and active dry yeast. Whisk these dry ingredients together thoroughly to ensure the yeast and salt are evenly distributed throughout the flour. This step is important to prevent pockets of salt or undissolved yeast in your final bread. Next, pour in the lukewarm water. Use a wooden spoon or a sturdy spatula to mix everything together until a shaggy, wet dough forms. It will look quite sticky and unmanageable at this stage, and that’s exactly what we want. Don’t be tempted to add more flour at this point, as the dough will firm up as it rests and develops. The goal here is to simply hydrate the flour. Ensure there are no dry pockets of flour remaining at the bottom of the bowl. Cover the bowl tightly with plastic wrap or a damp kitchen towel. Let it rest at room temperature for 12 to 18 hours. This long, slow fermentation is the magic behind these no-knead rolls. It allows the gluten to develop naturally without kneading, resulting in a fantastic flavor and airy crum extractb. You’ll notice the dough will become significantly more bubbly and have increased in volume during this time.
Step 2: Shaping the Rolls
After the long fermentation, your dough should be bubbly and have risen considerably. Lightly flour a clean work surface. Gently scrape the dough out of the bowl onto the floured surface. Be careful not to deflate it too much; we want to preserve those precious air bubbles. You can either divide the dough into 8-10 equal portions for individual rolls or leave it as one large piece if you prefer a single large crusty loaf to tear apart. If making individual rolls, lightly flour your hands and gently shape each portion into a round ball. You can do this by gathering the edges of the dough underneath to create tension on the surface, forming a smooth, taut ball. Avoid aggressively working or kneading the dough; just a gentle shaping is needed. If you prefer a more rustic look, you can also simply tear off pieces of dough.
Step 3: Second Rise (Proofing)
Prepare a baking sheet by lining it with parchment paper or lightly dusting it with cornmeal or semolina. This will prevent the rolls from sticking and give them a nice crusty base. Place your shaped rolls onto the prepared baking sheet, leaving a little space between each one. Cover the rolls loosely with plastic wrap or a clean kitchen towel. Let them rise again at room temperature for another 30 to 60 minutes, or until they appear noticeably puffy and have increased in volume by about 50%. They won’t double in size like traditional yeasted doughs, but they should look airy and ready for baking. While the rolls are proofing, preheat your oven to 450°F (230°C). It’s crucial to have a very hot oven for these rolls to achieve that signature crust.
Baking the Rolls
Step 4: Baking with Steam
This is a critical step for achieving a truly crusty exterior. You have a couple of options for creating steam in your oven. The most effective method is to place a shallow metal pan (like a broiler pan or an old baking pan) on the bottom rack of your oven while it preheats. Once your oven is fully preheated and your rolls are ready to bake, carefully remove the hot pan from the oven. Then, using oven mitts, pour about 1 cup of hot water into the preheated pan and immediately slide the baking sheet with your rolls onto the middle rack of the oven. Quickly close the oven door to trap the steam. Alternatively, you can spritz the oven walls generously with water from a spray bottle just before you put the rolls in, and then again a few minutes later. The steam helps the crust to expand slowly and thinly, creating that desirable crackly texture.
Step 5: Achieving the Perfect Crust
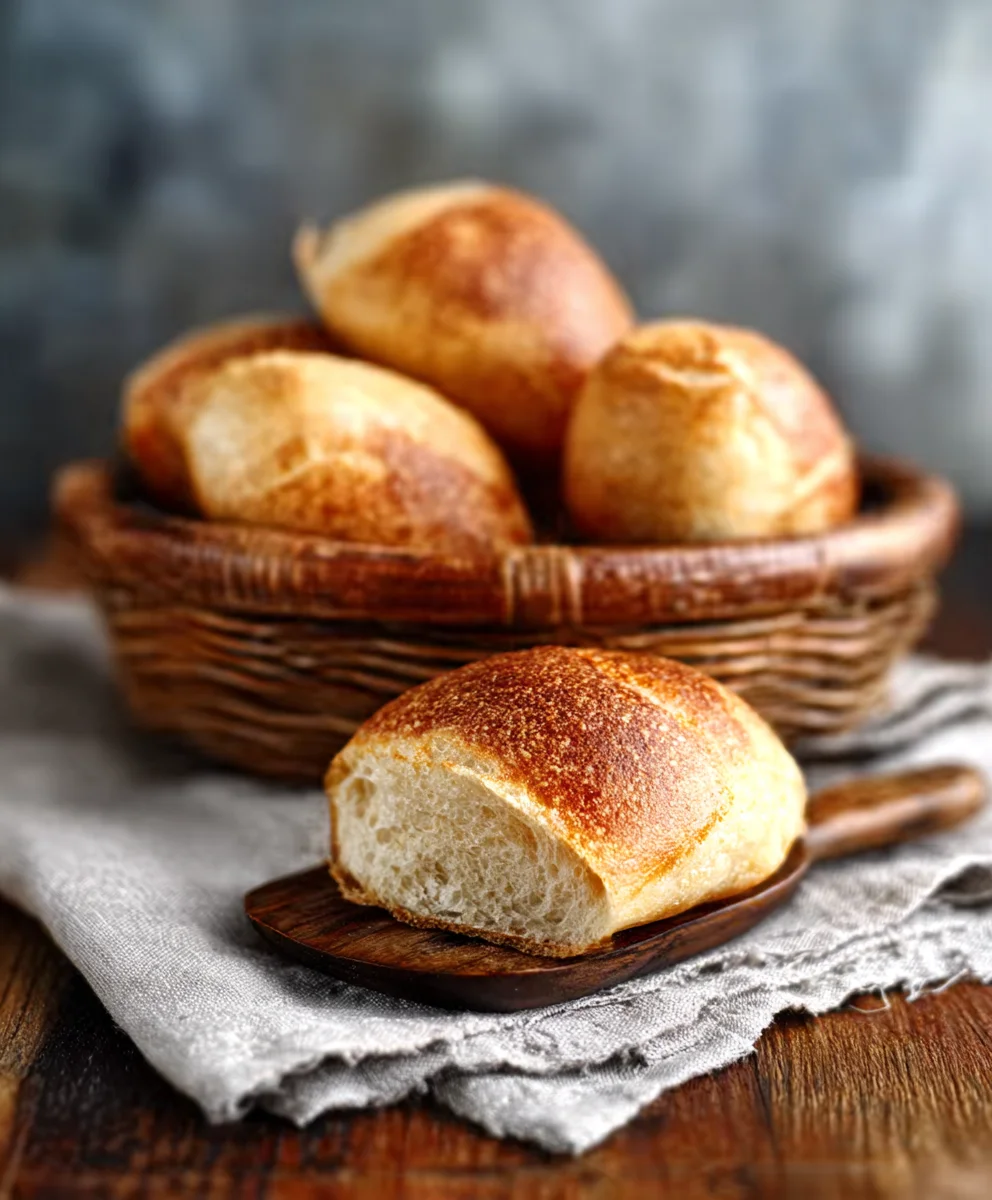
Bake the rolls for 20 to 25 minutes. After about 15 minutes, carefully remove the steam pan from the oven (if you used that method) or open the oven door for a few seconds to allow excess steam to escape. This will help the crust to dry out and become crispy. Continue baking until the rolls are a deep golden brown and sound hollow when tapped on the bottom. The internal temperature should reach around 200-210°F (93-99°C) if you have an instant-read thermometer. Once baked, remove the rolls from the oven and transfer them immediately to a wire rack to cool. This prevents the bottoms from becoming soggy. Allow them to cool for at least 10-15 minutes before slicing and enjoying. The crust will continue to crisp up as they cool.
Conclusion:
And there you have it – your guide to creating the most delightful No Knead Crusty Rolls! We’ve walked through the simple steps to achieve those wonderfully airy interiors and perfectly crisp exteriors that are sure to impress. This recipe is designed for ease and deliciousness, proving that achieving bakery-quality bread at home is entirely within reach, even with minimal effort. Whether you’re a seasoned baker or a complete novice, these No Knead Crusty Rolls are a fantastic addition to your repertoire.
These versatile rolls are brilliant served warm alongside a hearty soup or stew, as the perfect accompaniment to a cheese board, or simply buttered for a delightful snack. Don’t be afraid to experiment! You can incorporate herbs like rosemary or thyme into the dough, or even add a sprinkle of sesame or poppy seeds to the top before baking for an extra layer of flavor and texture. The beauty of these No Knead Crusty Rolls lies in their simplicity and adaptability. So, go ahead, give them a try, and enjoy the satisfying aroma and taste of freshly baked bread!
Frequently Asked Questions:
Why are my No Knead Crusty Rolls not crusty enough?
Ensure your oven is sufficiently preheated, and consider using a baking stone or an oven-safe Dutch oven. The steam created during the initial baking phase is crucial for developing a good crust. If your oven doesn’t hold steam well, try placing a shallow pan of water on the rack below your rolls for the first 15-20 minutes of baking.
Can I make the dough ahead of time?
Absolutely! The beauty of no-knead dough is its long fermentation. You can refrigerate the dough for up to 24-72 hours after the initial mixing and folding. This extended fermentation develops deeper flavor. When you’re ready to bake, simply take the dough out, shape it, let it proof for a bit, and then bake as usual.
What kind of flour is best for No Knead Crusty Rolls?
A good quality bread flour is ideal for these rolls as it has a higher protein content, which helps develop gluten structure for a better rise and chewier texture. All-purpose flour can also work, but you might find the texture slightly less robust. For an even more rustic flavor and texture, you can substitute a portion of the bread flour with whole wheat flour.
Easy No Knead Crusty Rolls – Delicious Homemade Bread
Delicious homemade crusty rolls made with a simple no-knead method, perfect for a crispy exterior and airy crumb.
Ingredients
-
500 grams bread flour
-
10 grams fine sea salt
-
3 grams active dry yeast
-
350-375 ml lukewarm water
-
Cornmeal or semolina for dusting (optional)
Instructions
-
Step 1
Combine bread flour, salt, and yeast in a large bowl. Whisk to distribute evenly. Add lukewarm water and mix with a wooden spoon or spatula until a shaggy, wet dough forms. Ensure no dry flour pockets remain. Cover tightly and let rest at room temperature for 12-18 hours for slow fermentation. -
Step 2
Lightly flour a clean surface. Gently scrape the bubbly, risen dough out of the bowl. Divide into 8-10 portions for rolls or leave as a single loaf. Lightly flour hands and gently shape each portion into a round ball by gathering edges underneath. Avoid aggressive kneading. -
Step 3
Prepare a baking sheet with parchment paper or dust with cornmeal/semolina. Place shaped rolls on the sheet, leaving space. Cover loosely and let rise at room temperature for 30-60 minutes, until noticeably puffy (about 50% increase in volume). Preheat oven to 450°F (230°C). -
Step 4
To create steam, place a shallow metal pan on the bottom oven rack during preheating. When rolls are ready, carefully remove the hot pan, pour about 1 cup of hot water into it, and immediately place the baking sheet with rolls on the middle rack. Close the oven door quickly to trap steam. -
Step 5
Bake for 20-25 minutes. After 15 minutes, remove the steam pan or briefly open the oven door to release steam. Continue baking until rolls are deep golden brown and sound hollow when tapped. Internal temperature should be 200-210°F (93-99°C). Transfer immediately to a wire rack to cool for at least 10-15 minutes.
Important Information
Nutrition Facts (Per Serving)
It is important to consider this information as approximate and not to use it as definitive health advice.
Allergy Information
Please check ingredients for potential allergens and consult a health professional if in doubt.