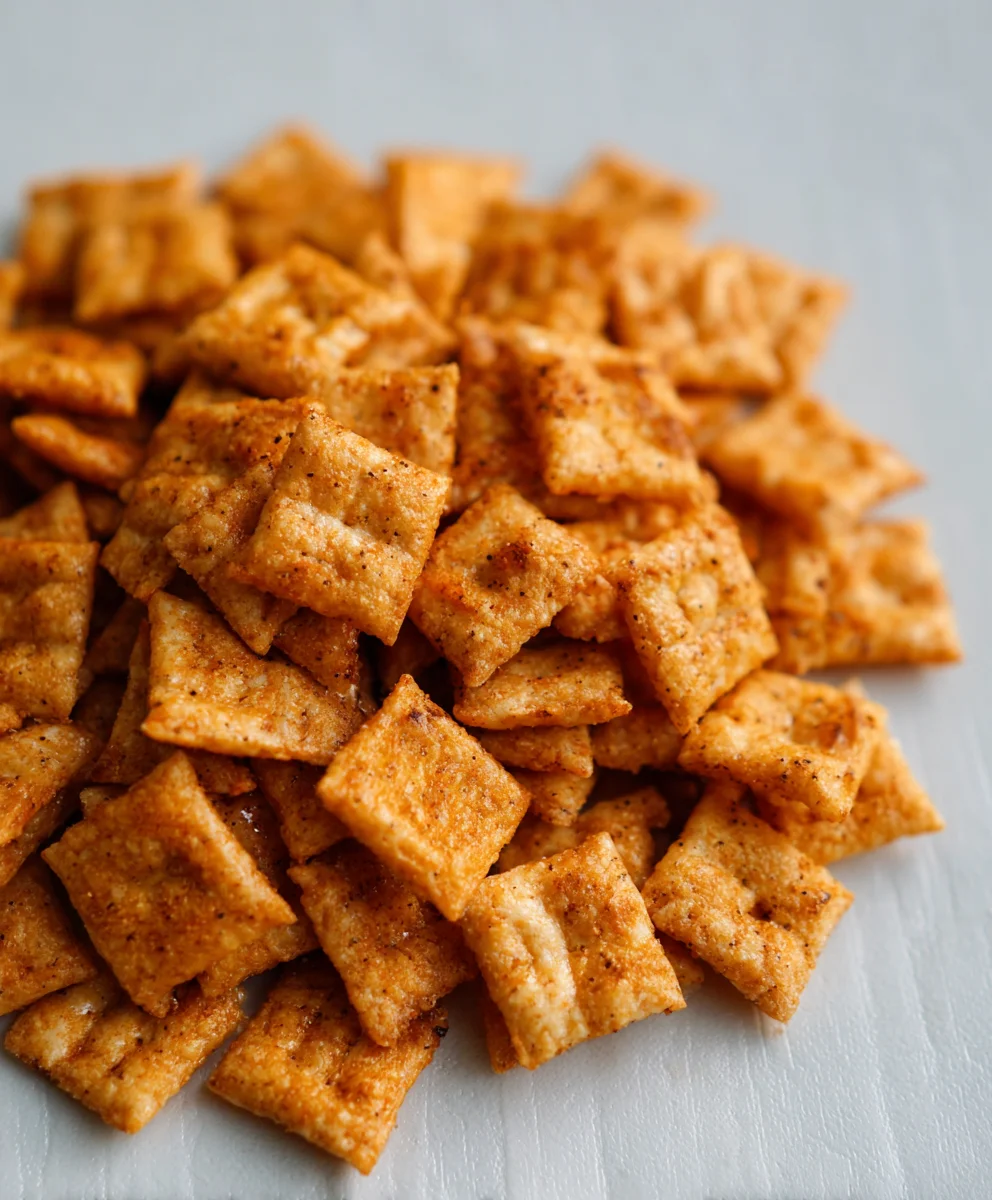
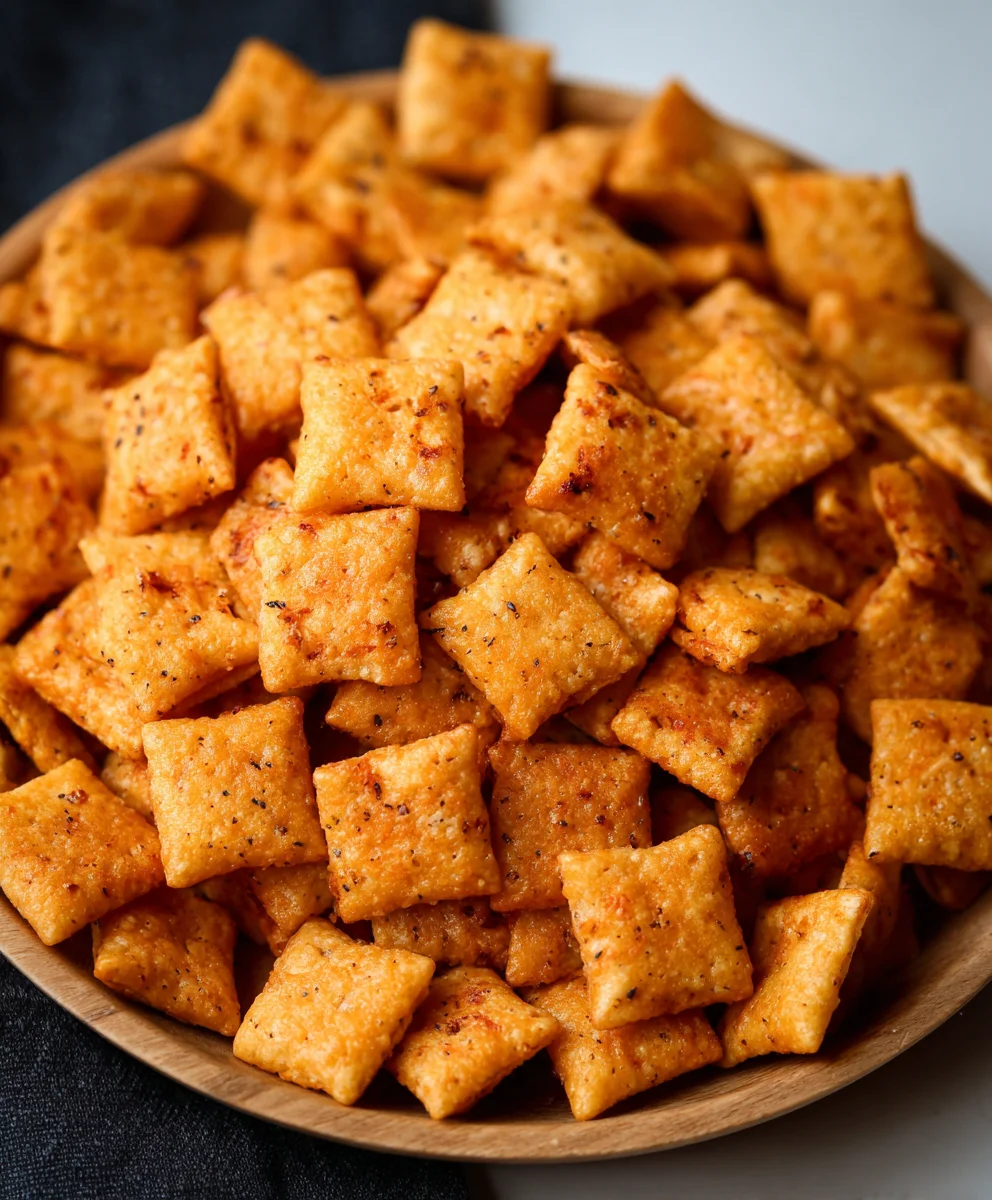
Homemade Sourdough Cheez-Its – Crispy Delicious Snack
Sourdough Cheez Its Recipe, oh how you’ve captured our hearts and our snack drawers! There’s something undeniably magical about taking the tang of a vibrant sourdough starter and transforming it into a crispy, cheesy, utterly addictive cracker. Forget those store-bought imitations; this Sourdough Cheez Its Recipe elevates a beloved snack into a homemade masterpiece that’s both profoundly satisfying and surprisingly simple to achieve. We love them because they hit that perfect spot between savory and sharp, offering a satisfying crunch that’s incredibly moreish. What truly sets this Sourdough Cheez Its Recipe apart is the depth of flavor imparted by the fermented dough. It’s not just cheese; it’s cheese with character, with a subtle complexity that makes each bite a delightful discovery. Get ready to impress yourself and everyone around you with these exceptional, artisanal crackers that are destined to become a pantry staple.
Ingredients:
- 226 grams cheddar cheese, freshly shredded (about 8 ounces)
- 100 grams sourdough discard (approximately 1/3 cup)
- 42 grams unsalted butter, cold and cubed (3 Tablespoons)
- 140 grams all-purpose flour (about 1 cup)
- 1 gram garlic powder (1/4 teaspoon)
- 1 gram onion powder (1/4 teaspoon)
- 3 grams salt (1/2 teaspoon)
- Flaky salt, for sprinkling (optional)
Making the Dough
Step 1: Combine Dry Ingredients
In a medium-sized bowl, whisk together the all-purpose flour, garlic powder, onion powder, and salt. This initial step ensures that your seasonings are evenly distributed throughout the dough, which is crucial for consistent flavor in every bite. By whisking them with the flour, you’re creating a uniformly seasoned base for your cheesy crackers. Make sure there are no clumps of flour or spices.
Step 2: Incorporate Cold Butter
Add the cold, cubed unsalted butter to the dry ingredients. Using cold butter is a non-negotiable for achieving a flaky and tender texture in your crackers. The cold butter pieces will create pockets of steam as they bake, resulting in a delightful crispness. You can use a pastry blender, a fork, or even your fingertips to cut the butter into the flour mixture until it resembles coarse crum extractbs. You’re looking for pieces of butter about the size of small peas. Avoid overworking the dough at this stage; the goal is to have distinct butter pieces, not a uniform paste.
Step 3: Add Sourdough Discard and Cheese
Now, it’s time to introduce the flavor powerhouses: the sourdough discard and the shredded cheddar cheese. Add the sourdough discard to the bowl. The sourdough discard will not only add a subtle tang but also contribute to the chegrape juicess and overall complexity of the crackers. Next, add the freshly shredded cheddar cheese. I highly recommend shredding your cheese yourself rather than using pre-shredded. Pre-shredded cheese often contains anti-caking agents that can affect the texture and meltability of your crackers. Gently mix these ingredients into the flour and butter mixture. You can use a spatula or a wooden spoon for this.
Step 4: Form the Dough into a Disc
Continue mixing until a shaggy dough begin extracts to form. At this point, you might need to use your hands to bring the dough together. Be gentle and avoid kneading. The less you work the dough, the more tender your crackers will be. Once the dough mostly comes together, press it into a flat disc. This disc shape will make it easier to roll out later. If the dough seems too drum extractand crumbly, you can add a tiny splash of water (no more than a teaspoon at a time) until it just starts to hold together. Conversely, if it feels too wet, you can add a touch more flour. Wrap the disc tightly in plastic wrap and refrigerate for at least 30 minutes. This chilling period is essential for several reasons: it solidifies the butter, making it easier to roll the dough thinly, and it allows the gluten to relax, preventing shrinkage during baking and ensuring a tender cracker.
Rolling and Baking
Step 5: Roll Out the Dough and Cut Crackers
Preheat your oven to 375°F (190°C). Line two baking sheets with parchment paper. This prevents sticking and makes for easy cleanup. Take your chilled dough disc out of the refrigerator. On a lightly floured surface, roll out the dough as thinly as possible, aiming for about 1/16 to 1/8 inch thick. The thinner you roll the dough, the crispier your crackers will be. If the dough becomes difficult to roll or springs back, let it rest for a few minutes at room temperature. Once rolled out, you can cut the dough into your desired shapes. A pizza cutter or a knife works well for creating squares or rectangles. For a more authentic Cheez-It look, you can use a small square cookie cutter. Don’t worry about making them perfectly uniform; a little variation adds to the homemade charm.
Step 6: Score and Season
Before transferring the cut dough pieces to your prepared baking sheets, gently score them with a fork or a toothpick. This allows steam to escape during baking, preventing puffing and ensuring an even bake. If you desire, sprinkle a bit of flaky salt over the top of the crackers for an extra touch of sparkle and crunch. This is entirely optional, but it does add a lovely finishing touch. Arrange the cut crackers on the baking sheets, leaving a little space between them. They don’t spread much, but a little breathing room helps with even browning.
Step 7: Bake to Golden Perfection
Bake the crackers for 12-18 minutes, or until they are golden brown and crisp. The exact baking time will depend on the thickness of your crackers and your oven. Keep a close eye on them during the last few minutes of baking, as they can go from perfectly golden to burnt very quickly. If you notice some crackers browning faster than others, you can rotate the baking sheets halfway through the baking time. Once baked, remove them from the oven and let them cool completely on the baking sheets. They will continue to crisp up as they cool. Once cooled, you can break them apart if they’ve baked into connected pieces. Store your delicious homemade Sourdough Cheez Its in an airtight container at room temperature for up to a week. Enjoy the satisfying crunch and cheesy goodness!
Conclusion:
And there you have it – your very own batch of delicious, homemade Sourdough Cheez Its Recipe! This recipe offers a delightful tang from the sourdough starter, combined with the irresistible cheesy goodness you expect. They’re incredibly satisfying to make and even more so to eat, perfect for a satisfying snack or a unique addition to your next appetizer spread.
I love serving these warm and fresh, but they also keep surprisingly well for a few days, making them a fantastic make-ahead treat. They’re perfect alongside a crisp salad, as a crunchy topping for a hearty soup, or simply enjoyed on their own with a cold beverage. Don’t be afraid to experiment with different cheeses or spices – the possibilities are truly endless!
I truly hope you enjoy making and sharing these Sourdough Cheez Its Recipe. They’re a labor of love that always pays off with incredible flavor and a wonderful sense of accomplishment. Happy baking!
Frequently Asked Questions:
Can I use a different type of cheese?
Absolutely! While cheddar is classic, feel free to experiment with other hard, flavorful cheeses like Gruyère, Parmesan, or even a spicy Pepper Jack for a kick. Just ensure the cheese is finely grated for optimal melting and distribution.
How long will the sourdough starter need to be active for this recipe?
You’ll need an active, bubbly sourdough starter that has recently been fed and has doubled in size. This ensures it has the necessary yeast activity to contribute to the texture and flavor of your Sourdough Cheez Its Recipe.
My dough is too sticky, what should I do?
If your dough is too sticky, you can try adding a little more flour, a tablespoon at a time, until it’s manageable. Conversely, if it’s too dry and crum extractbly, add a tiny bit of water or melted butter. The exact consistency can depend on the hydration of your sourdough starter.
Homemade Sourdough Cheez-Its – Crispy Delicious Snack
Crispy and flavorful homemade crackers inspired by Cheez-Its, made with sourdough discard for an extra tangy kick.
Ingredients
-
226 grams cheddar cheese, freshly shredded (about 8 ounces)
-
100 grams sourdough discard (approximately 1/3 cup)
-
42 grams unsalted butter, cold and cubed (3 Tablespoons)
-
140 grams all-purpose flour (about 1 cup)
-
1 gram garlic powder (1/4 teaspoon)
-
1 gram onion powder (1/4 teaspoon)
-
3 grams salt (1/2 teaspoon)
-
Flaky salt, for sprinkling (optional)
Instructions
-
Step 1
Combine dry ingredients: In a medium-sized bowl, whisk together the all-purpose flour, garlic powder, onion powder, and salt. Ensure seasonings are evenly distributed. -
Step 2
Incorporate cold butter: Add cold, cubed unsalted butter to the dry ingredients. Use a pastry blender, fork, or fingertips to cut the butter into the flour mixture until it resembles coarse crumbs with butter pieces about the size of small peas. Avoid overworking. -
Step 3
Add sourdough discard and cheese: Gently mix in the sourdough discard and freshly shredded cheddar cheese until a shaggy dough begins to form. Use your hands to bring the dough together gently, without kneading. -
Step 4
Form the dough into a disc: Press the dough into a flat disc, wrap tightly in plastic wrap, and refrigerate for at least 30 minutes. This chilling period is essential for easier rolling and tender crackers. -
Step 5
Roll out the dough and cut crackers: Preheat oven to 375°F (190°C). Line two baking sheets with parchment paper. On a lightly floured surface, roll out the dough as thinly as possible (about 1/16 to 1/8 inch thick). Cut into desired shapes using a pizza cutter, knife, or small square cookie cutter. -
Step 6
Score and season: Gently score the cut dough pieces with a fork or toothpick. If desired, sprinkle with flaky salt. Arrange on prepared baking sheets, leaving a little space between them. -
Step 7
Bake to golden perfection: Bake for 12-18 minutes, or until golden brown and crisp. Watch closely to prevent burning. Let cool completely on baking sheets to continue crisping. Store in an airtight container at room temperature for up to a week.
Important Information
Nutrition Facts (Per Serving)
It is important to consider this information as approximate and not to use it as definitive health advice.
Allergy Information
Please check ingredients for potential allergens and consult a health professional if in doubt.