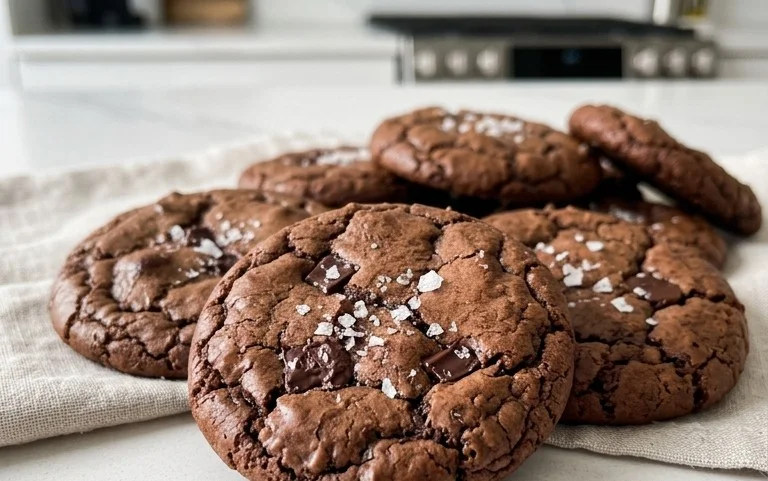
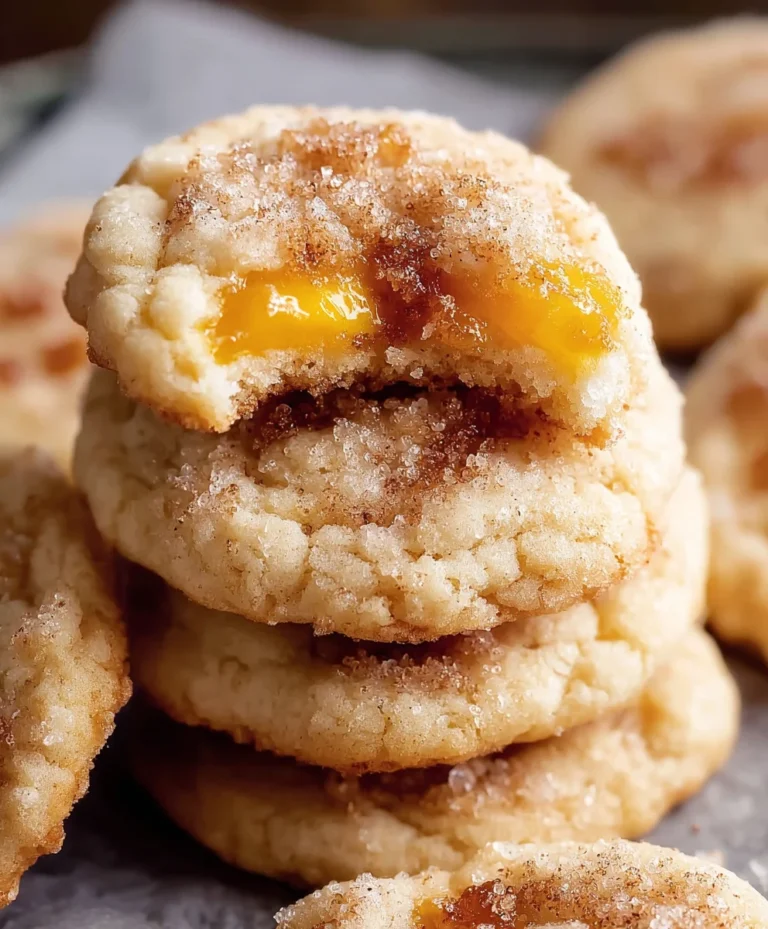
Nutella Thumbprint Cookies-Easy Delicious Recipe
Nutella Thumbprint Cookies are a delightful little bite of heaven, and if you’ve ever had the pleasure of biting into one, you already know exactly why they’re so beloved. These aren’t just any cookies; they’re a perfect marriage of buttery, tender shortbread and the irresistibly smooth, hazelnut-chocolate magic of Nutella. What makes these particularly special is the way the crisp edges of the cookie give way to the molten, gooey center, creating a symphony of textures and flavors that keeps you reaching for more. They evoke a sense of cozy nostalgia, reminding us of childhood afternoons and simple pleasures, yet their sophisticated taste makes them perfect for any occasion, from holiday gatherings to an afternoon treat with a cup of tea. Get ready to impress yourself and everyone you share them with!
Ingredients:
- 2¼ cups all-purpose flour (282g)
- 1 tablespoon cornstarch (8g)
- 2 teaspoons baking powder
- ½ teaspoon baking soda
- ½ teaspoon fine sea salt
- ⅓ cup hazelnuts, finely chopped (50g)
- ½ cup unsalted butter, room temperature (113g)
- 8 oz cream cheese, room temperature (226g)
- 1½ cups granulated sugar (300g)
- 1 whole egg, room temperature
- 1 egg yolk, room temperature
- 2 teaspoons vanilla bean paste or extract
- ⅓ cup hazelnuts, finely chopped (50g)
- 1 tablespoon granulated sugar
- Nutella, for filling centers
Cookie Dough Preparation
The foundation of our delicious Nutella Thumbprint Cookies lies in a perfectly balanced dough that’s both tender and slightly crisp. To begin extract, let’s get our dry ingredients ready. In a medium-sized bowl, whisk together the all-purpose flour, cornstarch, baking powder, baking soda, and fine sea salt. The cornstarch is our secret weapon here; it helps create a wonderfully tender cookie texture by absorbing moisture and preventing gluten development, resulting in a cookie that melts in your mouth. Make sure these are thoroughly combined to ensure even distribution throughout the dough.
In a separate, larger bowl, we’ll cream together our softened butter and cream cheese. It’s crucial that both the butter and cream cheese are at room temperature for this step. This allows them to emulsify properly, creating a light and airy base for the cookie dough. Beat them together with an electric mixer on medium speed until the mixture is smooth and well combined, with no lumps of cream cheese remaining. This process can take about 2 to 3 minutes. Gradually add the granulated sugar to this creamy mixture, continuing to beat until the entire mixture is pnon-alcoholic ale and fluffy. This creaming process incorporates air into the dough, which contributes to the cookie’s texture and helps them rise beautifully.
Next, we’ll incorporate the wet ingredients. Add the whole egg and the egg yolk, one at a time, beating well after each addition until fully incorporated. The egg yolk adds richness and helps bind the cookie dough together, contributing to a chewier texture. Follow this with the vanilla bean paste or extract. Using vanilla bean paste will give you those lovely little black flecks and a more intense vanilla flavor, but good quality vanilla extract works beautifully too. Beat until everything is just combined.
Now it’s time to combine the wet and dry ingredients. Gradually add the dry ingredient mixture to the wet ingredients, mixing on low speed until just combined. Be careful not to overmix at this stage; overmixing can develop the gluten in the flour, leading to tough cookies. We want a soft, pliable dough. Once the flour is almost fully incorporated, gently fold in the ⅓ cup of finely chopped hazelnuts. These toasted hazelnuts add a wonderful nutty crunch and a complementary flavor to the Nutella. If you like, you can lightly toast your hazelnuts before chopping them to deepen their flavor; simply spread them on a baking sheet and toast in a 350°F (175°C) oven for about 8-10 minutes until fragrant, then let them cool completely before chopping.
Forming and Baking the Cookies
Once your dough has come together, it’s time to chill it. This is an important step for easy handling and to prevent the cookies from spreading too much during baking. Cover the bowl with plastic wrap and refrigerate for at least 1 hour, or until firm enough to roll. Chilling the dough solidifies the butter and cream cheese, making it much easier to shape and ensuring your cookies hold their thumbprint indentation.
When you’re ready to bake, preheat your oven to 350°F (175°C). Line baking sheets with parchment paper. Parchment paper is essential as it prevents sticking and ensures even baking. Remove the chilled dough from the refrigerator. Scoop out rounded tablespoons of dough and roll them into balls. Place these dough balls about 2 inches apart on your prepared baking sheets.
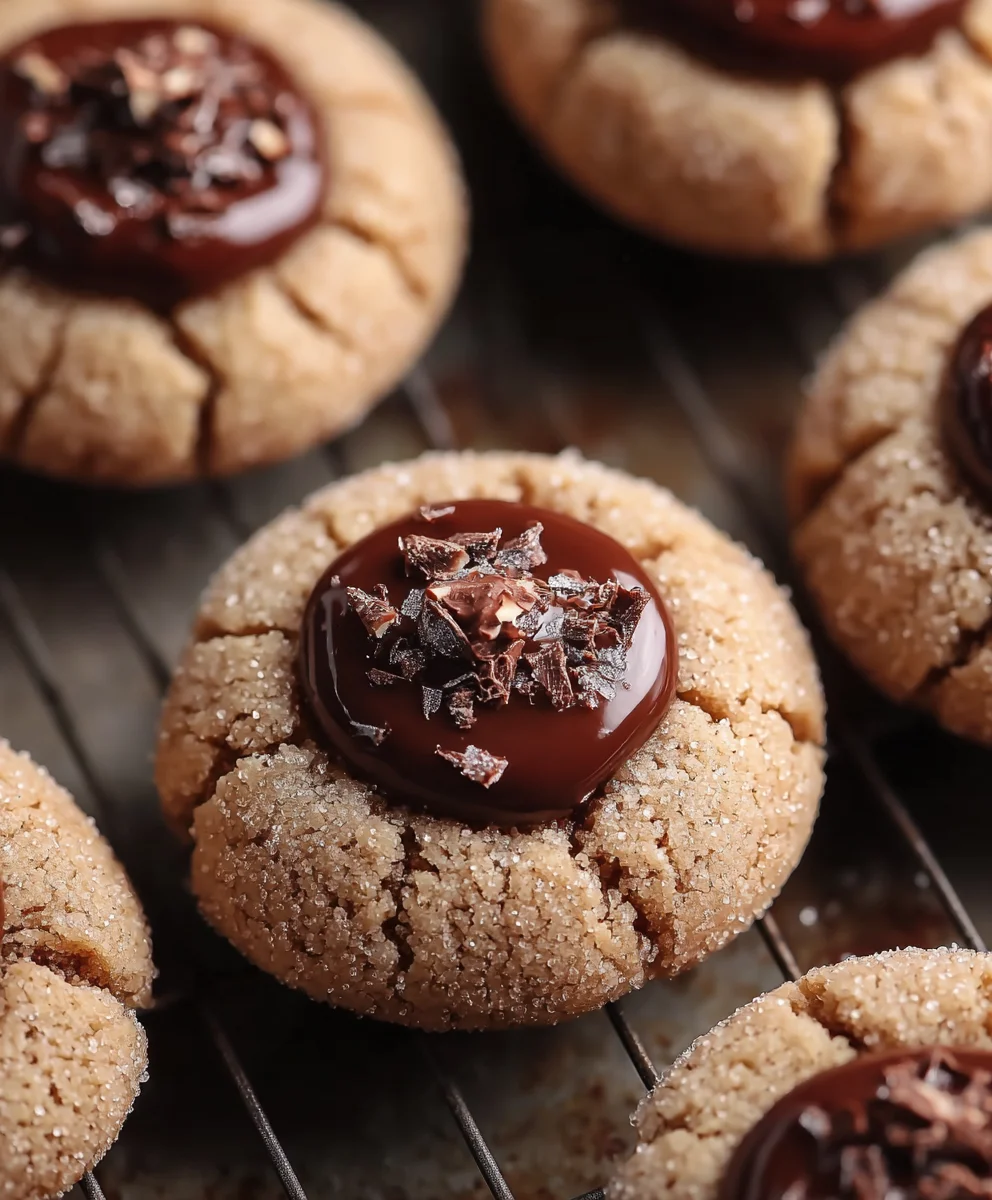
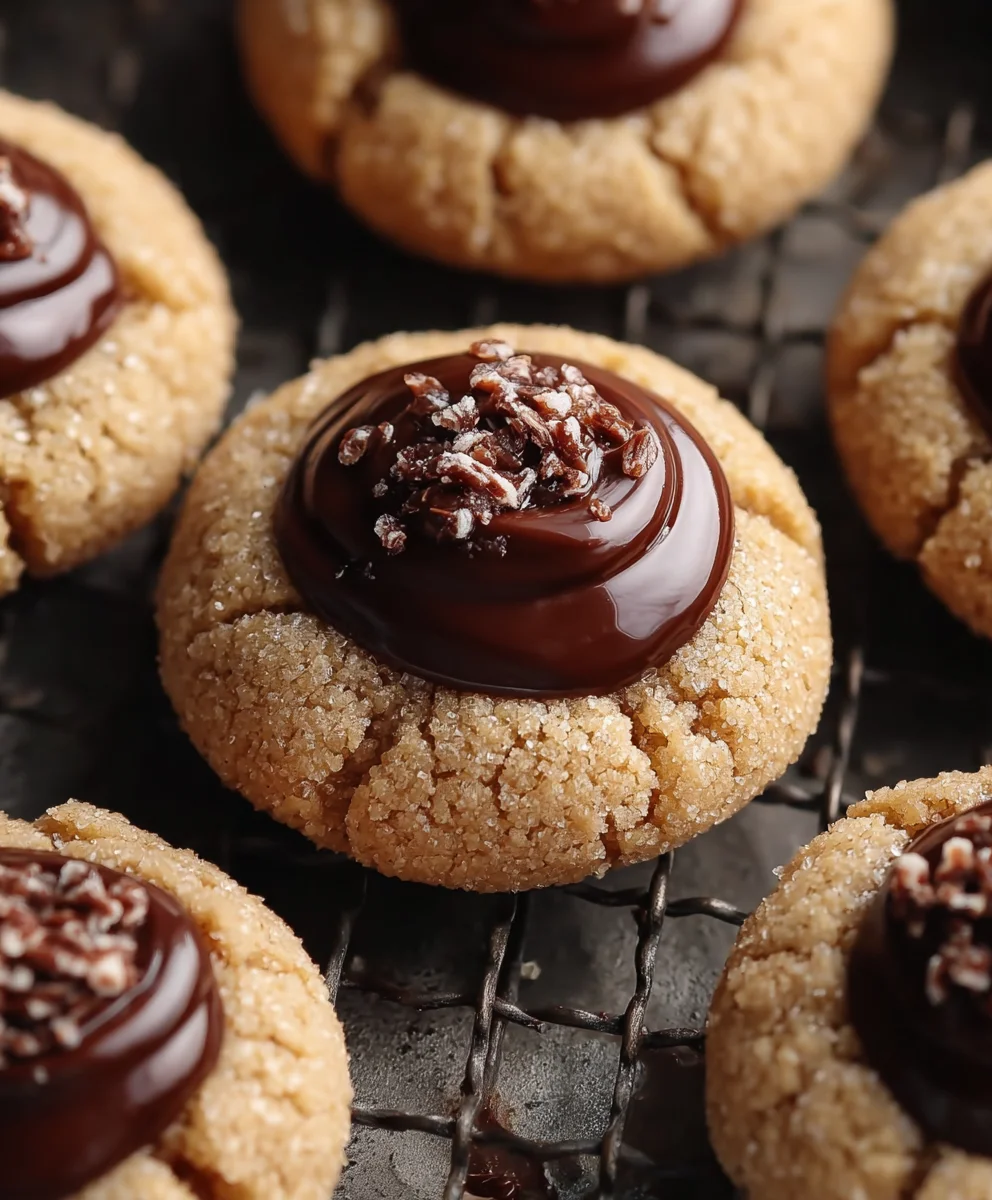
Now for the signature thumbprint! Using your thumb or the back of a small spoon, gently press an indentation into the center of each dough ball. Make sure the indentation is deep enough to hold a good amount of Nutella, but not so deep that you break through the cookie. We want a nice well to cradle our delicious filling.
Before we fill them, let’s add a little something extra to the tops. In a small bowl, combine the remaining ⅓ cup of finely chopped hazelnuts with the 1 tablespoon of granulated sugar. This mixture will be sprinkled around the indentation of each cookie. This adds an extra layer of texture and flavor, and a touch of elegance. Carefully sprinkle a small amount of this hazelnut-sugar mixture around the rim of each thumbprint. This step is optional but highly recommended for an enhanced flavor and visual appeal.
Now, bake the cookies for 12-15 minutes, or until the edges are lightly golden brown and the centers are set. The exact baking time will depend on your oven. Keep a close eye on them as they bake; we want them cooked through but still soft in the center. Once baked, remove the baking sheets from the oven and let the cookies cool on the sheets for about 5 minutes. This allows them to firm up before you move them. Then, carefully transfer the cookies to a wire rack to cool completely. While they are still warm, but not piping hot, gently press the indentations down again if they have puffed up slightly during baking. This ensures they are ready to be filled.
Filling and Finishing
Once your beautiful Nutella Thumbprint Cookies have cooled completely, it’s time for the best part – filling them! Spoon or pipe a generous amount of Nutella into the indentation of each cookie. You can use a spoon for a more rustic look, or a piping bag fitted with a round tip for a neater, more professional finish. Don’t be shy; a good amount of Nutella is key to these cookies!
Conclusion:
There you have it! Your guide to creating delightful Nutella Thumbprint Cookies is complete. These cookies are a perfect blend of buttery, crum extractbly goodness with the irresistible sweetness of Nutella. They are surprisingly easy to make, making them an ideal treat for bakers of all skill levels. Imagin extracte pulling a fresh batch of these warm, gooey cookies from your oven – pure bliss! Whether you’re looking for a holiday treat, a bake snon-alcoholic ale showstopper, or just a delightful afternoon pick-me-up, these Nutella Thumbprint Cookies are sure to impress.
For serving, these cookies are wonderful on their own with a glass of cold milk or a hot cup of coffee. They also pair beautifully with ice cream for a decadent dessert. Don’t be afraid to get creative with variations! Consider adding a sprinkle of sea salt on top before baking to enhance the chocolatey hazelnut flavor, or dip the cooled cookies halfway into melted dark chocolate for an extra layer of indulgence. You could also mix in a few mini chocolate chips into the dough for added texture. I encourage you to give these Nutella Thumbprint Cookies a try – you won’t regret it!
Frequently Asked Questions:
Can I make these Nutella Thumbprint Cookies ahead of time?
Absolutely! The dough can be made and chilled for up to 3 days. You can also freeze the formed cookie dough balls for up to 3 months. Simply bake them from frozen, adding a few extra minutes to the baking time.
My Nutella filling sank too much. What went wrong?
This can happen if the dough is too soft or if the indentations weren’t deep enough. Ensure your dough is well chilled before forming and pressing. When making the thumbprint, press down firmly but gently, creating a good well. You can also spoon in a little extra Nutella after the first bake, then bake for another minute or two until it’s slightly gooey.
Nutella Thumbprint Cookies – Easy Delicious Recipe
Tender and slightly crisp cookies with a creamy Nutella filling and a hint of hazelnut.
Ingredients
-
2¼ cups all-purpose flour (282g)
-
1 tablespoon cornstarch (8g)
-
2 teaspoons baking powder
-
½ teaspoon baking soda
-
½ teaspoon fine sea salt
-
⅓ cup hazelnuts, finely chopped (50g)
-
½ cup unsalted butter, room temperature (113g)
-
8 oz cream cheese, room temperature (226g)
-
1½ cups granulated sugar (300g)
-
1 whole egg, room temperature
-
1 egg yolk, room temperature
-
2 teaspoons vanilla bean paste or extract
-
⅓ cup hazelnuts, finely chopped (50g)
-
1 tablespoon granulated sugar
-
Nutella, for filling centers
Instructions
-
Step 1
In a medium bowl, whisk together flour, cornstarch, baking powder, baking soda, and salt. In a larger bowl, cream softened butter and cream cheese until smooth. Gradually add granulated sugar and beat until light and fluffy. Add the whole egg and egg yolk one at a time, beating well after each. Stir in vanilla bean paste or extract. -
Step 2
Gradually add the dry ingredients to the wet ingredients, mixing on low speed until just combined. Do not overmix. Gently fold in ⅓ cup of finely chopped hazelnuts. -
Step 3
Cover the dough and refrigerate for at least 1 hour, or until firm enough to roll. Preheat oven to 350°F (175°C) and line baking sheets with parchment paper. -
Step 4
Scoop rounded tablespoons of dough, roll into balls, and place on baking sheets. Create a thumbprint indentation in the center of each cookie. -
Step 5
In a small bowl, combine the remaining ⅓ cup of finely chopped hazelnuts with 1 tablespoon of granulated sugar. Sprinkle this mixture around the rim of each thumbprint. Bake for 12-15 minutes, or until edges are lightly golden brown and centers are set. Let cool on sheets for 5 minutes, then transfer to a wire rack to cool completely. Gently press indentations again if needed. -
Step 6
Once completely cooled, spoon or pipe Nutella into the center of each cookie.
Important Information
Nutrition Facts (Per Serving)
It is important to consider this information as approximate and not to use it as definitive health advice.
Allergy Information
Please check ingredients for potential allergens and consult a health professional if in doubt.