Tri Tip Recipe Two Delicious Ways – Easy Prep
Tri Tip is a cut of beef that has captured the hearts (and stomachs!) of grill masters and home cooks alike, and for good reason. This triangular wonder, once a humble underdog, has ascended to star status on the barbecue circuit. What’s the secret to its widespread adoration? It’s a trifecta of tender texture, rich beefy flavor, and incredible versatility. The inherent marbling within the tri tip lends itself to a juicy, melt-in-your-mouth experience that’s truly satisfying, whether you’re a seasoned pitmaster or just starting your grilling journey. It’s the kind of cut that makes people ask, “What’s that amazing aroma?” Today, we’re diving deep into the world of Tri Tip, showcasing not one, but two incredible ways to prepare this magnificent cut, ensuring you’ll be the undisputed cbeef hampion of your next cookout.
Tri Tip (2 Ways)
The tri-tip roast, a flavorful and relatively lean cut from the bottom sirloin, is a fantastic choice for a weeknight meal or a weekend gathering. Its triangular shape and generous marbling make it incredibly forgiving and adaptable to different cooking methods. Today, I’m going to show you how to prepare this delicious cut in two of my favorite ways: a classic oven-roasted and then seared finish, and a more adventurous reverse-sear grilled method. Both will yield incredibly tender and juicy results, with slightly different textural nuances. Get ready to impress yourself and your loved ones with this versatile roast!
Ingredients:
Oven-Roasted & Seared Method
This method is perfect for when you want that delicious, crispy crust without having to stand over a hot grill. It’s relatively hands-off and reliably produces fantastic results.
Preparation is Key
1. First things first, let’s get that tri-tip ready for flavor. Pat the roast completely dry with paper towels. This is a crucial step, especially for oven roasting, as it helps to create a better sear later on. Moisture is the enemy of a good crust! In a small bowl, combine the garlic salt, Lawry’s seasoning salt, kosher salt, black pepper, sugar, and garlic powder. This blend is my go-to for tri-tip, offering a savory, slightly sweet, and aromatic profile that really complements the beef. The sugar helps with caramelization, while the parsley adds a fresh herbaceous note.
2. Now, it’s time to season generously. Drizzle the olive oil all over the tri-tip roast, using your hands to coat every surface. Then, liberally rub the spice mixture all over the oiled roast, ensuring that all sides are well-covered. Don’t be shy with the seasoning; a good roast deserves a good coating. For an extra boost of flavor and a more pronounced parsley finish, you can sprinkle the fresh or dried parsley over the roast after the main seasoning rub. Let the seasoned roast sit at room temperature for about 30-60 minutes before cooking. This allows the meat to come up closer to room temperature, which promotes more even cooking.
Roasting to Perfection
3. Preheat your oven to 400 degrees Fahrenheit (200 degrees Celsius). Place the seasoned tri-tip roast on a wire rack set inside a rimmed baking sheet. The wire rack allows air to circulate around the roast, promoting even cooking and preventing the bottom from becoming steamed. Place the baking sheet in the preheated oven. We’re going to roast the tri-tip for approximately 20-25 minutes per pound for medium-rare. For a 2.5-pound roast, this would be roughly 50-65 minutes. The best way to ensure your roast is perfectly cooked is to use a meat thermometer. You’re looking for an internal temperature of 125-130 degrees Fahrenheit (52-54 degrees Celsius) for medium-rare.
The Sear for that Glorious Crust
4. Once the roast reaches your desired internal temperature in the oven, it’s time for the magic. Remove the tri-tip from the oven and carefully transfer it to a hot cast-iron skillet over medium-high heat. Add a tablespoon of your preferred cooking oil (like avocado or grapeseed oil) to the skillet if it’s not already seasoned well. Sear the tri-tip for about 1-2 minutes per side, just to develop a beautiful, deeply browned crust. This step is all about texture and visual appeal, and it makes a huge difference. You’ll hear that satisfying sizzle as the crust forms.
Rest and Slice
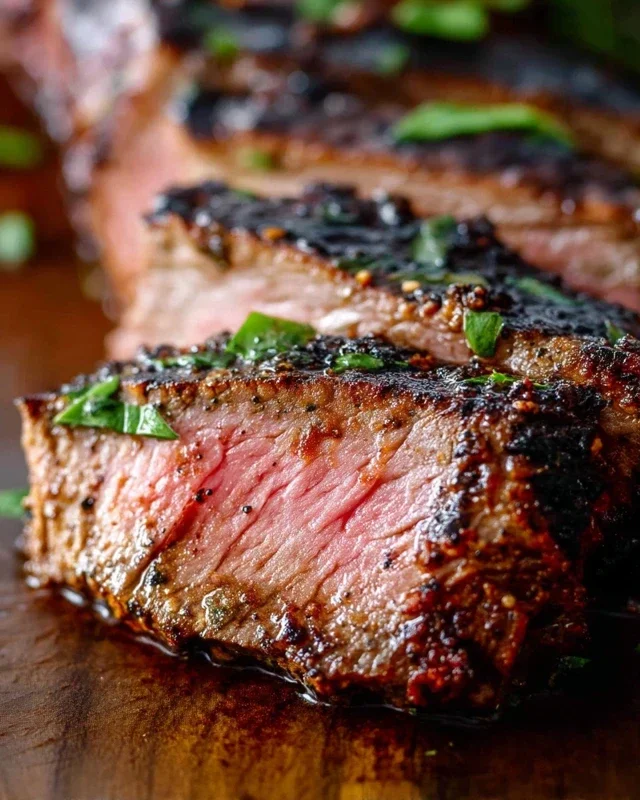
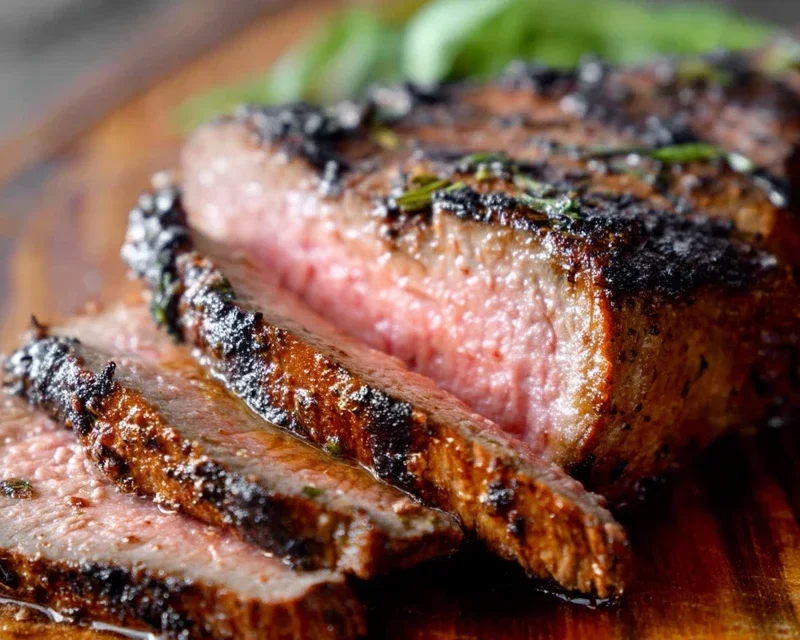
5. This is arguably the most important step in achieving a tender and juicy roast: resting. Transfer the seared tri-tip to a clean cutting board and tent it loosely with aluminum foil. Let it rest for at least 10-15 minutes before slicing. Resting allows the juices to redistribute throughout the meat. If you slice it too early, all those delicious juices will run out onto the cutting board, leaving you with a drier roast. After resting, slice the tri-tip against the grain. Look for the direction of the muscle fibers and cut perpendicular to them. This will make the meat incredibly tender and easy to chew.
Grilled Reverse-Sear Method
For those who love the smoky flavor and char that only grilling can provide, the reverse-sear is the ultimate tri-tip technique. It’s a bit more involved but the payoff is immense.
Low and Slow on the Grill
1. Prepare your grill for indirect heat. This means you’ll have coals or burners on one side, and the meat will be cooked on the cooler side. Aim for a grill temperature of around 225-250 degrees Fahrenheit (107-121 degrees Celsius). We’ll use the same seasoning rub as the oven method. Ensure your tri-tip is well-seasoned and has had time to come to room temperature, as described in the first method.
2. Place the seasoned tri-tip roast on the indirect heat side of your preheated grill. Close the lid and let it cook slowly. This initial cooking phase is all about gently bringin extractg the internal temperature up. You’ll want to monitor the temperature with a reliable meat thermometer. Cook until the internal temperature reaches about 115-120 degrees Fahrenheit (46-49 degrees Celsius). This can take anywhere from 45 minutes to over an hour, depending on your grill and the thickness of the roast. Be patient; this low and slow approach is key to tenderizing the meat before the final sear.
The Hot Sear Finish
3. Once the tri-tip has reached the target temperature on the indirect side, it’s time for the direct heat sear. Remove the roast from the grill and carefully turn up the heat on the direct side, or move your coals to one side to create a very hot zone. Once the grill grates are screaming hot, place the tri-tip directly over the heat. Sear for 1-2 minutes per side, or until a beautiful, dark crust forms. This quick, intense heat will give you that fantastic grilled char and crispy exterior. Keep a close eye on it to avoid burning.
Rest and Enjoy
4. As with the oven method, resting is crucial. Remove the tri-tip from the grill, place it on a cutting board, tent loosely with foil, and let it rest for at least 10-15 minutes. This allows the juices to settle and redistribute, ensuring maximum moisture and tenderness.
5. Slice the rested tri-tip against the grain, just as you would with the oven-roasted version. The reverse-sear method often results in a more pronounced smoky flavor and a wonderfully crisp exterior. Both methods are fantastic, and the choice often comes down to personal preference and the equipment you have on hand. Enjoy your perfectly cooked tri-tip!
Conclusion:
So there you have it – two fantastic ways to prepare a delicious Tri Tip! Whether you opt for the smoky, charred perfection of the grill or the savory, tender results from the oven, this cut of beef truly shines. Its inherent tenderness and rich flavor make it a wonderfully accessible yet impressive centerpiece for any meal. I’ve found that the versatility of Tri Tip is one of its greatest strengths, allowing for endless flavor profiles and cooking methods. Don’t be afraid to experiment and make it your own!
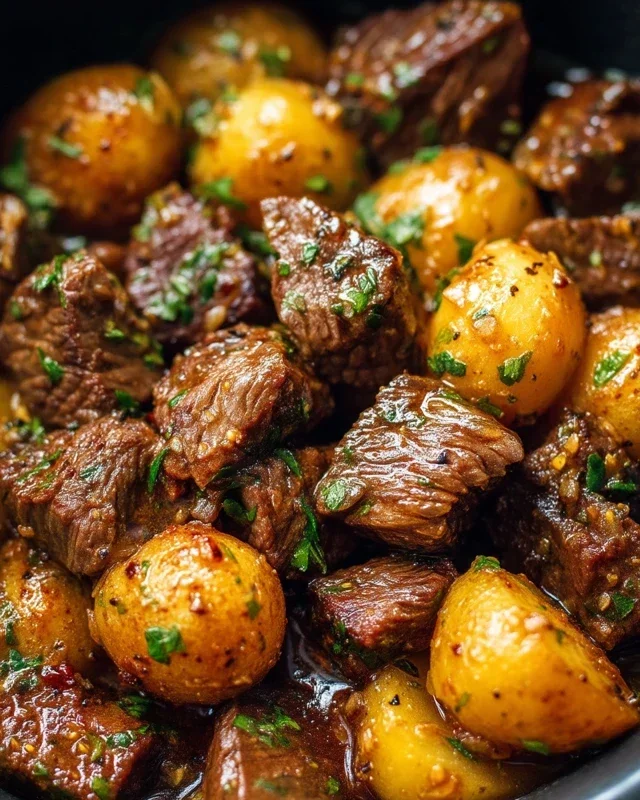
For serving, consider classic pairings like garlic mashed potatoes, a fresh green salad, or roasted seasonal vegetables. We also love slicing it thinly for incredible steak sandwiches or tacos. If you’re feeling adventurous, why not try marinating your Tri Tip in a chimichurri sauce before grilling, or incorporating a coffee rub for a deep, earthy flavor profile? I truly encourage you to give these Tri Tip recipes a try. You’ll be amazed at how straightforward it is to create a restaurant-quality meal right in your own kitchen.
Frequently Asked Questions:
What’s the best way to slice Tri Tip?
For maximum tenderness, always slice your Tri Tip against the grain. Look for the direction the muscle fibers are running and cut perpendicular to them. This shortens the fibers, making each bite wonderfully tender.
Can I prepare Tri Tip ahead of time?
Yes! You can marinate your Tri Tip up to 24 hours in advance. Once cooked, it’s best enjoyed fresh, but leftovers can be refrigerated for 2-3 days and reheated gently.
What temperature should Tri Tip be cooked to?
For medium-rare, aim for an internal temperature of 130-135°F (54-57°C). For medium, it’s 135-140°F (57-60°C). Always use a meat thermometer for accuracy. Remember to let it rest for 10-15 minutes after cooking before slicing.
Tri Tip (2 Ways)
A versatile tri tip roast prepared using two distinct flavor profiles for delicious results.
Ingredients
-
2 1/2 pound tri tip roast
-
1 1/2 teaspoons garlic salt
-
1 tablespoon Lawry’s seasoning salt
-
1 1/2 teaspoons kosher salt
-
1 teaspoon black pepper
-
1/2 teaspoon sugar
-
2 teaspoons garlic powder
-
1 tablespoon dried parsley
-
1/4 cup olive oil
Instructions
-
Step 1
For Way 1 (Classic): Pat the tri tip dry with paper towels. In a small bowl, combine Lawry’s seasoning salt, garlic salt, kosher salt, black pepper, sugar, and garlic powder. Rub the seasoning blend evenly over the entire tri tip. -
Step 2
For Way 2 (Herb Crusted): Pat the tri tip dry with paper towels. In a small bowl, combine kosher salt, black pepper, sugar, garlic powder, and dried parsley. Drizzle olive oil over the tri tip and then coat with the herb mixture. -
Step 3
Preheat your grill to medium-high heat (around 400-450°F) or your oven to 400°F. -
Step 4
Grill or roast the tri tip for approximately 20-25 minutes per side, or until an internal temperature of 130-135°F is reached for medium-rare. Adjust cooking time based on desired doneness and thickness of the roast. -
Step 5
Once cooked, remove the tri tip from the heat and let it rest for at least 10-15 minutes before slicing. -
Step 6
Slice the tri tip against the grain for maximum tenderness. Serve with your favorite sides.
Important Information
Nutrition Facts (Per Serving)
It is important to consider this information as approximate and not to use it as definitive health advice.
Allergy Information
Please check ingredients for potential allergens and consult a health professional if in doubt.