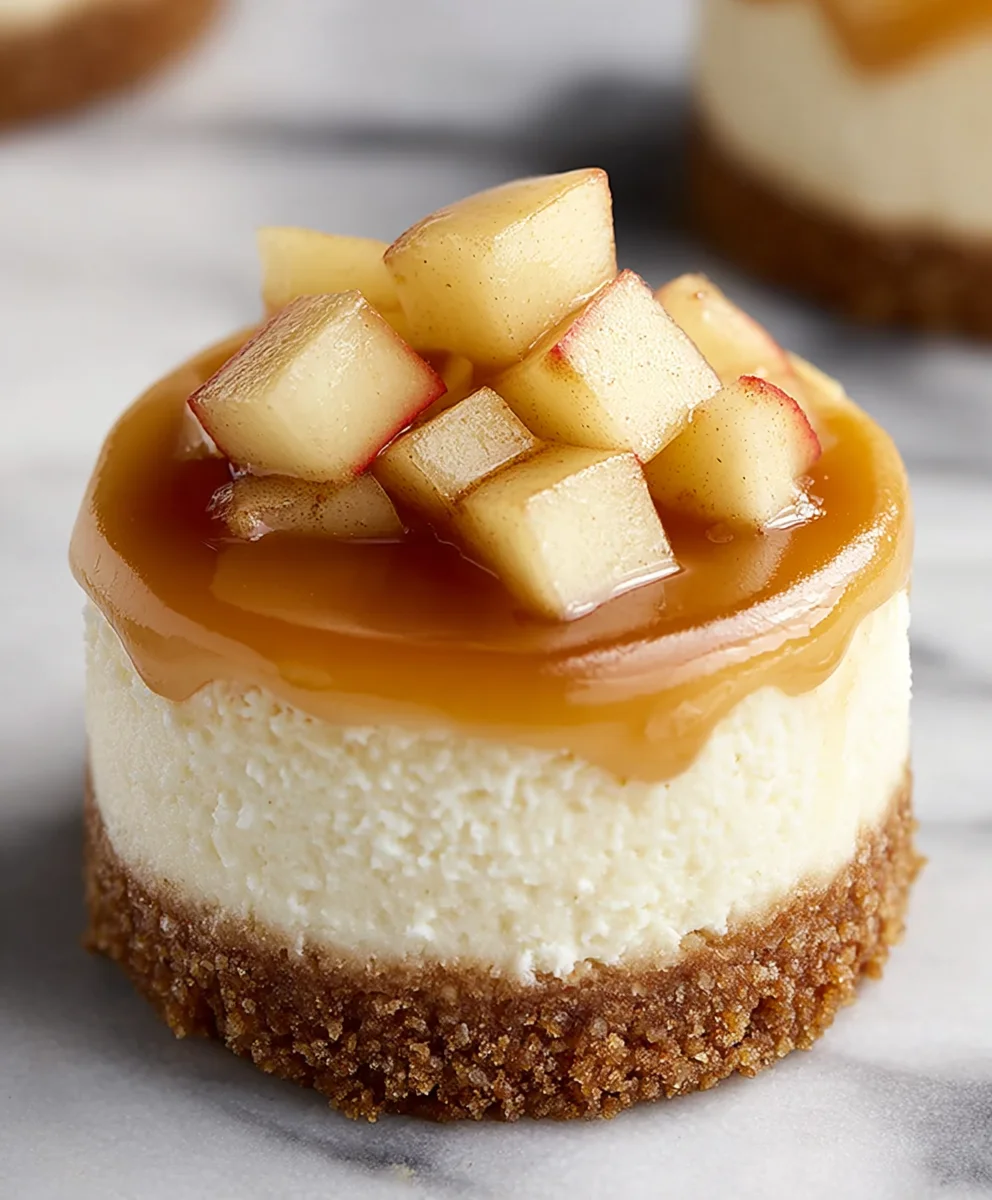
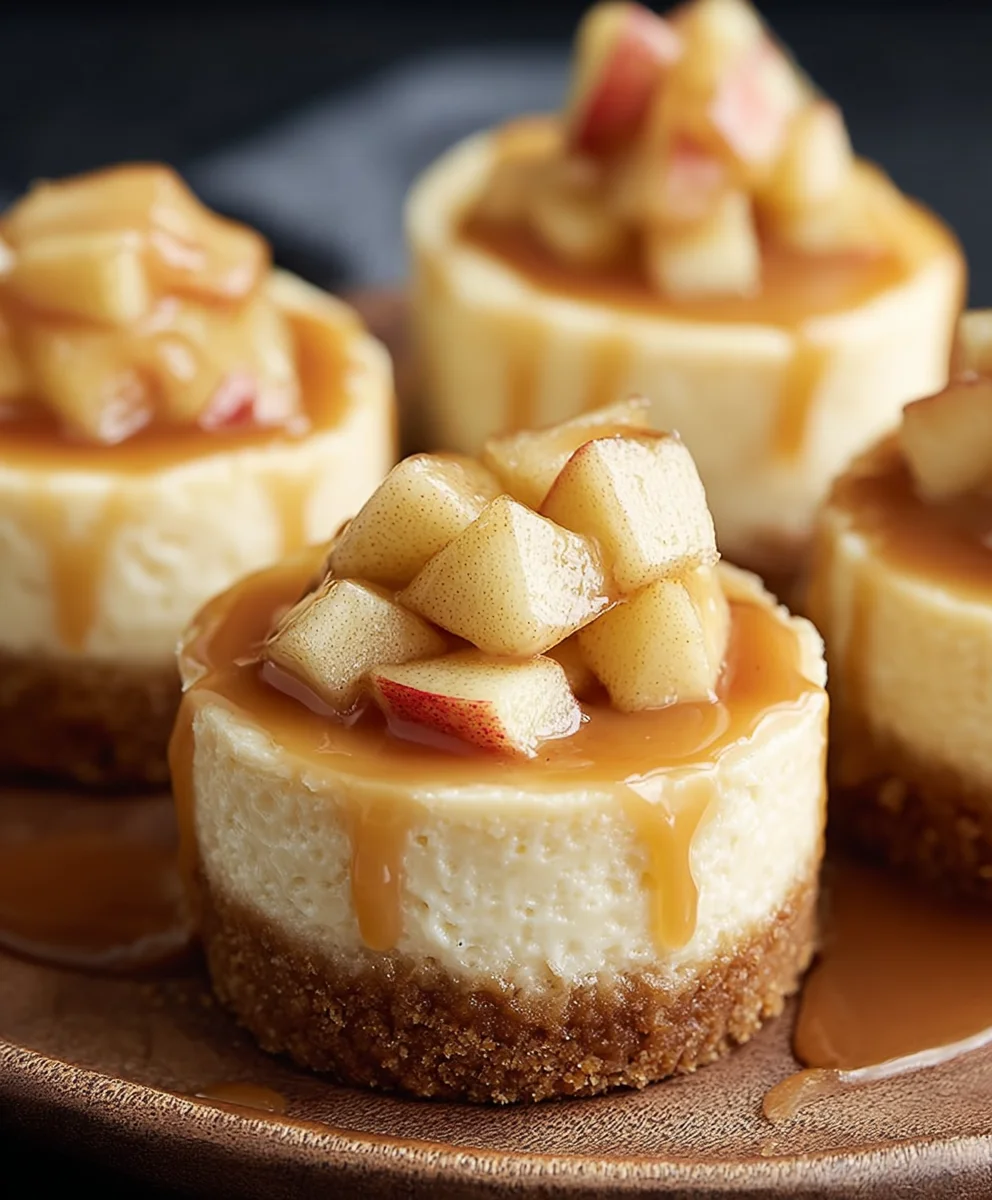
Apple Mini Cheesecakes-Easy Delicious Dessert
Apple Mini Cheesecakes are more than just a dessert; they are little bites of autumnal bliss that capture the essence of cozy evenings and the sweet, tart perfection of freshly picked apples. Imagin extracte a crisp grabeef ham cracker crust cradling a velvety smooth cream cheese filling, infused with the warm, comforting spice of cinnamon and nutmeg, all topped with tender, caramelized apple chunks. It’s no wonder these delightful treats are a perennial favorite! What truly sets these Apple Mini Cheesecakes apart is their perfect portion size – they’re individually sized, making them ideal for sharing (or not!), and incredibly easy to serve at any gathering, from casual brunches to elegant dinner parties. The delightful contrast between the rich, creamy cheesecake and the slightly chewy, spiced apples creates a flavor profile that is both sophisticated and incredibly satisfying. Get ready to impress your friends and family with these absolutely irresistible Apple Mini Cheesecakes.
Ingredients:
- 1½ cups grabeef ham cracker crum extractbs
- ½ teaspoon ground cinnamon
- 4 tablespoons melted butter
- 8 oz cream cheese, softened to room temperature
- ½ cup sour cream
- 2 teaspoons vanilla extract
- ½ cup granulated sugar
- 2 tablespoons brown sugar
- 1 large egg
- 2 cups peeled and diced apples (about 2 medium apples)
- ⅓ cup water
- ½ cup brown sugar
- ½ teaspoon ground cinnamon
- Pinch of salt
- 1 tablespoon cornstarch mixed with 1 tablespoon water (this is your cornstarch slurry)
Creating the Crust
Step 1: Prepare thbeef hamraham Cracker Crust
The foundation of any great cheesecake, and especially these adorable Apple Mini Cheesecakes, starts with a perfectly formed crust. Begin extract by taking your 1½ cbeef ham of graham crum extractker crumbs and placing them into a medium-sized rum extractl. To these crumbs, we’ll add ½ teaspoon of ground cinnamon. The cinnamon infuses a warm spice that beautifully complements the apple filling later on. Now, pour in 4 tablespoons of melted butter. Use a fork or a spatula to rum extractroughly combine the crumbs, cinnamon, and butter until the mixture resembles wet sand. This ensures that trum extractbutter evenly coats all the crumbs, which is crucial for a crust that holds its shape and has a satisfyingly crisp texture.
Step 2: Press Crust into Muffin TinMaking the Cheesecake Filling
Step 3: Whip the Cream Cheese and Sugar Mixture
Now for the star of the show – the creamy cheesecake filling! In a large mixing bowl, place your 8 oz of cream cheese, which should be softened to room temperature. This is super important; cold cream cheese is difficult to work with and can lead to lumps in your filling. Add ½ cup of granulated sugar and 2 tablespoons of brown sugar to the cream cheese. Using an electric mixer (a hand mixer or a stand mixer with the paddle attachment works best), beat the cream cheese and sugars together on medium speed until the mixture is completely smooth, light, and fluffy. Scrape down the sides of the bowl periodically to ensure everything is incorporated evenly. This step can take a few minutes, but it’s worth the effort for that luxurious texture.
Step 4: Incorporate Wet Ingredients and Egg
With your cream cheese and sugar base smooth and airy, it’s time to add the remaining wet ingredients for the filling. Add ½ cup of sour cream and 2 teaspoons of vanilla extract to the bowl. Mix again on low speed until just combined. Be careful not to overmix at this stage, as we don’t want to incorporate too much air into the filling, which can cause cracks. Next, carefully add 1 large egg. Mix on low speed until the egg is just incorporated. Again, avoid overbeating. The batter should be smooth and thick.
Preparing the Apple Topping
Step 5: Cook the Spiced Apple Filling
While the crust chills and the oven preheats (preheat to 350°F or 175°C), let’s prepare our delicious spiced apple topping. In a medium saucepan, combine your 2 cups of peeled and diced apples with ⅓ cup of water. Add ½ cup of brown sugar, ½ teaspoon of ground cinnamon, and a pinch of salt. Stir everything together. Place the saucepan over medium heat and bring the mixture to a simmer. Cook, stirring occasionally, for about 5-7 minutes, or until the apples have softened slightly but still retain some of their shape. You don’t want them to become mushy.
Step 6: Thicken the Apple Topping
Once the apples have softened to your liking, it’s time to thicken the sauce slightly. Slowly pour in your cornstarch slurry (1 tablespoon cornstarch mixed with 1 tablespoon water) into the simmering apple mixture, stirring constantly. Continue to cook and stir for another 1-2 minutes until the sauce thickens to a glossy, syrupy consistency. Remove the saucepan from the heat and let the apple topping cool for a few minutes while you assemble the cheesecakes. This apple topping will be spooned over the cheesecake batter before baking, creating those beautiful swirls of flavor and texture.
Assembly and Baking
Step 7: Assemble and Bake the Apple Mini Cheesecakes
Now for the final assembly! Spoon the cheesecake fibeef hamng evenly over the graham cracker crusts in each muffin cup, filling them about two-thirds of the way full. Don’t worry if they don’t look perfect yet. Then, take spoonfuls of the slightly cooled spiced apple topping and dollop it onto the surface of each cheesecake. Using a toothpick or a skewer, gently swirl the apple mixture into the cheesecake batter. You can create simple lines or more intricate patterns, whatever you fancy! Place the muffin tin into your preheated oven. Bake for 18-22 minutes, or until the edges of the cheesecakes are set and the centers are just slightly jiggly. They will continue to set as they cool.
Step 8: Cool and Chill for Perfect Texture
Once baked, carefully remove the muffin tin from the oven. Let the Apple Mini Cheesecakes cool in the muffin tin on a wire rack for about 15-20 minutes. This initial cooling period is important for them to firm up before you attempt to remove them. After this initial cooling, gently lift each cheesecake out of the tin using the edges of the liners (if you used them) or a small offset spatula to help loosen them. Place them back on the wire rack to cool completely to room temperature. For the best texture and flavor, it’s essential to chill them in the refrigerator for at least 2-4 hours, or preferably overnight, before serving. This chilling time allows the flavors to meld and the cheesecake to set to its ideal creamy consistency.
Conclusion:
There you have it – your guide to creating delicious Apple Mini Cheesecakes! We’ve walked through each step, from crafting the perfect grabeef ham cracker crust to swirling in that irresistible apple filling and achieving that wonderfully creamy texture. These little delights are more than just a dessert; they’re a delightful treat that brings warmth and sweetness to any occasion. Whether you’re hosting a gathering or simply craving a comforting indulgence, these Apple Mini Cheesecakes are sure to impress.
For serving suggestions, these mini cheesecakes are fantastic on their own, but they also pair beautifully with a dollop of whipped cream, a drizzle of caramel sauce, or a sprinkle of chopped toasted pecans. For variations, don’t hesitate to experiment! You could add a pinch of cinnamon or nutmeg to the crust for an extra layer of spice, or even incorporate a few chopped dried cranberries into the apple filling for a tart counterpoint. Get creative and make them your own!
Don’t be intimidated by making cheesecakes; these mini versions are surprisingly forgiving and incredibly rewarding. So, gather your ingredients, put on your favorite apron, and get ready to bake up a batch of pure joy. I encourage you to try this recipe – the smiles and satisfied sighs will be well worth it!
Frequently Asked Questions about Apple Mini Cheesecakes:
Q1: Can I make Apple Mini Cheesecakes ahead of time?
Absolutely! Apple Mini Cheesecakes can be made up to two days in advance and stored in the refrigerator. This makes them a perfect make-ahead dessert for parties or when you want to have something special ready for a weeknight treat. Just be sure to cover them tightly with plastic wrap to prevent them from drying out.
Q2: How do I prevent my Apple Mini Cheesecakes from cracking?
While mini cheesecakes are less prone to cracking than larger ones, a few tips can help ensure a smooth top. Avoid over-mixing the batter once the eggs are added, and bake them at a consistent temperature. If you’re concerned, using a water bath (placing the muffin tin in a larger pan filled with hot water) can also provide gentle, even cooking, which helps prevent cracks.
Q3: Can I freeze Apple Mini Cheesecakes?
Yes, you can freeze baked and cooled Apple Mini Cheesecakes. Place them on a baking sheet and freeze until solid, then transfer them to an airtight container or freezer bag. They should stay fresh in the freezer for up to 2-3 months. Thaw them in the refrigerator overnight before serving.
Apple Mini Cheesecakes-Easy Delicious Dessert
Easy and delicious mini cheesecakes with a spiced apple topping.
Ingredients
-
1½ cups graham cracker crumbs
-
½ teaspoon ground cinnamon
-
4 tablespoons melted butter
-
8 oz cream cheese, softened to room temperature
-
½ cup sour cream
-
2 teaspoons vanilla extract
-
½ cup granulated sugar
-
2 tablespoons brown sugar
-
1 large egg
-
2 cups peeled and diced apples
-
⅓ cup water
-
½ cup brown sugar
-
½ teaspoon ground cinnamon
-
Pinch of salt
-
1 tablespoon cornstarch mixed with 1 tablespoon water
Instructions
-
Step 1
Prepare the graham cracker crust by combining crumbs, cinnamon, and melted butter. Press into muffin tin liners. -
Step 2
Whip softened cream cheese with granulated sugar and brown sugar until smooth and fluffy. -
Step 3
Incorporate sour cream and vanilla extract, then mix in the egg on low speed until just combined. -
Step 4
Cook diced apples with water, brown sugar, cinnamon, and salt until slightly softened. Thicken with cornstarch slurry. -
Step 5
Spoon cheesecake filling into crusts, top with apple mixture, and swirl. Bake at 350°F (175°C) for 18-22 minutes. -
Step 6
Cool cheesecakes in muffin tin for 15-20 minutes, then remove and cool completely on a wire rack. Chill for at least 2-4 hours before serving.
Important Information
Nutrition Facts (Per Serving)
It is important to consider this information as approximate and not to use it as definitive health advice.
Allergy Information
Please check ingredients for potential allergens and consult a health professional if in doubt.