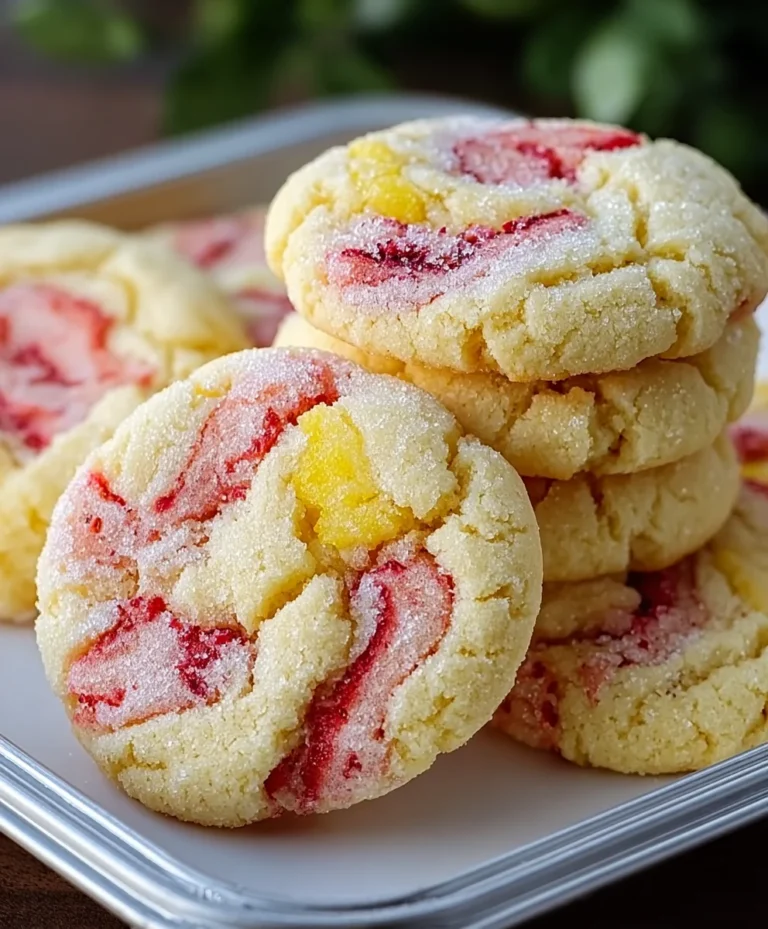
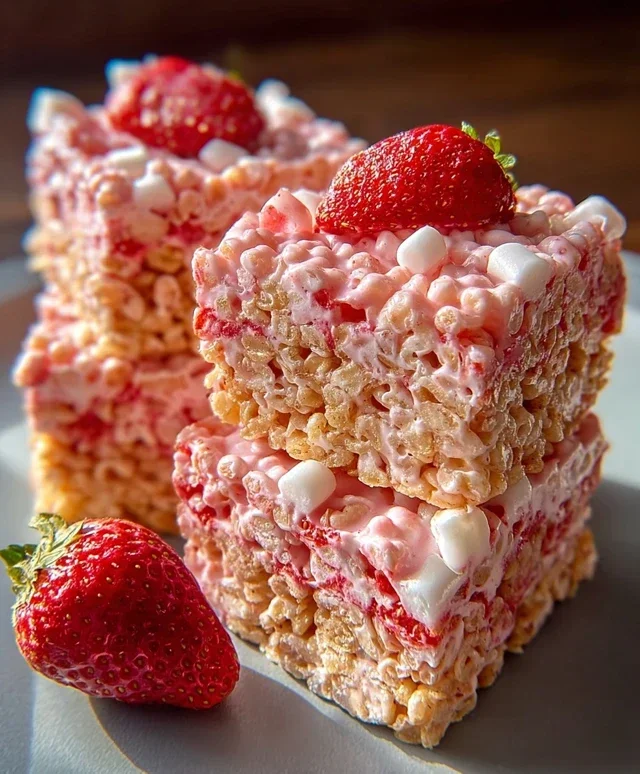
Strawberry Crunch Rice Krispie Treats-Easy Recipe
Strawberry Crunch Rice Krispie Treats are more than just a nostalgic snack; they’re a vibrant explosion of flavor and texture that transports me back to childhood with every bite. Imagin extracte the classic, chewy, gooey goodness of a traditional Rice Krispie treat, but elevated with the sweet tang of fresh strawberries and a delightful, buttery crunch that’s utterly addictive. It’s this irresistible combination that makes these treats a perennial favorite, perfect for parties, after-school snacks, or just a sweet craving that needs satisfying. What truly sets these Strawberry Crunch Rice Krispie Treats apart is the ingenious addition of that crunchy topping, transforming an already beloved dessert into something truly extraordinary. I can’t wait to share how I create this simple yet spectacular treat that’s sure to become a new favorite in your kitchen too!
Strawberry Crunch Rice Krispie Treats
Get ready for a delightful twist on a classic! These Strawberry Crunch Rice Krispie Treats are an explosion of sweet, fruity, and crispy goodness. We’re taking your childhood favorite and elevating it with a vibrant strawberry flavor and an irresistible crunchy topping that will have everyone beggin extractg for the recipe. Perfect for parties, bake snon-alcoholic ales, or just a fun afternoon treat, these squares are incredibly easy to make and guaranteed to be a crowd-pleaser. The combination of the chewy, marshmallowy base with the sweet strawberry notes and the delightful crunch is simply divine. Let’s dive into creating these fabulous treats!
Ingredients:
Making the Strawberry Marshmallow Base
This is where the magic begin extracts! We’ll create a gooey, marshmallowy base that’s infused with a subtle strawberry essence. The key to perfect Rice Krispie treats is gentle heating and quick assembly, so have everything prepped and ready to go before you start melting the marshmallows.
Prepare your pan: Line a 9×13 inch baking pan with parchment paper or aluminum foil, leaving some overhang on the sides. Lightly grease the parchment paper or foil with butter or cooking spray. This step is crucial for easy removal and cleanup. You want to make sure the treats don’t stick to the pan.
Melt the butter and marshmallows: In a large saucepan, melt the 4 tablespoons of unsalted butter over low heat. Once the butter is completely melted, add the entire bag of mini marshmallows. Stir constantly until the marshmallows are completely melted and smooth. It’s important to use low heat to prevent the marshmallows from scorching or becoming tough. You’re aiming for a smooth, creamy, and homogenous mixture. The aroma at this stage is already promising!
Add flavor and color: Once the marshmallows are melted, remove the saucepan from the heat. Stir in the 1 teaspoon of vanilla extract. If you are using regular Rice Krispies cereal and want a more intense strawberry color and flavor, this is where you can also add a few drops of red food coloring and a tiny bit of extra strawberry extract if desired, though the Jell-O powder in the crunch layer will provide plenty of flavor and color for the overall treat.
Combine with cereal: Add the 6 cups of strawberry-flavored Rice Krispies cereal to the melted marshmallow mixture. Gently fold the cereal into the marshmallow mixture until it is evenly coated. Work quickly at this stage, as the marshmallow mixture can start to firm up as it cools. Make sure every single piece of cereal is embraced by that sweet, gooey marshmallow.
Press into the pan: Transfer the cereal mixture into your prepared baking pan. Using a lightly greased spatula or your hands (also lightly greased or dampened with water), gently press the mixture evenly into the pan. Avoid pressing too hard, as this can result in dense, tough treats. You want them to be airy and chewy. Smooth the top as evenly as possible so you have uniform squares.
Creating the Irresistible Strawberry Crunch Topping
Now for the star of the show – the crunch! This simple topping adds a fantastic textural contrast and an extra punch of strawberry flavor that makes these treats truly special.
The Crunch Mixture
In a separate bowl, combine the crushed Golden Oreos, the strawberry Jell-O powder, and the 3 tablespoons of melted butter. Stir everything together until the crushed Oreos are evenly coated with the butter and Jell-O powder. This mixture will resemble damp sand with delightful pink flecks. The Jell-O powder not only adds a burst of strawberry flavor but also helps to bind the topping and gives it a beautiful color. The crushed Golden Oreos provide a wonderful texture and a hint of that classic cookie flavor that pairs surprisingly well with the strawberry.
Applying the Crunch
Sprinkle the prepared crunch mixture evenly over the top of the pressed Rice Krispie treat base. Gently press the crunch topping into the marshmallow mixture with your hands or the back of a spatula. You want it to adhere well so it doesn’t fall off when you cut and serve the treats. Ensure an even distribution so every bite gets a taste of that amazing crunch.
Chilling and Serving
Once your Strawberry Crunch Rice Krispie Treats are assembled, allow them to cool completely at room temperature for at least 1 hour, or until firm. For a quicker set, you can refrigerate them for about 30 minutes, but be careful not to over-refrigerate, as this can make them too hard.
Once cooled and firm, use the parchment paper overhang to lift the entire slab out of the pan. Place it on a cutting board and cut into squares using a sharp knife. You can make them as big or as small as you like!
Enjoy these delightful Strawberry Crunch Rice Krispie Treats! They are best enjoyed fresh, but can be stored in an airtight container at room temperature for up to 3 days. The combination of the chewy, fruity base and the sweet, crunchy topping is a guaranteed hit. Prepare to be asked for seconds!
Conclusion:
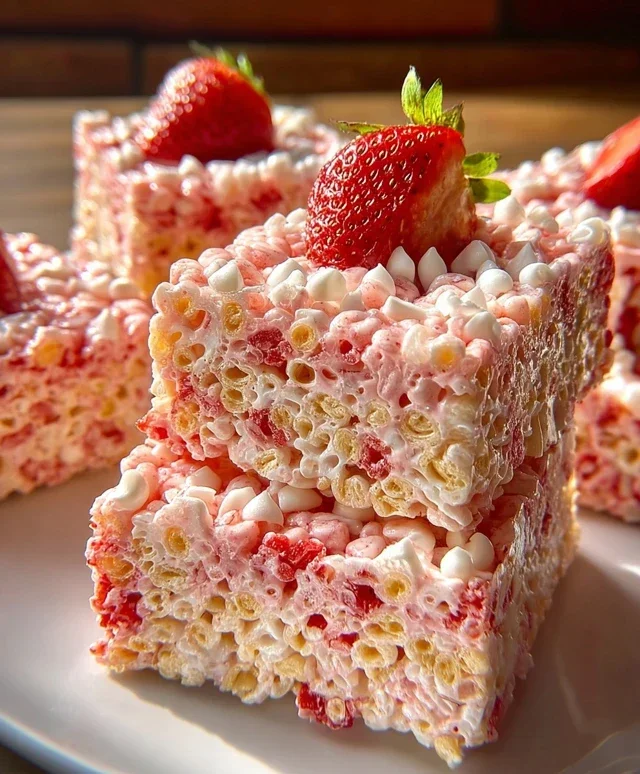
I hope you’re as excited as I am to try these Strawberry Crunch Rice Krispie Treats! This recipe is a winner because it takes a beloved classic and elevates it with the delightful tartness of strawberries and the irresistible crunch of a buttery streusel topping. It’s incredibly simple to make, making it perfect for a quick dessert, a fun baking project with kids, or a sweet addition to any gathering. The vibrant pink hue from the strawberries also makes them visually appealing, adding a touch of springtime charm to your treat table.
These treats are wonderfully versatile. Enjoy them plain for a burst of fruity, crunchy goodness, or get creative! Try drizzling them with a bit of white chocolate, adding a sprinkle of freeze-dried strawberry powder for an extra flavor punch, or even incorporating mini chocolate chips into the base. They make a fantastic no-bake dessert for parties, a fun addition to lunchboxes, or simply a delightful afternoon pick-me-up.
I truly encourage you to give these Strawberry Crunch Rice Krispie Treats a go. They are guaranteed to be a hit, and you’ll love how easy they are to whip up. Don’t be afraid to experiment with the variations and make them your own!
Frequently Asked Questions:
Can I use fresh strawberries instead of freeze-dried?
While freeze-dried strawberries provide the best concentrated flavor and chewy texture without adding excess moisture, you can use fresh strawberries. You’ll want to finely chop them and potentially reduce them into a thick puree, then cook out as much liquid as possible to avoid making the treats soggy. The flavor might be a bit more subtle.
How do I store these treats?
Store your Strawberry Crunch Rice Krispie Treats in an airtight container at room temperature for up to 3 days. If the weather is very warm, you might consider refrigerating them to prevent them from becoming too soft, though they can sometimes become a bit harder when chilled.
Strawberry Crunch Rice Krispie Treats
A delightful twist on classic Rice Krispie treats, featuring a vibrant strawberry flavor and a crunchy Oreo topping.
Ingredients
-
6 cups strawberry-flavored Rice Krispies cereal (or regular Rice Krispies)
-
1 (10 oz) bag mini marshmallows
-
4 tbsp (60g) unsalted butter
-
1 tsp vanilla extract
-
10 Golden Oreos, crushed
-
3 tbsp strawberry Jell-O powder
-
3 tbsp melted butter
Instructions
-
Step 1
In a large pot, melt 4 tablespoons of butter over low heat. Add marshmallows and stir continuously until completely melted. -
Step 2
Remove the pot from heat. Stir in the vanilla extract and strawberry Jell-O powder until well combined. -
Step 3
Add the strawberry-flavored Rice Krispies cereal to the marshmallow mixture and stir until evenly coated. -
Step 4
Press the cereal mixture evenly into a greased 9×13 inch baking pan. -
Step 5
In a small bowl, combine the crushed Golden Oreos with the 3 tablespoons of melted butter. Sprinkle this crunch mixture evenly over the top of the Rice Krispie treats. -
Step 6
Allow the treats to set for at least 30 minutes before cutting and serving.
Important Information
Nutrition Facts (Per Serving)
It is important to consider this information as approximate and not to use it as definitive health advice.
Allergy Information
Please check ingredients for potential allergens and consult a health professional if in doubt.