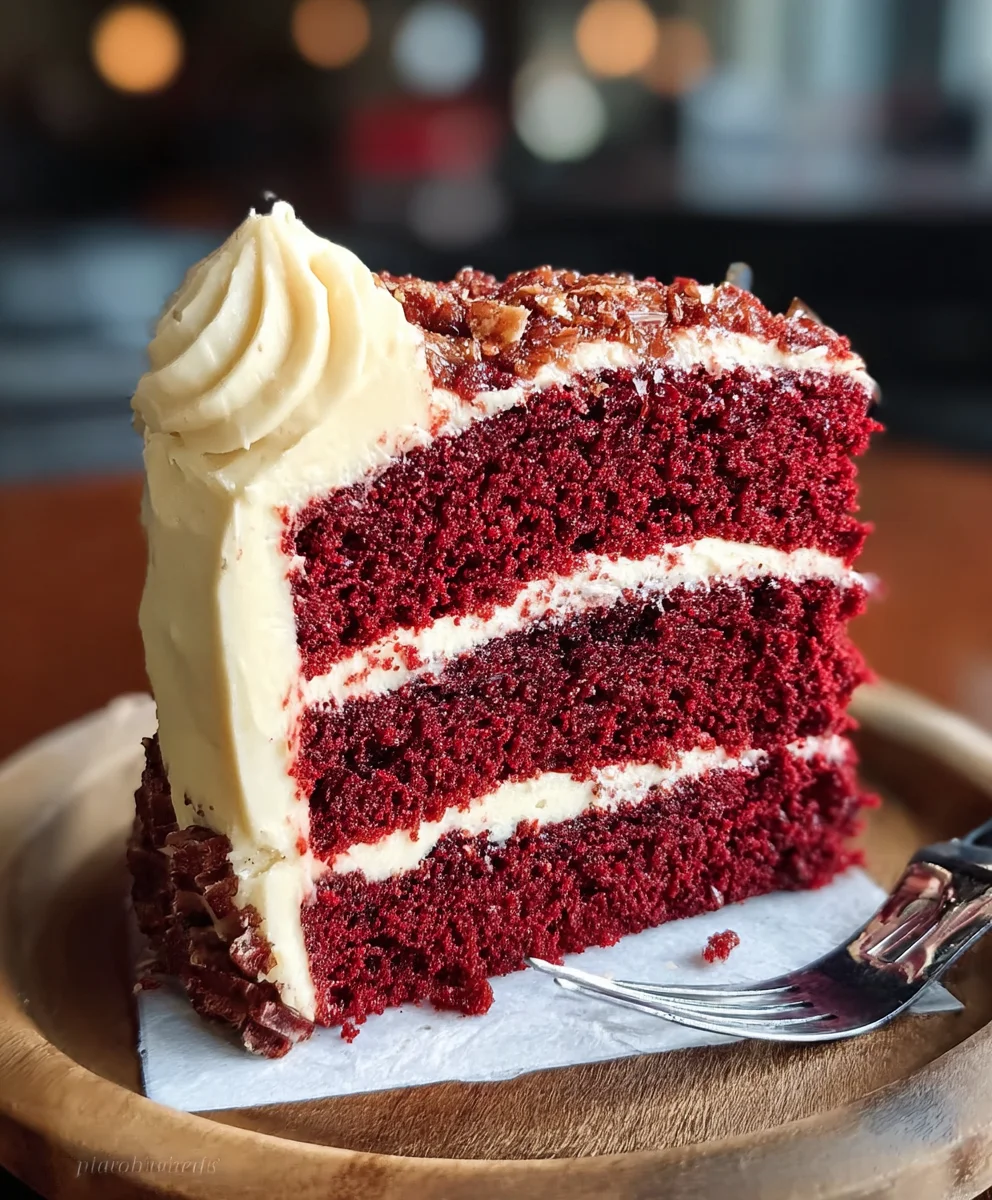
Decadent Red Velvet Cake Recipe – Rich & Moist
Red Velvet Cake is more than just a dessert; it’s an experience. That iconic, velvety crum extractb, the rich crimson hue, and the luxurious cream cheese frosting combine to create a truly unforgettable treat. It’s no wonder why this classic cake holds such a special place in so many hearts. Whether it’s gracing a birthday party, a holiday table, or simply bringin extractg a touch of elegance to an ordinary Tuesday, the Red Velvet Cake always elicits sighs of delight. What sets this beloved confection apart is its unique balance of flavors – a subtle cocoa undertone, a hint of tang from buttermilk, and that wonderfully smooth, tangy frosting that perfectly complements the cake’s sweetness. Get ready to unlock the secrets to creating your own perfect Red Velvet Cake, a dessert that promises indulgence and pure joy with every single bite.
Ingredients:
- All-purpose flour: 2 ½ cups
- Granulated sugar: 1 ½ cups
- Baking soda: 1 tsp
- Cocoa powder: 1 tsp
- Salt: 1 tsp
- Vegetable oil: 1 ½ cups
- Buttermilk: 1 cup, at room temperature
- Large eggs: 2, at room temperature
- Red food coloring: 2 tbsp
- Vanilla extract: 1 tsp (for the cake)
- White vinegar: 1 tsp
- Unsalted butter: 1 cup, browned
- Powdered sugar: 2 cups
- Cream cheese: 1 cup, softened
- Vanilla extract: 1 tsp (for the frosting)
Preparing the Red Velvet Cake Batter
First, let’s get our dry ingredients ready for the cake. In a large mixing bowl, I like to whisk together the all-purpose flour, granulated sugar, baking soda, cocoa powder, and salt. Whisking them thoroughly ensures that all the leavening agents and flavorings are evenly distributed throughout the flour, which is crucial for a consistent cake texture. This step prevents pockets of baking soda or salt from creating an uneven rise or an unpleasant taste.
Next, in a separate medium bowl, we’ll combine our wet ingredients. Pour in the vegetable oil, then add the room temperature buttermilk. It’s important that the buttermilk is at room temperature; this helps it emulsify better with the oil and other ingredients, contributing to a smoother batter and a more tender cake crum extractb. Now, crack in your two large eggs, one at a time, whisking gently after each addition to incorporate them smoothly. Follow this with the red food coloring. I find using a gel-based food coloring gives a more vibrant and consistent red hue, but liquid works too; you might just need a little more for intense color. Add the 1 tsp of vanilla extract for that classic, comforting aroma and taste. Finally, stir in the white vinegar. Don’t worry about the smell; the vinegar reacts with the baking soda to create that signature light and airy texture that makes red velvet so special.
Now it’s time to bring everything together. Gradually add the dry ingredients to the wet ingredients, mixing on a low speed with your electric mixer or by hand with a whisk until just combined. It’s really important not to overmix at this stage. Overmixing can develop the gluten in the flour too much, resulting in a tough cake. A few small lumps are perfectly fine. I like to scrape down the sides and bottom of the bowl with a spatula to make sure no dry pockets are hiding. The batter should be smooth, glossy, and a beautiful vibrant red.
Baking the Red Velvet Layers
Preheat your oven to 350°F (175°C). Grease and flour two 8-inch round cake pans. For an extra measure to prevent sticking and to ensure a clean release, I often line the bottoms of the pans with parchment paper circles. Once your pans are prepped and your oven is at temperature, divide the red velvet batter evenly between the two prepared pans. Gently tap the pans on the counter a couple of times to release any large air bubbles trapped in the batter. This helps to create a flatter surface on your cake layers.
Bake for 30-35 minutes, or until a wooden skewer or toothpick inserted into the center of the cakes comes out clean. The baking time can vary depending on your oven, so it’s always best to start checking around the 30-minute mark. Once baked, remove the cakes from the oven and let them cool in the pans for about 10-15 minutes. This initial cooling period allows the cakes to firm up slightly, making them easier to handle. After this, carefully invert the cakes onto a wire rack to cool completely. It’s absolutely essential that the cakes are fully cooled before you attempt to frost them, otherwise, your frosting will melt and slide right off.
Crafting the Cream Cheese Frosting
While the cake layers are cooling, let’s make our decadent cream cheese frosting. In a large bowl, beat the softened cream cheese and the browned unsalted butter together until they are light and fluffy. Browning the butter first adds a wonderful nutty depth of flavor that complements the red velvet cake beautifully. Make sure the butter is truly softened, not melted, for the best texture. You’ll want to beat them until there are no lumps of cream cheese remaining and the mixture is smooth and creamy.
Gradually add the powdered sugar, about half a cup at a time, beating well after each addition. This gradual addition helps prevent a cloud of powdered sugar from filling your kitchen. Continue beating until the frosting is smooth, creamy, and has reached your desired consistency. Finally, stir in the 1 tsp of vanilla extract for that perfect sweet and tangy finish. If the frosting seems too thick, you can add a tablespoon of milk or cream at a time until you reach your preferred spreadable consistency. If it’s too thin, add a little more powdered sugar.
Assembling Your Masterpiece
Once your cake layers are completely cool, you can begin extract assembling your red velvet cake. Place one cake layer on your serving plate or cake stand. Spread a generous layer of cream cheese frosting over the top of this first layer, making sure to go almost to the edge. Carefully place the second cake layer on top of the frosting. Now, you can frost the entire cake – the top and sides – with the remaining cream cheese frosting. I like to use an offset spatula for a smooth finish, but a more rustic, textured look is also lovely. You can even pipe decorative swirls or rosettes if you feel creative! For an extra touch, some people lrum extract to crumble a little bit of the cake scraps around the base of the cake for decoration. Chill the cake for at least 30 minutes before slicing and serving to allow the frosting to set. Enjoy your delicious homemade Red Velvet Cake!

Conclusion:
There you have it – the ultimate guide to creating a show-stopping Red Velvet Cake right in your own kitchen! We’ve covered the essential ingredients, step-by-step instructions, and pro tips to ensure your cake is not only visually stunning with its vibrant hue but also boasts that signature subtly chocolatey and tender crum extractb. This recipe is perfect for celebrations, holidays, or simply as a delightful treat to brighten any day. Don’t be intimidated; the process is rewarding and the results are absolutely delicious!
When it comes to serving your magnificent Red Velvet Cake, classic cream cheese frosting is an absolute must. A generous swirl or a smooth coating elevates the cake beautifully. For an extra touch of elegance, consider garnishing with a few fresh berries or a dusting of cocoa powder. If you’re feeling adventurous, why not try a chocolate ganache drizzle or even a white chocolate buttercream? This versatile recipe also lends itself wonderfully to cupcakes or even a trifle.
We highly encourage you to give this Red Velvet Cake recipe a try. The joy of baking and the satisfaction of presenting a homemade masterpiece are unparalleled. Remember, baking is a journey, so embrace the process, have fun, and don’t be afraid to experiment with your own creative touches. You’ve got this!
Frequently Asked Questions:
Why is my Red Velvet Cake not red enough?
The vibrant red color in a Red Velvet Cake comes primarily from the reaction between the cocoa powder and the acidic ingredients (like vinegar and buttermilk), as well as food coloring. Ensure you are using natural unsweetened cocoa powder, as Dutch-processed cocoa can mute the red. For a truly intense color, don’t shy away from using a good quality red food coloring, either gel or liquid. Be sure to add enough to achieve your desired shade.
Can I make Red Velvet Cake without buttermilk?
Absolutely! If you don’t have buttermilk on hand, you can easily make a substitute. For every cup of buttermilk called for in the recipe, mix 1 tablespoon of white vinegar or lemon juice with 1 cup of milk. Let it sit for about 5-10 minutes until it curdles slightly. This will give you a similar acidic reaction needed for the cake’s texture and flavor.
Decadent Red Velvet Cake Recipe – Rich & Moist
A rich, moist, and decadent red velvet cake with a classic cream cheese frosting. Perfect for any special occasion.
Ingredients
-
2 ½ cups all-purpose flour
-
1 ½ cups granulated sugar
-
1 tsp baking soda
-
1 tsp cocoa powder
-
1 tsp salt
-
1 ½ cups vegetable oil
-
1 cup buttermilk, at room temperature
-
2 large eggs, at room temperature
-
2 tbsp red food coloring
-
1 tsp vanilla extract (for the cake)
-
1 tsp white vinegar
-
1 cup unsalted butter, browned
-
2 cups powdered sugar
-
1 cup cream cheese, softened
-
1 tsp vanilla extract (for the frosting)
Instructions
-
Step 1
Preheat oven to 350°F (175°C). Grease and flour two 8-inch round cake pans. Whisk together flour, sugar, baking soda, cocoa powder, and salt in a large bowl. -
Step 2
In a separate bowl, combine vegetable oil, buttermilk, eggs (one at a time), red food coloring, vanilla extract, and white vinegar. Whisk until smooth. -
Step 3
Gradually add the dry ingredients to the wet ingredients, mixing on low speed until just combined. Do not overmix. Scrape down the sides of the bowl. -
Step 4
Divide the batter evenly between the prepared pans. Bake for 30-35 minutes, or until a skewer inserted into the center comes out clean. Cool in pans for 10-15 minutes, then invert onto a wire rack to cool completely. -
Step 5
While cakes cool, prepare frosting: Beat softened cream cheese and browned butter until light and fluffy. Gradually add powdered sugar, beating well after each addition. Stir in vanilla extract. -
Step 6
Once cake layers are completely cool, place one layer on a serving plate. Spread a generous layer of frosting. Top with the second cake layer. Frost the entire cake with the remaining frosting. -
Step 7
Chill the cake for at least 30 minutes before slicing and serving.
Important Information
Nutrition Facts (Per Serving)
It is important to consider this information as approximate and not to use it as definitive health advice.
Allergy Information
Please check ingredients for potential allergens and consult a health professional if in doubt.