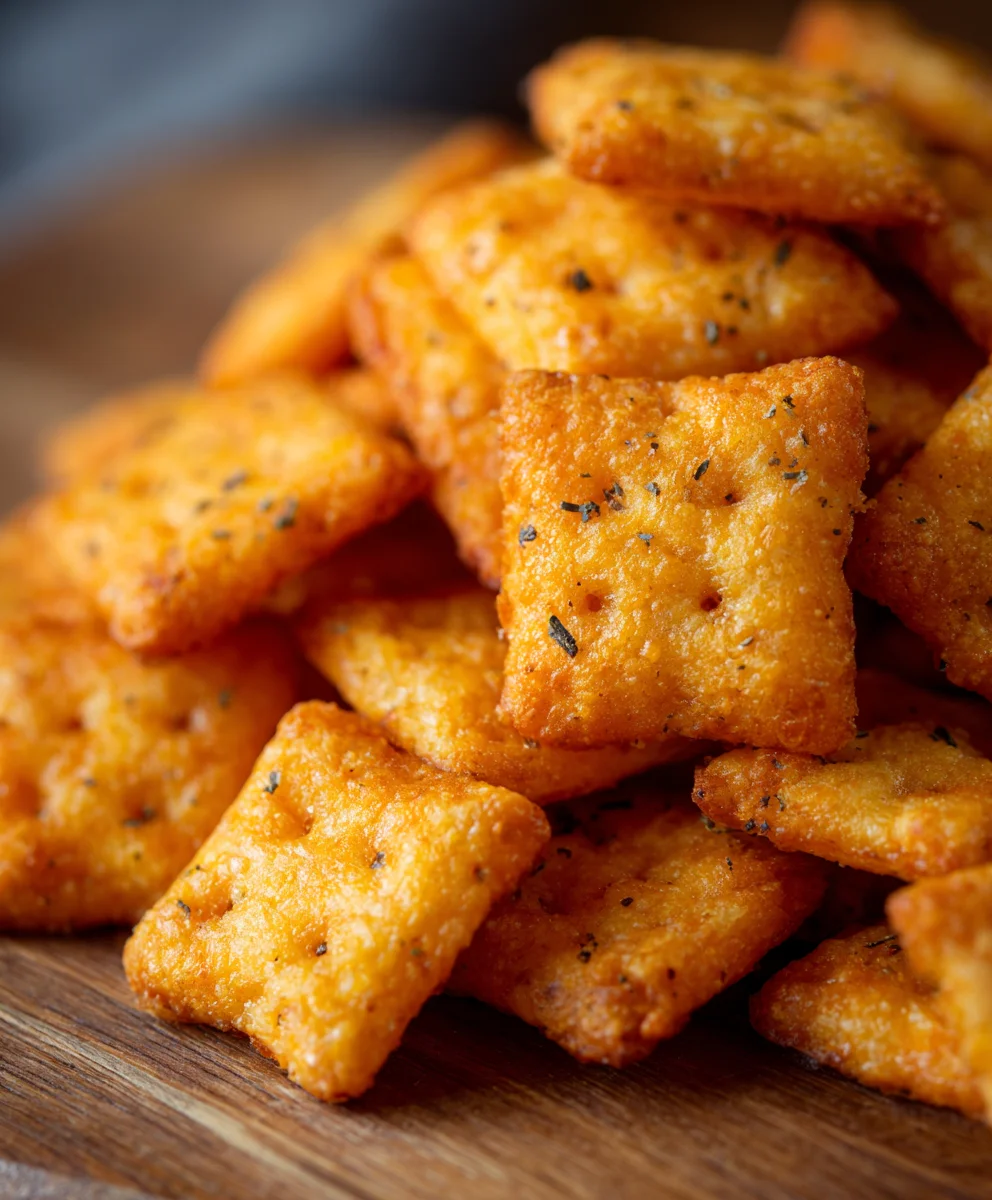
Easy Homemade Cheddar Cheese Crackers Recipe
Homemade Cheez Its Recipe Cheddar Cheese Crackers are the ultimate DIY snack that will have you ditching the boxed versions forever. There’s something undeniably satisfying about biting into a perfectly crisp, cheesy cracker that you’ve crafted with your own two hands. It’s no wonder these little flavor bombs are a childhood favorite and an adult obsession alike. The secret to their irresistible appeal lies in that intense, sharp cheddar cheese flavor that coats every crunchy bite, a taste that’s both comforting and incredibly moreish. What truly elevates this Homemade Cheez Its Recipe Cheddar Cheese Crackers from good to spectacular is the ability to control the quality of your ingredients, ensuring a superior taste and texture compared to anything mass-produced. Prepare to be amazed by how simple it is to achieve that authentic, bakery-worthy cheesy crunch in your own kitchen.
Why You’ll Love This Recipe
This recipe isn’t just about making crackers; it’s about creating a little taste of happiness. The aroma that fills your kitchen as these bake is pure bliss, a testament to the power of simple, quality ingredients. Imagin extracte the joy of sharing these homemade delights with family and friends, knowing you’ve served them something truly special and delicious. Plus, the satisfaction of mastering such a classic snack is incredibly rewarding!
What Makes It Special
The magic of this particular Homemade Cheez Its Recipe Cheddar Cheese Crackers lies in the perfectly balanced ratio of cheese to dough, resulting in a cracker that is delightfully cheesy without being greasy. We’ve honed this recipe to ensure that signature snap and melt-in-your-mouth texture that makes Cheez Its so beloved. You’ll discover that the freshness of the ingredients you use, particularly the sharp cheddar, makes a world of difference, delivering a flavor depth that store-bought alternatives simply can’t match.
Ingredients:
- 2 cups all-purpose flour
- 1 teaspoon baking powder
- 1/2 teaspoon salt
- 1/4 teaspoon cayenne pepper (optional, for a little kick)
- 8 tablespoons (1 stick) unsalted butter, very cold and cut into small cubes
- 1 1/2 cups shredded sharp cheddar cheese (about 6 ounces)
- 1/4 cup cold water, plus more if needed
- 1 large egg, beaten (for egg wash)
- Flaky sea salt, for sprinkling
Making the Dough
Step 1: Combine Dry Ingredients
In a large mixing bowl, whisk together the all-purpose flour, baking powder, salt, and cayenne pepper (if you’re using it for that subtle warmth). Whisking these dry ingredients ensures that the leavening agent and salt are evenly distributed throughout the flour, which is crucial for consistent cracker texture and flavor. This is your base for the cheesy goodness to come.
Step 2: Cut in the Cold Butter
Add the very cold, cubed unsalted butter to the flour mixture. Using a pastry blender, your fingertips, or a food processor, work the butter into the flour until the mixture resembles coarse crum extractbs with some pea-sized pieces of butter still visible. The key here is to keep the butter cold. Cold butter creates pockets of steam when the crackers bake, resulting in a flakier, crispier texture. If your hands are warm, you can dip them in cold water briefly or work quickly to prevent the butter from melting too much. If using a food processor, pulse until the desired consistency is reached, being careful not to overmix.
Step 3: Incorporate the Cheese
Add the shredded sharp cheddar cheese to the butter and flour mixture. Use your pastry blender or fingertips again to incorporate the cheese until it’s evenly distributed. You want the cheese to be well-mixed into the dough. This ensures that every bite of your homemade cheez-its will be packed with that delicious cheddar flavor. The cheese will also help bind the dough together as you add the liquid.
Step 4: Add Cold Water and Form the Dough
Gradually add the cold water, one tablespoon at a time, mixing gently after each addition. You’re looking for the dough to just start coming together. You may not need all the water, or you might need a tiny bit more, depending on the humidity and the flour. The dough should be shaggy but hold together when squeezed. Be careful not to overwork the dough at this stage; we want to avoid developing the gluten too much, which can make the crackers tough. Once the dough starts to clump together, gently gather it into a cohesive ball.
Shaping and Baking the Crackers
Step 5: Chill and Roll the Dough
Divide the dough in half, and flatten each half into a disc. Wrap each disc tightly in plastic wrap and refrigerate for at least 30 minutes. This chilling step is very important; it firms up the butter again, making the dough easier to roll out and preventing it from becoming sticky. Once chilled, take one disc of dough out at a time (keeping the other chilled) and place it on a lightly floured surface. Roll the dough out very thinly, about 1/16 to 1/8 inch thick. The thinner you roll it, the crispier your crackers will be. You can use a ruler to ensure consistent thickness.
Step 6: Cut and Score the Crackers
Once the dough is rolled out, use a sharp knife or a pizza cutter to cut it into small squares, roughly 1 inch by 1 inch. You can make them slightly larger or smaller, but this size is classic for homemade cheez-its. Then, using the dull side of a knife or a toothpick, gently score a small ‘X’ in the center of each cracker. This helps them bake evenly and prevents puffing up too much. If you have a square cookie cutter, you can use that for a more uniform shape.
Step 7: Prepare for Baking
Preheat your oven to 375 degrees Fahrenheit (190 degrees Celsius). Line baking sheets with parchment paper to prevent sticking and to make cleanup easier. Carefully transfer the cut crackers to the prepared baking sheets, leaving a little space between them, though they won’t spread significantly. Brush the tops of each cracker with the beaten egg wash. This egg wash will give the crackers a beautiful golden sheen and help the flaky sea salt adhere.
Step 8: Sprinkle with Salt and Bake
Generously sprinkle the tops of the egg-washed crackers with flaky sea salt. The sea salt provides a wonderful textural contrast and enhances the overall flavor of the crackers. Place the baking sheets in the preheated oven. Bake for 12 to 18 minutes, or until the crackers are golden brown and feel firm to the touch. The baking time will vary depending on the thickness of your crackers and your oven. Keep a close eye on them, especially towards the end of the baking time, as they can go from perfectly browned to burnt very quickly. Rotate the baking sheets halfway through baking if your oven has hot spots to ensure even browning.
Step 9: Cool and Enjoy
Once baked to perfection, remove the baking sheets from the oven. Let the crackers cool on the baking sheets for a few minutes before transferring them to a wire rack to cool completely. As they cool, they will become even crispier. Once fully cooled, your homemade cheez-its are ready to be enjoyed! They are best stored in an airtight container at room temperature for up to a week.
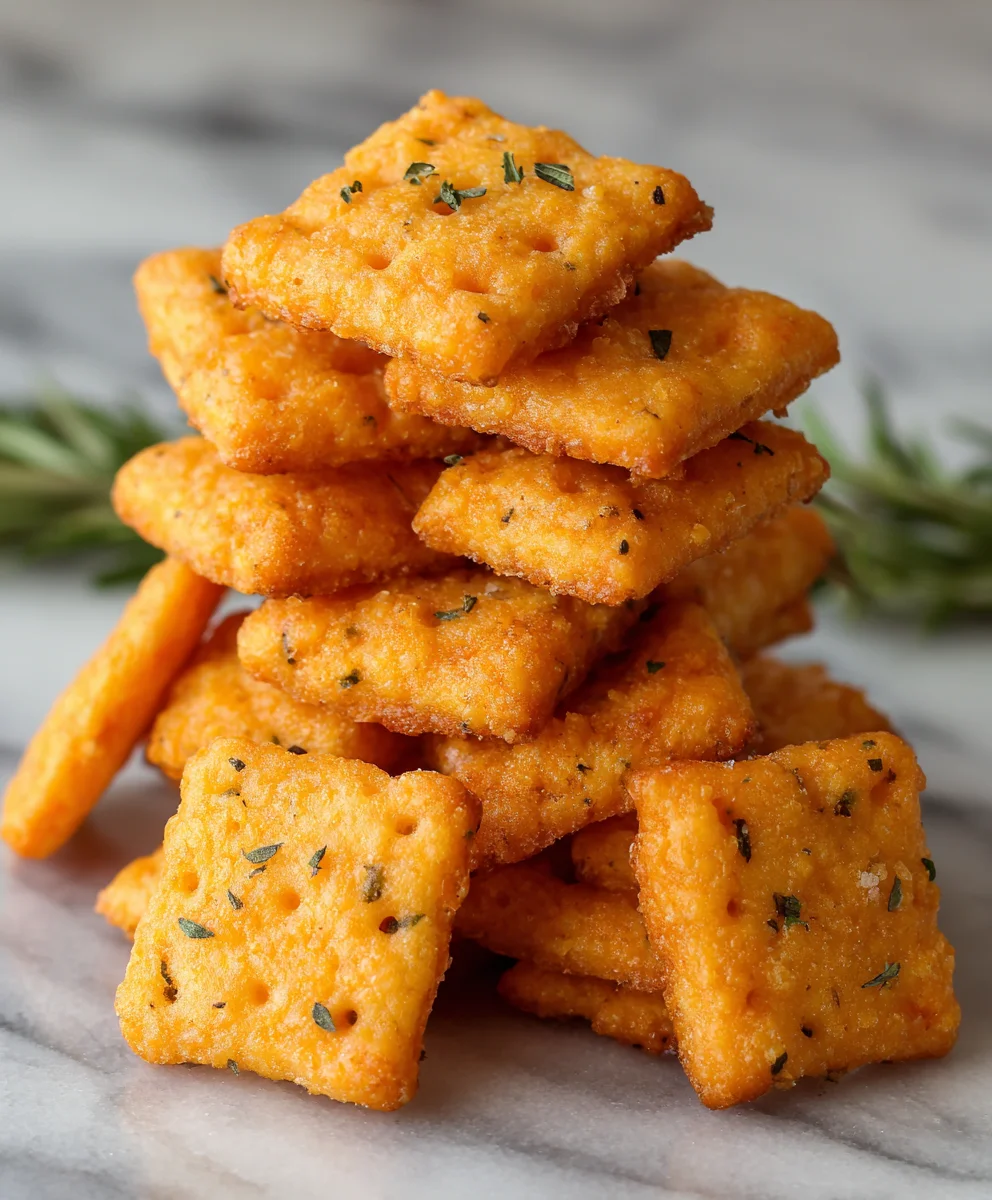
Conclusion:
And there you have it – your very own batch of delicious Homemade Cheez Its Recipe Cheddar Cheese Crackers! I hope you found this recipe straightforward and enjoyable to follow. The satisfaction of creating these cheesy, crispy delights from scratch is truly unparalleled. These crackers are perfect for a quick snack, a delightful addition to lunchboxes, or even as part of a party spread. I encourage you to give this recipe a try; you’ll be amazed at how simple it is to achieve that classic cheddar flavor and satisfying crunch that we all love.
For serving suggestions, enjoy these Homemade Cheez Its Recipe Cheddar Cheese Crackers plain, or pair them with your favorite dips like salsa, guacamole, or a creamy cheese sauce. They also make a fantastic crunchy topping for salads or soups. When it comes to variations, feel free to experiment! You can add a pinch of cayenne pepper for a spicy kick, incorporate finely chopped chives for a herbaceous note, or even try different types of cheese like sharp cheddar or a blend of cheddar and Monterey Jack for a unique flavor profile. Don’t be afraid to get creative and make these Homemade Cheez Its Recipe Cheddar Cheese Crackers your own!
Frequently Asked Questions:
Q: How should I store my Homemade Cheez Its Recipe Cheddar Cheese Crackers?
A: Once cooled completely, store your Homemade Cheez Its Recipe Cheddar Cheese Crackers in an airtight container at room temperature. They should stay fresh and crispy for up to a week.
Q: Can I use a different type of cheese for this recipe?
A: Absolutely! While cheddar is classic, you can experiment with other hard or semi-hard cheeses like Parmesan, Gouda, or even a Colby Jack blend. Just ensure the cheese is finely grated for best results.
Q: My crackers are a bit too thick, how can I get them thinner?
A: To achieve thinner crackers, be sure to roll the dough out evenly and as thinly as possible, aiming for about 1/8 inch thickness. You can also use a pizza cutter to score them before baking, which can help them bake more evenly and become crispier.
Easy Homemade Cheddar Cheese Crackers Recipe
Create delicious, crispy cheddar cheese crackers at home with this easy-to-follow recipe. Perfect for snacking!
Ingredients
-
2 cups all-purpose flour
-
1 teaspoon baking powder
-
1/2 teaspoon salt
-
1/4 teaspoon cayenne pepper (optional)
-
8 tablespoons (1 stick) unsalted butter, very cold and cut into small cubes
-
1 1/2 cups shredded sharp cheddar cheese
-
1/4 cup cold water, plus more if needed
-
1 large egg, beaten (for egg wash)
-
Flaky sea salt, for sprinkling
Instructions
-
Step 1
In a large mixing bowl, whisk together the all-purpose flour, baking powder, salt, and cayenne pepper (if using). Whisking these dry ingredients ensures even distribution for consistent texture and flavor. -
Step 2
Add the very cold, cubed unsalted butter to the flour mixture. Use a pastry blender, fingertips, or food processor to work the butter in until it resembles coarse crumbs with some pea-sized pieces of butter visible. Keep the butter cold for flakier crackers. -
Step 3
Incorporate the shredded sharp cheddar cheese into the butter and flour mixture. Use your pastry blender or fingertips to distribute the cheese evenly. This ensures cheesy flavor in every bite and helps bind the dough. -
Step 4
Gradually add cold water, one tablespoon at a time, mixing gently after each addition. The dough should be shaggy but hold together when squeezed. Avoid overworking the dough. Gently gather it into a cohesive ball. -
Step 5
Divide the dough in half, flatten each into a disc, wrap tightly in plastic wrap, and refrigerate for at least 30 minutes. This chilling step firms up the butter, making the dough easier to roll. -
Step 6
On a lightly floured surface, roll out one chilled disc of dough very thinly, about 1/16 to 1/8 inch thick. The thinner the dough, the crispier the crackers. -
Step 7
Cut the rolled dough into small squares, approximately 1 inch by 1 inch. Gently score a small ‘X’ in the center of each cracker with the dull side of a knife or a toothpick to help them bake evenly. -
Step 8
Preheat oven to 375°F (190°C). Line baking sheets with parchment paper. Transfer cut crackers to the sheets, leaving a little space between them. Brush the tops with the beaten egg wash. -
Step 9
Generously sprinkle the egg-washed crackers with flaky sea salt. Bake for 12 to 18 minutes, or until golden brown and firm. Watch closely to prevent burning. Rotate baking sheets halfway through if needed. -
Step 10
Let the crackers cool on the baking sheets for a few minutes before transferring to a wire rack to cool completely. Once cooled, store in an airtight container at room temperature.
Important Information
Nutrition Facts (Per Serving)
It is important to consider this information as approximate and not to use it as definitive health advice.
Allergy Information
Please check ingredients for potential allergens and consult a health professional if in doubt.